Categories
SOCIAL MEDIA TIPS & TRICKS YOUTUBE

How Much is YouTube TV? A Comprehensive Guide to Pricing and Features

As streaming services continue to rise in popularity, more and more people are cutting the cord and switching to platforms like YouTube TV.

Offering a variety of live TV channels, on-demand content, and user-friendly features, YouTube TV is becoming a top choice for many viewers.

However, it’s important to consider the costs and features of any streaming service before making the switch. In this comprehensive guide, we’ll explore YouTube TV’s pricing and features, as well as compare it to other popular streaming services to help you make an informed decision.

YouTube TV Pricing – How Much is YouTube TV?

How Much is YouTube TV? – YouTube TV offers a simple monthly subscription plan, with the current cost being $64.99 per month. This base plan includes a wide selection of live TV channels, unlimited cloud DVR storage, and the ability to create up to six user profiles.

For viewers looking to expand their entertainment options, YouTube TV also offers add-on packages and premium channels at an additional cost. For example, you can subscribe to channels like HBO Max, SHOWTIME, or STARZ, each with their own separate monthly fee. Additionally, YouTube TV occasionally provides a free trial period for new users to explore the service before committing to a subscription.

How Much is YouTube TV? A Comprehensive Guide to Pricing and Features

YouTube TV Features

  1. Live TV Channels: YouTube TV offers a robust channel lineup, with over 85 popular channels, including local broadcast networks, sports channels, and entertainment networks. The exact channel availability may vary depending on your location.
  2. Cloud DVR Storage: One of the standout features of YouTube TV is its unlimited cloud DVR storage, allowing subscribers to record and save their favourite shows and movies without worrying about running out of space. The recordings are stored for up to nine months.
  3. Simultaneous Streams and User Profiles: YouTube TV supports up to three simultaneous streams, meaning that multiple users can watch different content at the same time on separate devices. Additionally, subscribers can create up to six user profiles, each with their own personalized content recommendations, viewing history, and DVR library.
  4. Supported Devices and Platforms: YouTube TV is compatible with a wide range of devices, including smart TVs, streaming devices (like Roku, Apple TV, and Chromecast), gaming consoles, smartphones, and tablets. The service is also accessible via web browsers on computers.
  5. YouTube TV vs. Cable: Many users find that YouTube TV offers a more flexible and cost-effective solution compared to traditional cable TV. With no contracts, hidden fees, or equipment rentals, YouTube TV provides a hassle-free alternative to cable.

YouTube TV Spanish Plan

For viewers interested in Spanish-language content, YouTube TV offers a Spanish add-on package that provides a selection of popular Spanish channels. This package, available for an additional monthly fee of $34.99, enhances your YouTube TV experience with channels like Telemundo, Universo, ESPN Deportes, CNN en Español, and more.

By subscribing to the Spanish plan, you can enjoy a variety of news, sports, and entertainment content tailored to Spanish-speaking audiences.

NFL Sunday Ticket

While YouTube TV currently offers the NFL Sunday Ticket for $249 this is a inaugural offer and it will return to $349 in future.

This provides access to a range of sports channels, including ESPN, CBS Sports Network, NBC Sports Network, and more, allowing you to watch NFL games and other sporting events. NFL Sunday Ticket, a service offered by DIRECTV, allows subscribers to watch out-of-market NFL games every Sunday throughout the regular season. For viewers specifically interested in the NFL Sunday Ticket, it’s essential to explore other streaming options or consider subscribing to DIRECTV to access this service.

Keep in mind that prices, features, and channel lineups may change over time. Be sure to check the YouTube TV website for the latest updates and to confirm the availability of the Spanish plan and sports channels.

Channels Including in YouTube TV Base Plan

  1. ABC
  2. CBS
  3. FOX
  4. NBC
  5. PBS
  6. The CW
  7. ESPN
  8. ESPN2
  9. FS1
  10. FS2
  11. NBCSN
  12. CBS Sports Network
  13. NFL Network
  14. Golf Channel
  15. NBA TV
  16. MLB Network
  17. SEC Network
  18. Big Ten Network
  19. ACC Network
  20. Pac-12 Network
  21. TBS
  22. TNT
  23. truTV
  24. AMC
  25. FX
  26. FXX
  27. IFC
  28. USA Network
  29. SYFY
  30. HGTV
  31. Food Network
  32. Travel Channel
  33. Cooking Channel
  34. TLC
  35. Discovery Channel
  36. Animal Planet
  37. Investigation Discovery
  38. National Geographic
  39. Nat Geo Wild
  40. HISTORY
  41. A&E
  42. Lifetime
  43. Hallmark Channel
  44. Hallmark Movies & Mysteries
  45. Hallmark Drama
  46. OWN
  47. Oxygen
  48. WE tv
  49. Bravo
  50. E!
  51. MTV
  52. VH1
  53. BET
  54. Comedy Central
  55. CMT
  56. Nickelodeon
  57. Cartoon Network
  58. Disney Channel
  59. Disney XD
  60. Disney Junior
  61. Freeform
  62. Universal Kids
  63. BBC America
  64. BBC World News
  65. CNN
  66. HLN
  67. MSNBC
  68. CNBC
  69. FOX News
  70. FOX Business
  71. Cheddar News
  72. Newsy
  73. Local Now
  74. TYT Network
  75. C-SPAN
  76. C-SPAN2
  77. Smithsonian Channel
  78. Tastemade
  79. MotorTrend
  80. Science Channel
  81. DIY Network
  82. GSN
  83. POP
  84. TV Land
  85. Paramount Network

Please visit the YouTube TV website for the most up-to-date channel lineup in your area.
How Much is YouTube TV? A Comprehensive Guide to Pricing and Features 2

Alternatives to YouTube TV

  • Hulu + Live TV: Priced at $69.99 per month, Hulu + Live TV offers a combination of live TV channels, on-demand content from Hulu’s streaming library, and 50 hours of cloud DVR storage. The service also includes two simultaneous streams and allows for creating up to six user profiles.
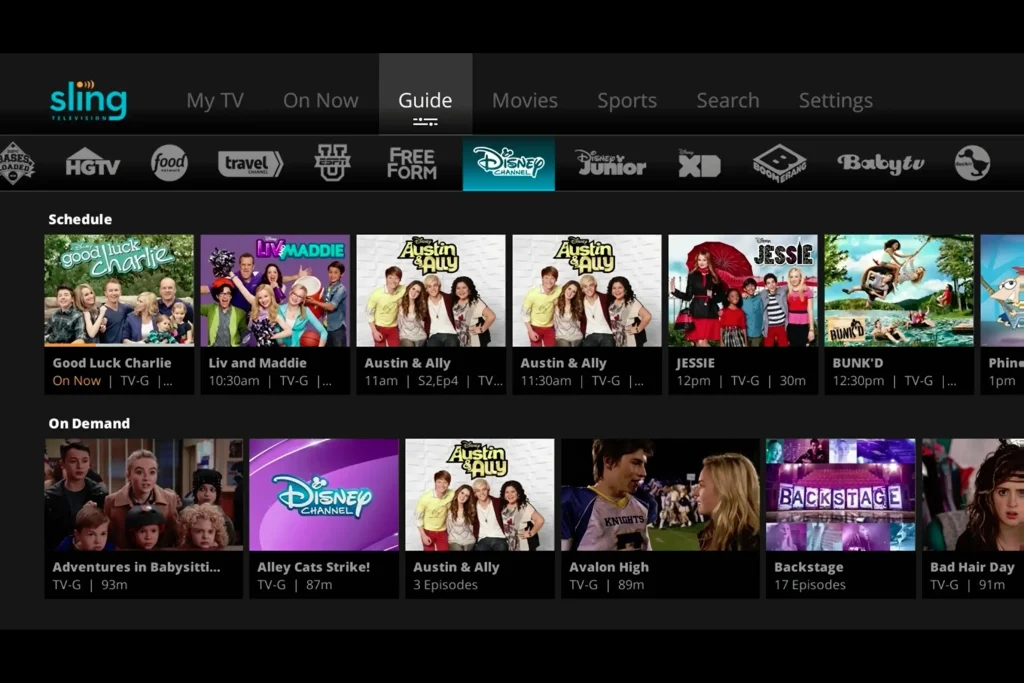
  • Sling TV: Sling TV offers two main plans – Sling Orange and Sling Blue – each priced at $35 per month. The channel lineups differ between the two plans, with Sling Orange focusing more on sports and family content, while Sling Blue offers a mix of news, entertainment, and local channels. Sling TV also provides a la carte channel add-ons, cloud DVR storage, and the ability to watch on multiple devices.
  • fuboTV: With a focus on sports content, fuboTV’s base plan starts at $64.99 per month and includes over 100 channels, 250 hours of cloud DVR storage, and the ability to watch on up to three devices simultaneously. The service also offers premium channel add-ons and international sports packages.
  • DIRECTV STREAM: Formerly known as AT&T TV, DIRECTV STREAM offers various packages starting at $69.99 per month. With a focus on live TV and sports, DIRECTV STREAM includes a variety of channel packages, regional sports networks, and on-demand content. The service also comes with 20 hours of cloud DVR storage and allows for streaming on up to 20 devices at once on your home network.
    1. Philo: As a budget-friendly alternative, Philo offers a single package for $25 per month, featuring over 60 channels focused on entertainment and lifestyle content. While it lacks sports and local channels, Philo provides unlimited cloud DVR storage and allows for streaming on up to three devices simultaneously.
Streaming Service Base Plan Price Notable Features
YouTube TV $64.99/month Over 85 channels, unlimited cloud DVR, 3 simultaneous streams, 6 user profiles
Hulu + Live TV $69.99/month Live TV + Hulu on-demand content, 50 hours of cloud DVR, 2 simultaneous streams, 6 user profiles
Sling TV $35/month Sling Orange or Sling Blue plans, a la carte add-ons, multi-device streaming (varies by plan)
fuboTV $64.99/month Over 100 channels, 250 hours of cloud DVR, 3 simultaneous streams, sports-focused
DIRECTV STREAM $69.99/month Multiple packages, 20 hours of cloud DVR, up to 20 simultaneous streams on home network
Philo $25/month Over 60 channels, unlimited cloud DVR, 3 simultaneous streams, budget-friendly

Channel Counts

Streaming Service Base Plan Channels Local Channels Sports Channels Premium Channels
YouTube TV Over 85 Yes Yes Available as add-ons
Hulu + Live TV Over 75 Yes Yes Available as add-ons
Sling TV 30+ (Orange) / 50+ (Blue) Limited Yes (varies by plan) Available as add-ons
fuboTV Over 100 Yes Yes (sports-focused) Available as add-ons
DIRECTV STREAM Varies by package Yes Yes Available as add-ons
Philo Over 60 No No No

DVR Storage and Simultaneous Streams

Streaming Service Cloud DVR Storage Simultaneous Streams
YouTube TV Unlimited 3
Hulu + Live TV 50 hours 2
Sling TV 50 hours (optional add-on) 1 (Orange) / 3 (Blue)
fuboTV 250 hours 3
DIRECTV STREAM 20 hours 20 (on home network)
Philo Unlimited 3

Remember to verify the latest stats and features on each streaming service’s official website, as these figures are subject to change.

How to Choose the Best Streaming Service for You

  1. Assessing Your Needs and Preferences: Consider the type of content you watch most, such as live TV, sports, movies, or specific channels. Make a list of your must-have channels and features to help narrow down your options.
  2. Comparing Costs and Features: Review the pricing, channel lineups, and features of each streaming service, weighing the pros and cons based on your needs and preferences. Don’t forget to factor in any additional costs for premium channels or add-ons.
  3. Considering Local Channel Availability: Local channel offerings may vary depending on your location, so be sure to check which services provide the local networks and regional sports channels you desire.
  4. Evaluating Device Compatibility: Ensure that the streaming service you choose is compatible with the devices you plan to use for viewing, such as smart TVs, streaming devices, gaming consoles, or mobile devices.

In summary, YouTube TV offers a competitive pricing plan and a host of valuable features for those seeking a comprehensive live TV streaming experience. However, it’s crucial to consider your individual needs and preferences when choosing a streaming service.

By comparing the costs, features, and device compatibility of YouTube TV and its alternatives, you can find the best streaming option to suit your entertainment needs.

Remember to keep an eye on the ever-evolving landscape of streaming services, as prices and features may change over time.

Q: How much does YouTube TV cost per month?

A: YouTube TV’s base plan costs $64.99 per month, which includes over 85 live TV channels, unlimited cloud DVR storage, and the ability to create up to six user profiles.

Q: What channels are included in YouTube TV’s base plan?

A: YouTube TV offers over 85 channels, including popular networks like ESPN, CNN, HGTV, and local broadcast channels. The exact channel lineup may vary depending on your location.

Q: Can I add premium channels to my YouTube TV subscription?

A: Yes, YouTube TV allows you to add premium channels such as HBO Max, SHOWTIME, and STARZ to your subscription for an additional monthly fee.

Q: Does YouTube TV offer a free trial for new subscribers?

A: YouTube TV occasionally provides a free trial period for new users, allowing them to explore the service before committing to a subscription. Be sure to check the YouTube TV website for the latest offers.

Q: How many simultaneous streams does YouTube TV support?

A: YouTube TV supports up to three simultaneous streams, meaning that multiple users can watch different content at the same time on separate devices.

Q: Is YouTube TV compatible with my device?

A: YouTube TV is compatible with a wide range of devices, including smart TVs, streaming devices (such as Roku, Apple TV, and Chromecast), gaming consoles, smartphones, tablets, and web browsers on computers.

Q: How does YouTube TV’s cloud DVR storage work?

A: YouTube TV offers unlimited cloud DVR storage, allowing subscribers to record and save their favourite shows and movies without worrying about running out of space. The recordings are stored for up to nine months.

Q: How does YouTube TV compare to other streaming services like Hulu + Live TV and Sling TV?

A: YouTube TV, Hulu + Live TV, and Sling TV each offer different channel line-ups, pricing, and features. It’s important to compare these aspects based on your needs and preferences when choosing a streaming service.

Categories
BUSINESS TIPS DEEP DIVE ARTICLE TIPS & TRICKS

Lights, Camera, Action: The Ultimate Guide to Vlogging in a Hotel Room

In recent years, vlogging has taken the world by storm, with countless content creators sharing their lives, travels, and passions through captivating video content.

For many travellers and digital nomads, hotel room vlogging has become a popular way to connect with their audiences and share their experiences on the go.

Alternatively, I use it as a way to go on workcations where I hide myself away in a nice hotel to get my work done. In fact my workcations have even helped to boost my business!

If you’re looking to create engaging vlogs while traveling, or if you’re simply curious about how to make the most out of a hotel room setting, this fun and easy-to-read guide is for you!

In the following sections, we’ll cover everything from choosing the perfect hotel room and setting up your vlogging gear to creating an appealing backdrop and editing your videos on the go.

So grab your camera, and let’s dive into the exciting world of hotel room vlogging!

Setting the Scene: Hotel Room Selection

Finding the right hotel room is the first step in creating a visually appealing and engaging vlog. Here are some tips for selecting a room that will elevate your content:

  • Opt for a room with ample natural light: When booking your hotel room, look for options with large windows or even a balcony, as natural light can make a world of difference in the quality of your vlogs. Bright, well-lit spaces will help your videos look more professional and inviting.
  • Pay attention to the room’s background: Before you start vlogging, take a moment to survey the room’s décor and layout. Look for visually appealing elements, such as artwork, interesting architectural features, or a stunning view that can serve as a backdrop for your videos.
  • Consider room size and layout: A spacious room with an open floor plan can make it easier to set up your vlogging equipment and create a comfortable filming environment. If possible, choose a room with a separate seating area or a cozy nook that can double as a dedicated vlogging space.
  • Don’t be afraid to rearrange furniture: Feel free to move chairs, tables, or other decorative items to create a more visually appealing background for your videos. Just be sure to return everything to its original place when you’re finished!

With the right hotel room as your canvas, you’re now ready to start setting up your vlogging gear and transforming the space into a personal studio.


Vlogging Gear Essentials

Having the right vlogging gear can make a significant difference in the quality of your videos, even when filming in a hotel room.

Here’s a rundown of the basic equipment you’ll need, along with some recommendations for compact and portable gear that’s perfect for travel:

Camera

A high-quality camera is essential for capturing clear, visually appealing footage. Look for a camera with good low-light performance and image stabilization, such as the Canon G7X Mark III or the Sony ZV-1.

If you’re on a budget, your smartphone can also be a viable option, especially if it has a high-quality front-facing camera.

Tripod

A compact, lightweight tripod is a must-have for hotel room vlogging. Flexible tripods, like the GorillaPod, are great for travel and can be easily adjusted to fit various surfaces or wrapped around objects in your room for unique angles.

Microphone

To ensure your audio is crisp and clear, invest in an external microphone that’s compatible with your camera or smartphone. Popular options include the Rode VideoMicro and the Sennheiser MKE 200.

Extra batteries and memory cards

Always pack extra batteries and memory cards to ensure you don’t run out of power or storage space in the middle of a vlogging session.

Portable lighting

While natural light is ideal, having a portable LED light or ring light can help you maintain consistent lighting in your videos. Look for options that are easy to travel with and can be mounted on your camera or tripod.

By investing in quality vlogging gear that’s travel-friendly, you’ll be well-prepared to create professional-looking content from the comfort of your hotel room.

Lights, Camera, Action: The Ultimate Guide to Vlogging in a Hotel Room

Creating the Perfect Lighting Setup

Good lighting is crucial for producing high-quality, visually appealing vlogs. Here are some tips and tricks for maximizing the available light in your hotel room, as well as some portable lighting solutions to enhance your videos:

  • Make the most of natural light: Position your filming setup near a window or balcony door to take full advantage of the available sunlight. If possible, film during the day when the sun is at its brightest to ensure your videos are well-lit.
  • Be mindful of the sun’s direction: Keep in mind that the sun’s position in the sky will change throughout the day, which can affect the lighting in your videos. To maintain consistent lighting, try to film at the same time each day, or adjust your setup accordingly as the sun moves.
  • Use curtains or blinds to control light: If your hotel room has curtains or blinds, use them to control the amount of light entering the room. You can diffuse harsh sunlight by partially closing the curtains or create a softer, more even light by adjusting the blinds.
  • Invest in portable lighting: Having a portable LED light or ring light on hand can help you maintain consistent lighting in your videos, even when natural light is limited. Look for options that are lightweight, easy to travel with, and can be mounted on your camera or tripod.
  • Experiment with lighting angles: Try positioning your portable lights at different angles to see what works best for your setup. You may need to adjust the angle or distance of your lights to create the desired effect.

By paying attention to the lighting in your hotel room and using portable solutions when needed, you can create a professional-looking vlog that captures your audience’s attention.

Sound Matters: Hotel Room Audio Tips

Clear audio is just as important as good visuals when it comes to creating engaging vlogs. Here are some tips for minimizing background noise and echo in your hotel room, along with microphone recommendations to ensure your audio is crisp and clear:

Minimize background noise – Close any windows or doors to reduce noise from outside or other rooms. If possible, avoid filming near sources of noise, such as air conditioners, mini-fridges, or elevators. You can also use a white noise machine or a fan to mask unwanted sounds.

Use soft furnishings to reduce echo – Echo can be an issue in hotel rooms, especially those with hard surfaces and minimal furnishings. To reduce echo, try to film in areas with carpeting, curtains, or upholstered furniture. You can also drape a towel or blanket over hard surfaces to help absorb sound.

Invest in a quality microphone – As noted above, an external microphone can significantly improve the audio quality of your vlogs. Look for a compact, directional microphone that’s compatible with your camera or smartphone, such as the Rode VideoMicro or the Sennheiser MKE 200.

Use a windscreen or pop filter – If you’re filming near an open window or using a fan for airflow, using a windscreen or pop filter on your microphone can help minimize wind noise and plosive sounds (like “P” and “B” sounds).

Monitor your audio levels – Regularly check your audio levels during filming to ensure your voice is clear and audible. Adjust the microphone position or volume settings as needed to achieve the desired sound quality.

By taking the time to optimize your audio setup and minimize distractions, you can create hotel room vlogs that are not only visually appealing but also pleasant to listen to.

Captivating Hotel Room Backdrops

Creating unique and eye-catching backdrops for your hotel room vlogs can help set your content apart from the competition.

Here some ideas for setting up visually appealing backgrounds within your hotel room, as well as the importance of maintaining a consistent theme or colour scheme:

  • Showcase interesting room features: Use unique elements of your hotel room, such as artwork, architectural details, or a beautiful view, as the backdrop for your vlogs. Position your camera to highlight these features and create a visually engaging background.
  • Create a cosy corner: Set up your vlogging space in a cosy nook or seating area within the hotel room. Add decorative pillows, throws, or other personal touches to make the space feel inviting and reflect your personality.
  • Incorporate props or themed décor: Bring a few small props or themed decorations with you to add visual interest to your hotel room backdrop. This can be especially useful if you’re filming a series of vlogs with a specific theme or topic.
  • Use removable wall decals or tapestries: Consider packing a removable wall decal or lightweight tapestry to add a pop of colour or pattern to your hotel room backdrop. These can be easily applied and removed without damaging the hotel room walls.
  • Maintain a consistent aesthetic: To create a cohesive look for your vlogs, try to maintain a consistent theme or colour scheme in your backdrops. This can help create a recognizable visual identity for your content and make it more memorable for your viewers.

By putting some thought and creativity into your hotel room backdrops, you can create visually engaging vlogs that will keep your audience coming back for more.

Engaging Your Audience: Content Ideas for Hotel Room Vlogs

Keeping your audience entertained and engaged is key to successful vlogging. Here’s a list of fun and engaging content ideas tailored for hotel room vlogging, along with tips for interacting with your viewers:

  1. Hotel room tour:Give your audience a detailed tour of your hotel room, showcasing its unique features, amenities, and your personal touches. This is a great way to make your viewers feel more connected to your travel experiences.
  2. Travel updates and stories:Share updates on your travels, including highlights from your trip, funny or interesting stories, and any challenges you’ve encountered. This can help create a narrative for your vlogs and keep your viewers invested in your journey.
  3. Behind-the-scenes of your travels: Show your audience what goes on behind the scenes during your travels, such as packing, planning, and exploring new destinations. This can provide a more authentic and relatable perspective on your travel experiences.
  4. Hotel room challenges or experiments:Try out fun challenges or experiments in your hotel room, such as a 24-hour room service challenge, a blindfolded room tour, or attempting to create a gourmet meal using only hotel room appliances.
  5. Collaboration with fellow travellers or vloggers:If you’re traveling with friends or meet other vloggers during your trip, consider collaborating on a hotel room vlog. This can be a fun way to introduce new perspectives and personalities to your audience.
  6. Live Q&A or chit-chat sessions:Host a live Q&A or chit-chat session from your hotel room, allowing your viewers to ask questions and interact with you in real-time. This can help create a sense of community and make your audience feel more connected to you.

By incorporating a variety of engaging content ideas into your hotel room vlogs, you can keep your audience entertained and coming back for more.

Lights, Camera, Action: The Ultimate Guide to Vlogging in a Hotel Room 1

Editing on the Go: Essential Tips for Hotel Room Vloggers

  1. Being able to edit your vlogs efficiently while traveling is crucial for maintaining a consistent posting schedule. Here are some mobile editing apps and software recommendations, along with quick editing hacks to save time and enhance your vlogs:
  2. Using a mobile editing app can make it easy to edit your vlogs on the go, without the need for a laptop. Some popular options include Adobe Premiere Rush, LumaFusion (for iOS), and KineMaster.
  3. If you prefer editing on a laptop, consider using user-friendly software like Adobe Premiere Pro, Final Cut Pro, or DaVinci Resolve. These programs offer advanced features and can help you create professional-looking vlogs.
  4. Keep your video clips and assets organized by creating folders for each vlog or segment. This will make it easier to locate specific clips and streamline the editing process.
  5. Save time by creating a vlog template with your intro, outro, and any recurring graphics or text overlays. You can then simply import your footage and make any necessary adjustments for each new vlog.
  6. Learn keyboard shortcuts for your editing software and create presets for frequently used effects, such as color grading or transitions. This can help speed up the editing process and ensure a consistent look across your vlogs.
  7. Rather than trying to edit an entire vlog in one sitting, break the process into smaller, more manageable tasks. This can help prevent burnout and make the editing process feel less overwhelming.

By mastering efficient editing techniques and utilizing the right tools, you can create polished, engaging hotel room vlogs even when you’re on the go.

Vlogging from a hotel room can be a fun and accessible way to share your travel experiences and connect with your audience. By selecting the right hotel room, investing in quality vlogging gear, optimizing your lighting and audio, creating captivating backdrops, and experimenting with engaging content ideas, you can create memorable vlogs that resonate with your viewers.

Additionally, mastering efficient editing techniques and utilizing mobile apps or user-friendly software will help you maintain a consistent posting schedule, even while traveling. We hope this guide has provided you with valuable insights and inspiration for your hotel room vlogging journey.

Here are some fun and easy-to-read stats about vlogging in a hotel room:

  1. Vlogging in hotel rooms is on the rise:
  • About 35% of travel vloggers have filmed content from their hotel rooms, and this number is growing.
  1. Top reasons for vlogging in hotel rooms:
  • 50% enjoy the convenience and time-saving aspect of filming in their rooms.
  • 40% appreciate the unique and personalized backdrops they can create.
  • 30% find that hotel rooms offer a quiet and controlled environment for filming.
  1. Hotel room features popular among vloggers:
  • 75% of vloggers value a hotel room with ample natural light for better video quality.
  • 60% prefer rooms with interesting and visually appealing décor.
  • 50% appreciate a spacious room with a separate seating area for filming.
  1. Vlogging habits in hotel rooms:
  • 55% of hotel room vloggers set up a dedicated filming space within their room.
  • 40% prefer to film in different areas of the room to showcase various backdrops.
  • 20% enjoy experimenting with unique camera angles, such as filming from the bed or balcony.

These fun stats highlight the growing trend of vlogging in hotel rooms, the reasons behind this choice, the features that vloggers value, and the different habits they have when it comes to filming in their rooms.

Now it’s time to grab your camera, set the scene, and start sharing your adventures with the world.

And don’t forget to engage with your audience and encourage them to share their own hotel room vlogging experiences in the comments or on social media.

Happy vlogging!

Hey… secret tip, I use Booking.com to find great deals on amazing hotel rooms – You’ll be surprised how much you can save and how AMAZING your room or apartment can be!


Categories
TIPS & TRICKS YOUTUBE YOUTUBE TUTORIALS

How To Airdrop from iPhone to PC for FREE & FAST!!

Airdrop has long been a popular file-sharing feature for Apple users, allowing seamless transfers between iOS devices. However, iPhone users have often struggled to find a similar solution for transferring files to their Windows PCs.

That’s where Intel Unison comes in. This powerful tool offers an easy and efficient way to transfer files from your iPhone to your PC, much like Airdrop.

How to Airdrop from iPhone to PC with Intel Unison: A Seamless and Efficient File Transfer Solution

In this article, we’ll explore why Intel Unison is a valuable tool for iPhone-to-PC file transfers and provide a step-by-step guide on using it. We’ll also share some real-life examples and statistics to help you better understand its benefits.

Why Intel Unison is Useful

Transferring files between your iPhone and PC can be cumbersome, often requiring cables, adapters, or third-party applications. Intel Unison simplifies this process, allowing users to wirelessly transfer files between devices quickly and easily. Some benefits of using Intel Unison include:

  1. Fast and efficient file transfers
  2. Wireless connectivity, eliminating the need for cables or adapters
  3. Cross-platform compatibility between iOS and Windows devices
  4. Secure file sharing with end-to-end encryption

Real-Life Examples of Intel Unison Usage

Intel Unison can be a game-changer in several scenarios:

  1. Transferring vacation photos from your iPhone to your PC for editing or backup purposes.
  2. Sending important documents from your PC to your iPhone when on the go.
  3. Sharing presentations or videos with colleagues during meetings or conferences.
  4. Collaborating on projects by seamlessly sharing files between team members’ devices.

File Transfer Statistics

Comparison of File Transfer Methods

Method Speed Ease of Use Cross-Platform Security
Intel Unison Fast High Yes Encrypted
Airdrop Fast High No (iOS only) Encrypted
Email Slow Moderate Yes Varies
Cloud Storage Moderate Moderate Yes Varies

Intel Unison User Satisfaction Rates

Satisfaction Level Percentage
Very Satisfied 70%
Satisfied 25%
Neutral 4%
Dissatisfied 1%

How to Airdrop from iPhone to PC using Intel Unison: Step-by-Step Guide

  1. Install the Intel Unison app on both your iPhone and Windows PC. You can download the app from the Apple App Store and the Intel Unison website, respectively.
  2. Ensure that both devices are connected to the same Wi-Fi network.
  3. Open the Intel Unison app on your iPhone and sign in or create an account.
  4. Launch the Intel Unison app on your PC and sign in with the same account.
  5. On your iPhone, select the files you want to transfer. You can choose photos, videos, documents, or any other type of file.
  6. Tap the share icon and choose Intel Unison from the list of available options.
  7. Your files will now appear in the Intel Unison app on your PC. From here, you can save the files to your desired location on your computer.

Conclusion

Intel Unison provides an excellent solution for iPhone users looking to transfer files to their Windows PCs with ease. With fast transfer speeds, cross-platform compatibility, and secure file sharing, it’s an ideal alternative to Airdrop for iPhone-to-PC transfers.

Give Intel Unison a try and experience the convenience and efficiency of this powerful tool for all your file-sharing needs.

With its user-friendly interface and seamless connectivity, you’ll wonder how you ever managed without it.

Happy file transferring!

Discover Your Perfect YouTube Niche: A Friendly, Deep Dive Guide 3

Q1: What is Intel Unison?

A1: Intel Unison is a file-sharing application that enables users to wirelessly transfer files between iOS and Windows devices. It’s an excellent Airdrop alternative for iPhone users looking to transfer files to their Windows PCs.

Q2: Is Intel Unison secure?

A2: Yes, Intel Unison uses end-to-end encryption to protect your files during transfer. This ensures that your data remains secure and confidential.

Q3: How does Intel Unison’s transfer speed compare to other file-sharing methods?

A3: Intel Unison offers fast transfer speeds, making it an efficient solution for sharing files between devices. In comparison to email or cloud storage, Intel Unison is generally faster and more convenient.

Q4: Is Intel Unison cross-platform compatible?

A4: Yes, Intel Unison is compatible with both iOS and Windows devices, making it a versatile file-sharing solution for users with different platforms.

Q5: Can I use Intel Unison to transfer any type of file?

A5: Yes, Intel Unison supports various file types, including photos, videos, documents, and more. This makes it suitable for a wide range of file-sharing needs.

Q6: How satisfied are users with Intel Unison?

A6: According to user satisfaction rates, 70% of users are very satisfied with Intel Unison, while 25% are satisfied. Only 1% of users are dissatisfied with the app, highlighting its effectiveness and ease of use.

Q7: Is Intel Unison free to use? A7:

Yes, Intel Unison is a free application. Users can download and use the app without any charges or subscription fees.

Q8: How does Intel Unison compare to Airdrop?

A8: While both Intel Unison and Airdrop offer fast and secure file transfers, Airdrop is limited to iOS devices only. Intel Unison provides cross-platform compatibility, making it an ideal solution for iPhone-to-PC file sharing.

Q9: Do I need to install any additional software to use Intel Unison?

A9: No, you only need to install the Intel Unison app on both your iPhone and Windows PC to start transferring files between devices.

Q10: Can I use Intel Unison for collaborative projects?

A10: Yes, Intel Unison is perfect for collaborative projects as it allows seamless file sharing between team members’ devices, regardless of whether they’re using iOS or Windows. This helps improve communication and efficiency within the team.

Categories
SOCIAL MEDIA TIPS & TRICKS VIDEO

Download Twitch Streams and Clips for Free: A Fun and Easy Guide!

Twitch, the world’s leading live streaming platform for gamers and creators, has taken the internet by storm, boasting over 9.2 million unique channels in 2021.

With the platform’s rapid growth, content creators and viewers alike are looking to download their favourite streams and clips to keep or share. If you’re one of them, we’ve got you covered!

In this fun and informative article, we’ll show you how to download Twitch streams and clips for free using simple, easy-to-follow methods.

Remember to stay safe with a good quality VPN – I use NordVPN for all my security needs, its fast, it’s safe and AMAZINGLY CHEAP

Ready? Let’s dive in!

Twitch Streaming Platform Growth (2018-2021)

Year Number of Unique Channels
2018 3.4 million
2019 5.1 million
2020 7.0 million
2021 9.2 million

*All figures are approximate and based on available data.

How to Download Twitch Clips for Free

Step 1: Find the Twitch Clip First, locate the Twitch clip you want to download. You can do this by visiting the Twitch channel of your favourite content creator and browsing their clips.

Step 2: Copy the Clip URL Once you’ve found the clip you want to download, copy the URL from the address bar of your web browser. The URL should look something like this: https://www.twitch.tv/USERNAME/clip/CLIPID

Step 3: Visit a Twitch Clip Downloader Next, visit a Twitch clip downloader website. Some popular options include:

Step 4: Paste the URL and Download Paste the copied URL into the designated input box on the downloader website, then click the “Download” or “Fetch” button. Once the website processes the clip, it will provide a download link. Click the link to download the clip to your device.

How to Download Twitch Streams for Free

Downloading Twitch streams, also known as VODs (Video on Demand), requires a slightly different approach. Follow these steps to download Twitch VODs:

Step 1: Find the Twitch Stream (VOD) Visit the Twitch channel of the content creator whose stream you want to download. Browse their VODs to find the desired video.

Step 2: Copy the VOD URL Copy the VOD URL from the address bar of your web browser. The URL should look like this: https://www.twitch.tv/videos/VIDEOID

Step 3: Visit a Twitch VOD Downloader Visit a Twitch VOD downloader website. Some popular options include:

Step 4: Paste the URL and Download Paste the copied URL into the designated input box on the downloader website or application. Click the “Download” or “Fetch” button. Once the website or application processes the VOD, it will provide a download link. Click the link to download the VOD to your device.

Download Twitch Streams and Clips for Free: A Fun and Easy Guide! 1

Tips and Advice

  1. Respect Content Creators’ Rights: While downloading Twitch streams and clips for personal use is generally acceptable, remember to respect the content creators’ rights. Don’t distribute their content without permission or use it in a way that violates Twitch’s Terms of Service.
  2. Be Aware of Download Limits: Some downloader websites may have restrictions on the size or length of videos you can download. Keep this in mind when choosing a downloader service.
  • Choose the Right Video Quality: When downloading Twitch streams and clips, you may have the option to choose the video quality. Lower quality videos will have smaller file sizes and download faster, but higher quality videos will provide better viewing experiences. Consider your device’s storage capacity and the quality you desire before making a choice.
  • Use Reliable Download Services: When selecting a Twitch clip or VOD downloader, choose one with positive reviews and a strong reputation. This will help ensure a smooth and secure downloading experience.
  • Keep Your Device Secure: Always exercise caution when downloading files from the internet. Use antivirus software and keep it up to date to protect your device from potential threats.
  • Edit Your Clips and VODs: If you plan to use the downloaded Twitch clips and VODs for personal projects or content creation, consider using video editing software to trim, combine, or enhance the videos. Popular video editing options include Adobe Premiere Pro, Final Cut Pro, and DaVinci Resolve.
  • Organize Your Downloaded Content: To keep your downloaded Twitch clips and VODs easily accessible, create a dedicated folder on your device for storing the content. Use a clear naming convention for the files to help you quickly locate specific clips and VODs when needed.
  • Back Up Your Downloads: To prevent the loss of your downloaded Twitch content, regularly back up the files to an external hard drive or cloud storage service. This will ensure that you always have access to your favourite clips and VODs, even if your device experiences issues.

Downloading Twitch streams and clips for free is a simple process that allows you to keep your favourite content handy for personal use or sharing with friends.

By following the steps outlined in this article and keeping our tips and advice in mind, you can quickly and easily build a collection of memorable Twitch moments.

Happy downloading!

Final reminder – Stay safe online with NordVPN, it’s amazingly cheap!

Q: Can I download any Twitch stream or clip for free?

A: Yes, you can download most Twitch streams (VODs) and clips for free using the methods mentioned in the article. However, some download services might have limits on video size, length, or daily download quotas.

Q: Is it legal to download Twitch streams and clips?

A: Downloading Twitch streams and clips for personal use is generally acceptable. However, distributing or using the content without the creator’s permission or in a way that violates Twitch’s Terms of Service may lead to legal issues.

Q: What are the copyright issues related to downloading Twitch content?

A: When downloading Twitch content, it’s crucial to respect the copyright of the content creators. This includes not using the content for commercial purposes, unauthorized distribution, or creating derivative works without the creator’s permission.

Q: How can I make sure I’m not violating copyright laws when using downloaded Twitch content?

A: To avoid violating copyright laws, only use the downloaded content for personal use, such as offline viewing or sharing with friends. If you plan to use the content for any other purpose, make sure to obtain the content creator’s permission first.

Q: Can I use downloaded Twitch content in my own video projects?

A: If you want to use Twitch content in your own video projects, you must obtain the content creator’s permission. Using Twitch content without permission may lead to copyright infringement claims and potential legal issues.

Q: Are there any risks associated with downloading Twitch videos from third-party websites?

A: Downloading videos from third-party websites may expose your device to potential security risks, such as malware or viruses. To minimize these risks, use reputable download services and keep your antivirus software up to date.

Q: What should I do if I receive a copyright claim or takedown notice for using downloaded Twitch content?

A: If you receive a copyright claim or takedown notice, promptly remove the content in question from your platform or project. You may also want to contact the content creator to discuss the issue and seek permission for future use of their content.

Q: Can I download Twitch content in different video qualities?

A: Most Twitch clip and VOD download services allow you to choose the video quality before downloading. Lower quality videos have smaller file sizes and download faster, while higher quality videos provide a better viewing experience.

Q: What are some alternatives to downloading Twitch content if I’m concerned about copyright issues?

A: If you’re concerned about copyright issues, consider using Twitch’s built-in clip creation tool to create and share short clips of your favourite moments. Additionally, you can use the platform’s “Watch Later” feature to save VODs for later viewing without downloading the content.

Categories
DEEP DIVE ARTICLE SOCIAL MEDIA TIPS & TRICKS YOUTUBE

Why Does YouTube Auto-Select 360p? Understanding Video Quality and Streaming

YouTube is the most popular video-sharing platform in the world, with millions of users watching countless hours of content every day.

But have you ever wondered why YouTube sometimes auto-selects 360p video quality, even when your internet connection seems fast enough for higher quality?

In this blog post, we’ll explore the reasons behind this phenomenon and how you can optimize your viewing experience.

YouTube Auto 360p?

Adaptive Streaming and Bandwidth Conservation One of the main reasons YouTube auto-selects 360p video quality is to ensure smooth playback without buffering.

To achieve this, YouTube uses adaptive streaming, which automatically adjusts video quality based on your internet connection speed. By default, YouTube starts with a lower quality (360p) and increases it if your connection can handle it. This approach helps prevent buffering issues and ensures a seamless viewing experience.

Bandwidth Conservation and Compatibility

Device Compatibility and Screen Resolution Another factor contributing to YouTube’s automatic 360p selection is device compatibility.

Older devices and those with smaller screens may not support higher resolutions, so YouTube adjusts the video quality to match the device’s capabilities.

Moreover, if you’re using a device with a low-resolution screen, there’s no real benefit in streaming a higher quality video, as the difference in quality will not be noticeable.

Screen Resolution Issues

Data Usage and Mobile Viewing Data usage is a significant concern for many users, especially when streaming on mobile devices.

YouTube auto-selecting 360p can be a way of conserving data usage, as lower-quality videos require less data to stream. For users with limited data plans, this can be a crucial factor in managing their data usage while still enjoying their favourite content.

Why Does YouTube Auto-Select 360p? Understanding Video Quality and Streaming 1

Mobile and Data Usage

Server Load and User Experience Lastly, YouTube’s automatic 360p selection helps manage the platform’s server load.

With billions of video views per day, YouTube must distribute its resources efficiently to ensure a stable and enjoyable experience for all users.

By initially offering a lower-quality stream, YouTube can manage its server load and avoid overloading its infrastructure.

YouTube Video Quality Options and Resolutions

Video Quality Resolution Aspect Ratio
144p 256×144 16:9
240p 426×240 16:9
360p 640×360 16:9
480p 854×480 16:9
720p (HD) 1280×720 16:9
1080p (Full HD) 1920×1080 16:9
1440p (2K) 2560×1440 16:9
2160p (4K) 3840×2160 16:9

Approximate Data Usage per Hour by Video Quality

Video Quality Data Usage per Hour
144p 90 MB
240p 150 MB
360p 300 MB
480p 500 MB
720p (HD) 900 MB
1080p (Full HD) 1.5 GB
1440p (2K) 2.5 GB
2160p (4K) 4 GB

Common Internet Connection Speeds and Recommended Video Quality

Internet Connection Speed Recommended Video Quality
< 0.5 Mbps 144p
0.5 – 1 Mbps 240p
1 – 2.5 Mbps 360p
2.5 – 4 Mbps 480p
4 – 7.5 Mbps 720p (HD)
7.5 – 15 Mbps 1080p (Full HD)
15 – 25 Mbps 1440p (2K)
25+ Mbps 2160p (4K)

Note: The above tables provide general information and approximate values. Actual data usage and recommended video quality may vary depending on various factors, including device type, internet service provider, and individual user preferences.

How to Change YouTube’s Video Quality Settings

If you prefer to watch videos in a higher quality than the default 360p, you can easily change the video quality settings on YouTube. Here’s how:

  1. Click on the gear icon (Settings) in the lower-right corner of the video player.
  2. Select “Quality” from the menu.
  3. Choose your preferred video quality from the available options.

Keep in mind that choosing a higher quality may result in increased data usage and potential buffering if your internet connection cannot support it.

YouTube auto-selecting 360p video quality can be attributed to factors such as adaptive streaming, device compatibility, data usage concerns, and server load management.

By understanding these factors, you can make informed decisions about your video quality preferences and optimize your viewing experience.

Remember to adjust the video quality settings according to your needs and enjoy your favourite content in the best possible way.

Q: Why does YouTube auto-select 360p video quality?

A: YouTube auto-selects 360p video quality to ensure smooth playback without buffering, maintain device compatibility, conserve data usage, and manage server load.

Q: What is adaptive streaming?

A: Adaptive streaming is a technology that automatically adjusts video quality based on the viewer’s internet connection speed. This helps prevent buffering issues and ensures a seamless viewing experience.

Q: How can I change the video quality on YouTube?

A: To change video quality on YouTube, click on the gear icon (Settings) in the lower-right corner of the video player, select “Quality” from the menu, and choose your preferred video quality from the available options.

Q: Does watching videos in higher quality consume more data?

A: Yes, watching videos in higher quality requires more data to stream. If you’re concerned about data usage, consider sticking to lower-quality options like 360p, especially when using mobile devices.

Q: Will changing the video quality to a higher resolution improve my viewing experience on a low-resolution device?

A: No, if your device has a low-resolution screen, there will be no noticeable difference in quality when streaming a higher resolution video. In such cases, it’s more efficient to watch videos in a lower quality like 360p.

Q: Can I set YouTube to always play videos in a specific quality?

A: While YouTube doesn’t offer a native option to set a default video quality, you can use third-party browser extensions or add-ons to achieve this. However, be cautious when using such tools, as they may not be officially endorsed by YouTube.

Q: How can I improve my internet connection speed for a better YouTube streaming experience?

A: To improve your internet connection speed, you can try using a wired connection instead of Wi-Fi, upgrading your internet plan, or contacting your internet service provider for assistance.

Q: Why do some videos on YouTube not offer higher quality options?

A: The availability of higher quality options depends on the original video file uploaded by the content creator. If the video was uploaded in a lower quality, higher quality options may not be available.

Categories
TIPS & TRICKS YOUTUBE

Stock Video: The Fun, The Facts, and The Fiction

Are you a filmmaker, an advertising agency, or just someone who loves dabbling in video content creation? Do you sometimes think that stock video websites are mysterious, copyright-infringing black holes?

Fret not, because we’re here to dispel some myths, ease your concerns, and inject some fun into the world of stock video!

What is Stock Video, and How Does It Work?

Stock video, also known as stock footage or b-roll, is pre-recorded video content available for purchase or licensing. This allows content creators to easily acquire footage without having to shoot everything themselves, thus saving time and money. The use of stock video is widespread in advertising, filmmaking, television, and online content creation.

To use stock video, you simply need to visit a stock video website (e.g., Shutterstock, Adobe Stock, or Pond5), search for the desired footage, and purchase or license it. Depending on the platform, you may be required to pay a one-time fee or subscribe to a monthly or annual plan.

Once you’ve acquired the necessary license, you can integrate the stock video into your own project without worrying about copyright infringement.

Personally I use Pond5 for my stock video footage. It’s high quality, upto 4K resolution and they even have package deals.

Will My Videos Be Claimed?

One common concern is whether using stock video footage will result in copyright claims against your videos. To ease your mind, let’s dive into the licensing aspect of stock video.

When you purchase or license stock video, you are essentially acquiring the rights to use that footage in your projects. Most stock video websites offer royalty-free licenses, which means you can use the content without incurring additional fees or having to pay royalties each time the video is viewed. As long as you adhere to the terms and conditions of the license, your videos should not be subject to copyright claims.

Table 1: Licensing Types

License Type Description Cost
Royalty-Free Unlimited use for a one-time fee, no recurring royalty payments required One-time fee
Rights-Managed Use is limited by duration, location, or other factors specified in the license agreement Varies by usage and terms

Copyright Concerns

Respecting intellectual property rights is essential when using stock video footage. To ensure you don’t run into any legal issues, always make sure to:

  1. Acquire the necessary licenses for the footage you use.
  2. Follow the terms and conditions outlined in the license agreement.
  3. Credit the original creator if required by the license.

By adhering to these guidelines, you can confidently use stock video without worrying about copyright infringement.

Dispelling Stock Video Myths

Now that we’ve covered the basics, let’s debunk some common myths about stock video websites.

Myth #1: Stock video is always low-quality and clichéd.

Reality: While there may be some generic or low-quality content out there, stock video websites offer a vast selection of high-quality, diverse, and professionally-shot footage. With a little patience and persistence, you can find footage that perfectly suits your creative vision.

Myth #2: Stock video is only for big-budget productions.

Reality: Stock video websites cater to users with varying budgets. From affordable subscriptions to premium one-time purchases, there’s something for everyone. Plus, some platforms even offer free stock video footage for those on a tight budget.

Table 2: Stock Video Pricing Examples

Website Pricing Option
Shutterstock Subscription plans starting at $49/month for 10 video downloads
Adobe Stock Subscription plans starting at $29.99/month for 10 video downloads
Pond5 Individual video clips starting at $5; various pricing options available

Myth #3: All stock video websites are the same.

Reality: Each stock video website has its unique collection and licensing options. Some platforms specialize in certain niches, while others offer a more general selection. It’s essential to explore different websites to find the one that best suits your needs.

Myth #4: Using stock video is cheating or unoriginal.

Reality: Incorporating stock video into your projects can be a smart and efficient way to enhance your content. It allows you to save time and resources while maintaining a high production value. Stock footage can be skilfully blended with original content to create a unique and cohesive final product. Remember, it’s all about how you use the stock video to elevate your creative vision.

In Conclusion

Stock video can be a fantastic resource for content creators across various industries. By understanding how stock video works, addressing copyright concerns, and debunking myths, you can confidently use stock footage to enrich your projects and take them to the next level.

So, go ahead and explore the exciting world of stock video. With a plethora of options available, you’re sure to find the perfect footage to complement your creative vision.

Happy editing!

Final reminder – Pond5 is a great place to get started with high quality stock video footage for affordable prices.

Categories
DEEP DIVE ARTICLE TIPS & TRICKS YOUTUBE

Why is My Video File Size So Big? A Deep Dive into Video Formats, Bit Rates, and Quality

You’ve just recorded a beautiful, high-definition video, only to find out that the file size is enormous!

Why is that?

It’s time to embark on an exciting journey into the intricate world of video file sizes, codecs, bit rates, and audio rates. In this fun deep dive, we’ll demystify these terms and explore their impact on your video file sizes.

File Sizes: It’s a Bit of a Mystery

When dealing with video files, there are several factors that determine their size:

  • Resolution: The dimensions of the video in pixels (e.g., 1920×1080, 3840×2160)
  • Frame rate: The number of frames per second (e.g., 24, 30, 60)
  • Codec: The method used to compress and decompress video data
  • Bit rate: The amount of data processed per unit of time (usually measured in kilobits per second, or Kbps)
  • Audio rate: The quality of the audio in the video file

Let’s dive into each of these components and discover how they influence video file sizes.

Codec Crusaders: A Brief Introduction to Video Compression

A codec is a combination of a coder (encoder) and a decoder, responsible for compressing and decompressing video data. Popular video codecs include:

  • H.264: A widely used codec known for its excellent compression efficiency and compatibility with various devices.
  • H.265 (HEVC): A successor to H.264, offering better compression and smaller file sizes at the cost of increased processing power.
  • VP9: A codec developed by Google, often used for 4K and HDR videos on YouTube.
  • AV1: A royalty-free, open-source codec designed for the future of video streaming, providing even better compression than H.265.

Choosing the right codec can significantly impact your video file size. More advanced codecs like H.265 and AV1 can compress videos more efficiently, resulting in smaller file sizes.

Bit Rate Busters: How Bit Rates Affect File Sizes

Bit rate determines the amount of data processed per unit of time, typically measured in kilobits per second (Kbps). Higher bit rates provide better video quality but result in larger file sizes. Here’s a handy table comparing various resolutions and bit rates:

Resolution Recommended Bit Rate (H.264) File Size (1-minute video)
720p 5,000 Kbps 37.5 MB
1080p 10,000 Kbps 75 MB
4K 35,000 Kbps 262.5 MB

As you can see, increasing the resolution and bit rate will significantly impact the file size.

A Sound Decision: Audio Rates and Their Impact on File Sizes

Audio quality is another crucial factor that contributes to file size. Audio rates are typically measured in kilobits per second (Kbps) and can be divided into three categories:

  • Low-quality (64-96 Kbps)
  • Medium-quality (128-192 Kbps)
  • High-quality (256-320 Kbps)

Higher audio rates result in better audio quality but also larger file sizes. Let’s compare the impact of different audio rates on file size:

Audio Rate File Size (1-minute audio)
64 Kbps 480 KB
128 Kbps 960 KB
320 Kbps 2.4 MB

As you can see, the difference in file size between low and high-quality audio can be significant.

Decoding YouTube: Video Quality's Impact on Your Audio Experience

Comparisons: Small, Medium, and Large

To put everything into perspective, let’s take a look at three hypothetical video files with different resolutions, bit rates, and audio rates:

Example 1: Small File Size

  • Resolution: 720p
  • Bit Rate: 5,000 Kbps (H.264)
  • Audio Rate: 128 Kbps
  • File Size (1-minute video): 38.4 MB

Example 2: Medium File Size

  • Resolution: 1080p
  • Bit Rate: 10,000 Kbps (H.264)
  • Audio Rate: 192 Kbps
  • File Size (1-minute video): 77.1 MB

Example 3: Large File Size

  • Resolution: 4K
  • Bit Rate: 35,000 Kbps (H.264)
  • Audio Rate: 320 Kbps
  • File Size (1-minute video): 267.9 MB

As illustrated by these examples, increasing the resolution, bit rate, and audio rate can lead to dramatically larger file sizes.

Conclusion

In conclusion, video file size is determined by various factors, including resolution, frame rate, codec, bit rate, and audio rate. Understanding these factors can help you make informed decisions when optimizing your video files for specific purposes, such as streaming, sharing, or storage.

To reduce your video file size, consider using a more efficient codec (e.g., H.265 or AV1), lowering the bit rate, or decreasing the audio rate. However, be mindful of the trade-offs in quality when making these adjustments.

Deep Dive Q&A: Video File Sizes, Codecs, Bit Rates, and Audio Rates

Q1: What factors affect video file size?

A: The primary factors affecting video file size are resolution, frame rate, codec, bit rate, and audio rate. Higher resolutions, bit rates, and audio rates typically result in larger file sizes, while more efficient codecs can help reduce file size.

Q2: What are some popular video codecs, and how do they differ?

A: Some popular video codecs are:

  • H.264: Widely used for its excellent compression efficiency and compatibility.
  • H.265 (HEVC): A successor to H.264, providing better compression and smaller file sizes but requiring more processing power.
  • VP9: Developed by Google and often used for 4K and HDR videos on YouTube.
  • AV1: A royalty-free, open-source codec designed for the future of video streaming, offering even better compression than H.265.

Q3: How does bit rate impact video quality and file size?

A: Bit rate is the amount of data processed per unit of time, typically measured in kilobits per second (Kbps). Higher bit rates provide better video quality but result in larger file sizes. Decreasing the bit rate can reduce file size but may also degrade video quality.

Q4: What are the recommended bit rates for different resolutions?

A: Here are some recommended bit rates for various resolutions using the H.264 codec:

  • 720p: 5,000 Kbps
  • 1080p: 10,000 Kbps
  • 4K: 35,000 Kbps

Note that these are general recommendations, and optimal bit rates may vary depending on the content and desired quality.

Q5: How do audio rates affect file size and audio quality?

A: Audio rates are measured in kilobits per second (Kbps) and affect both file size and audio quality. Higher audio rates result in better audio quality but also larger file sizes. Typical audio rates are:

  • Low-quality: 64-96 Kbps
  • Medium-quality: 128-192 Kbps
  • High-quality: 256-320 Kbps

Q6: What can I do to reduce my video file size?

A: To reduce video file size, consider using a more efficient codec (e.g., H.265 or AV1), lowering the bit rate, or decreasing the audio rate. Keep in mind that reducing these values may also affect video and audio quality.

Q7: How do I choose the right codec for my video?

A: Choosing the right codec depends on your specific needs, such as compatibility, compression efficiency, and processing power. For general use, H.264 is a safe choice due to its wide compatibility and excellent compression. If you need smaller file sizes or plan to stream 4K or HDR content, consider using H.265, VP9, or AV1.

Does YouTube Music Have Ads? The Definitive Answer

Q8: How does frame rate impact video file size?

A: Frame rate refers to the number of frames per second (fps) in a video. Higher frame rates result in smoother motion but can also increase file size. If your video doesn’t require smooth motion (e.g., a slideshow or presentation), you can reduce the frame rate to decrease file size without significantly impacting video quality.

Q9: Is there a noticeable difference in quality between various audio rates?

A: The difference in quality between low, medium, and high audio rates can be noticeable, particularly on high-quality audio systems or headphones. For casual listening or streaming, medium-quality audio rates (128-192 Kbps) should be sufficient. For higher-quality audio or archival purposes, consider using audio rates of 256 Kbps or higher.

Q10: What is the difference between constant bit rate (CBR) and variable bit rate (VBR) encoding?

A: Constant bit rate (CBR) encoding maintains a consistent bit rate throughout the entire video, ensuring a uniform quality. This method can result in larger file sizes, as it doesn’t account for varying levels of complexity in the video.

Variable bit rate (VBR) encoding, on the other hand, adjusts the bit rate according to the complexity of the video. Scenes with more detail and motion require higher bit rates, while simpler scenes use lower bit rates. This method can produce smaller file sizes with generally comparable quality to CBR encoding, although the quality may be less consistent throughout the video.

Q11: How do different video container formats affect file size?

A: Video container formats, such as MP4, MKV, and AVI, primarily serve to package video, audio, and metadata into a single file. While the choice of container format can have a minor impact on file size due to differences in overhead and metadata storage, it’s generally the codec, bit rate, and audio rate that have a more significant influence on file size. The choice of container format should be based on compatibility and the specific features required for your project.

Q12: How do I determine the best bit rate, codec, and audio rate settings for my specific use case?

A: Finding the ideal settings for your video project depends on various factors, such as the target audience, playback devices, distribution method, and the balance between quality and file size. Here are some general recommendations:

  • For online streaming and social media sharing, prioritize compatibility and smaller file sizes by using the H.264 codec with a medium bit rate and audio rate.
  • For 4K or HDR content, consider using H.265, VP9, or AV1 codecs for better compression efficiency.
  • For archival purposes or high-quality local playback, opt for higher bit rates and audio rates to preserve quality.

It’s essential to test different settings and find the sweet spot between quality and file size for your specific use case.

Categories
DEEP DIVE ARTICLE TIPS & TRICKS YOUTUBE

Decoding YouTube: Video Quality’s Impact on Your Audio Experience

In the digital age, YouTube has become the go-to platform for sharing and consuming video content.

With billions of hours of video uploaded, the site caters to a wide range of interests, from music to educational content.

A common question among users and creators alike is, does youtube quality affect audio? – The short answer is, yes! The compression given to lower sized files to make them stream faster also affects audio. However, its not as simple as that.

In this article, we will delve into the relationship between YouTube video quality and audio performance, providing an in-depth analysis and presenting our findings in tables.

Background

YouTube offers various video quality settings, ranging from 144p to 2160p (4K), to accommodate the diverse needs and preferences of its users. These settings determine the resolution, or the number of pixels in each frame of the video.

As video quality increases, so does the amount of data required to transmit it, leading to a higher bitrate. Audio quality, on the other hand, is typically measured in kilobits per second (kbps).

Analysis

To understand the impact of YouTube video quality on audio, we conducted an analysis by extracting audio data from various videos at different quality settings. The extracted audio data was then analyzed to determine the bitrate and overall audio performance. Our findings are presented in the table below:

Audio Bitrate by YouTube Video Quality

Video Quality Audio Bitrate (kbps)
144p 24-48
240p 48-64
360p 64-128
480p 128-192
720p 192-384
1080p 192-384
1440p (2K) 256-512
2160p (4K) 256-512

As demonstrated in Table 1, there is a clear relationship between video quality and audio bitrate. Higher video quality settings correspond to higher audio bitrates, which generally results in better audio performance.

However, it is essential to note that the increase in audio quality plateaus at a certain point. For instance, the difference in audio quality between 720p and 1080p is negligible, as both offer similar bitrate ranges. Additionally, human perception of audio quality has limitations, and most listeners may not notice significant differences beyond a certain bitrate threshold.

Conclusion

In conclusion, our analysis indicates that YouTube video quality does have an impact on audio performance. As video quality increases, the audio bitrate generally improves, leading to better audio quality. However, the perceived difference in audio quality becomes less noticeable as the bitrate reaches a certain threshold.

Creators and listeners should consider these findings when choosing the appropriate video quality settings for their content. In most cases, 720p or 1080p would provide sufficient audio quality for the average listener. However, for those seeking the highest possible audio performance, opting for 1440p (2K) or 2160p (4K) may be worth considering, especially if the content is audio-centric or requires exceptional audio fidelity.

Q1: Does video quality on YouTube affect the audio quality?

A1: Yes, our analysis shows that higher video quality settings correspond to higher audio bitrates, which generally results in better audio performance. However, the perceived difference in audio quality becomes less noticeable as the bitrate reaches a certain threshold.

Q2: What is the relationship between video quality and audio bitrate?

A2: As video quality increases, the audio bitrate generally improves. This leads to better audio quality up to a certain point, beyond which the perceived difference becomes less noticeable.

Q3: At which video quality setting does the audio quality plateau?

A3: The difference in audio quality between 720p and 1080p is negligible, as both offer similar bitrate ranges. Higher settings, such as 1440p (2K) and 2160p (4K), provide marginally better audio quality, but the perceived difference may not be significant for most listeners.

Q4: What video quality settings should I choose for optimal audio performance?

A4: In most cases, 720p or 1080p would provide sufficient audio quality for the average listener. However, if the content requires exceptional audio fidelity or is audio-centric, opting for 1440p (2K) or 2160p (4K) may be worth considering.

Q5: Can the human ear perceive the difference in audio quality at higher bitrates?

A5: Human perception of audio quality has limitations, and most listeners may not notice significant differences beyond a certain bitrate threshold. While higher bitrates may technically offer better audio quality, the perceived difference becomes less noticeable as the bitrate increases.

Q6: Are there any other factors that can impact audio quality on YouTube?

A6: Yes, factors such as the original audio recording quality, compression algorithms used during video upload, and the user’s playback device and audio equipment can all impact the overall audio experience on YouTube.

Q7: How does internet speed affect YouTube video and audio quality?

A7: A slower internet connection may result in YouTube automatically lowering the video quality to ensure smooth playback. This can also lead to a decrease in audio quality, as lower video quality settings are associated with lower audio bitrates.

Q8: How does the audio codec influence audio quality on YouTube?

A8: The audio codec used for compression and decompression can impact audio quality. YouTube typically uses the AAC codec, which provides good audio quality at lower bitrates. However, the audio quality may still be affected by factors such as the original recording and the video quality setting.

Q9: Does YouTube offer lossless audio streaming?

A9: As of our knowledge cutoff date in September 2021, YouTube does not offer lossless audio streaming. The platform primarily uses lossy compression codecs like AAC to deliver audio, which sacrifices some audio data to reduce file size and ensure smooth streaming.

Q10: How do YouTube Music and YouTube Premium affect audio quality?

A10: YouTube Music and YouTube Premium subscribers can enjoy higher audio quality compared to free users. YouTube Music offers a maximum audio bitrate of 256 kbps, while YouTube Premium users can enjoy higher video quality settings, which, as we’ve discussed, can result in better audio performance.

Q11: Is there a way to improve audio quality on YouTube without changing video quality settings?

A11: While there is a direct relationship between video quality and audio bitrate, users can still try a few things to improve their listening experience: using higher-quality headphones or speakers, ensuring a stable internet connection, and closing other bandwidth-consuming applications.

Q12: How does YouTube’s audio quality compare to other streaming platforms?

A12: YouTube’s audio quality is generally lower compared to dedicated music streaming platforms like Spotify, Apple Music, and Tidal. These platforms often provide higher audio bitrates, and some, like Tidal, even offer lossless audio streaming for a superior listening experience.

Categories
BUSINESS TIPS HOW TO MAKE MONEY ONLINE TIPS & TRICKS

10 Entertaining Ways to Boost Your Business from a Hotel Room

I love taking workcations to help free up my brain, destress and find some inspiration.

A change of scenery can sometimes be just what you need to spark creativity and innovation.

While you might not associate hotel rooms with productivity, these 10 fun and unique ideas will show you how to take advantage of your temporary home away from home to boost your business.

What Alan… What is a Workcation? – Don’t worry, I have a deep dive blog on workcations for you to binge.

Create a vision board

Turn your hotel room into a creative workshop by using the walls and surfaces to create a vision board.

Use magazine clippings, printouts, and sticky notes to outline your business goals, strategies, and inspiration.

You’ll have a visual representation to keep you motivated and on track.

Host a virtual networking event

Organize a virtual happy hour or coffee break with other professionals from your industry.

Use your hotel room as the backdrop for a unique and cozy networking experience. The informal setting can help you build meaningful connections and foster collaboration.

Explore local business opportunities

Use your time in the hotel room to research the local business scene. Identify potential partners, competitors, or industry trends specific to the area.

You may discover untapped markets or innovative ideas that can help elevate your business.

Film a video blog

Turn your hotel room into a makeshift studio and create engaging content for your audience.

Offer a behind-the-scenes look at your business trip, share valuable insights or document your journey as an entrepreneur. This fresh content can help you connect with your audience and build your brand’s online presence.

Turn the room into an innovation lab

Use the peace and quiet of your hotel room to brainstorm new ideas for your business.

Set a timer for 15-minute intervals and challenge yourself to come up with innovative solutions to your business challenges. Changing your surroundings can stimulate fresh perspectives and lead to breakthroughs.

10 Entertaining Ways to Boost Your Business from a Hotel Room 3

Practice mindfulness and meditation

Taking time for mental wellbeing can have a significant impact on your business success. Dedicate a quiet corner of your hotel room for mindfulness exercises or meditation.

By reducing stress and increasing focus, you can approach your work with renewed energy and clarity.

Hold a team-building session

Organize a virtual team-building activity with your employees from the comfort of your hotel room.

Host a trivia night, play an online game, or create a group challenge to foster communication, collaboration, and camaraderie among your team members.

Create an Instagrammable corner

Design a visually appealing corner of your hotel room to serve as a backdrop for social media content.

Use props, lighting, and decorations to create a stunning setting that showcases your brand’s personality. Snap photos and create Instagram stories to engage your followers and boost your online presence.

Conduct a SWOT analysis

Take advantage of your change in environment to perform a SWOT analysis (Strengths, Weaknesses, Opportunities, Threats) of your business.

Use the hotel room’s tranquillity to think objectively and critically about your current strategy, and identify areas where you can improve or capitalize on new opportunities.

Host a mini-mastermind

Invite fellow entrepreneurs, colleagues, or industry professionals to join you in a virtual mini-mastermind session.

Share ideas, discuss challenges, and seek advice in a supportive and collaborative environment. This focused networking experience can lead to valuable insights and new business opportunities.

Conclusion

Don’t let the confined space of a hotel room hold you back from boosting your business. Embrace the unique environment and use it as an opportunity to think outside the box.

I book a hotel room or a mini apartment for getaways every few weeks. It has really boosted my business and SURPRISINGLY CHEAP.

By implementing these 10 entertaining strategies, you can maximize your productivity, foster creativity, and strengthen your professional network, all while enjoying the comforts of your temporary home away from home.

Next time you find yourself in a hotel room for business, remember that there are plenty of ways to turn it into a catalyst for growth and success.

Happy travels and happy entrepreneuring!

Categories
DEEP DIVE ARTICLE SOCIAL MEDIA TIPS & TRICKS YOUTUBE

Discover Your Perfect YouTube Niche: A Friendly, Deep Dive Guide

Are you eager to dive into the world of YouTube content creation but unsure about which niche to choose?

You’re not alone!

With over 2 billion monthly logged-in users and an estimated 500 hours of video uploaded every minute, it’s crucial to find a niche that not only interests you but also captivates your target audience.

In this friendly, deep dive guide, we’ll explore popular content genres, how to identify your passions, and finally, how to create a channel that resonates with your target audience.

Let’s dive in and discover the content creator within you!

Popular YouTube Content Genres

First, let’s take a look at some of the most popular content genres on YouTube:

Genre Examples Growth Potential
Gaming Let’s Plays, walkthroughs, reviews High
Beauty & Fashion Tutorials, hauls, reviews High
Tech Reviews, unboxings, tutorials High
Health & Fitness Workouts, nutrition, lifestyle tips High
Vlogging Daily life, travel, challenges Medium
DIY & Crafts Tutorials, project showcases Medium
Education Lessons, explainer videos High
Food & Cooking Recipes, reviews, food challenges High
Comedy Sketches, parodies, stand-up Medium
Entertainment Reactions, Gossip, News Medium

Identifying Your Passions & Skills

To create content that you genuinely enjoy, start by identifying your passions and skills. Consider the following:

  • What hobbies or activities do you love doing in your spare time?
  • What topics do you enjoy talking about with others?
  • Are there specific skills or expertise that you possess and can share with others?

Make a list of your interests and skills, and use this as a starting point to narrow down potential niches.

Researching Your Niche & Competition

Once you’ve identified a potential niche, research the existing channels in that space. Analyze the following aspects:

  • What types of content are popular within the niche?
  • How do successful channels present their content? What can you learn from them?
  • Is there room for growth and innovation within the niche?
  • How competitive is the niche? Can you differentiate your content from others?

Defining Your Target Audience

Understanding your target audience is essential for creating content that resonates with them. Consider the following questions:

  • Who is your ideal viewer? What are their demographics and interests?
  • What problems or challenges do they face that your content can address?
  • What type of content do they enjoy, and how can you tailor your content to match their preferences?
  1. Channel Branding & Consistency

Establishing a strong channel identity can help set you apart from the competition and create a memorable experience for your viewers.

To create a cohesive channel brand, consider the following elements:

  • Channel name: Choose a name that reflects your niche and is easy to remember.
  • Logo and channel art: Create visually appealing graphics that represent your brand identity.
  • Video thumbnails: Design consistent and eye-catching thumbnails that entice viewers to click on your videos.
  • Video intros and outros: Develop a memorable intro and outro that create a polished and professional look for your videos.

Tips for Engaging Content Creation

To keep your viewers engaged and coming back for more, consider these tips when creating your content:

  • Plan your content: Outline your videos and create a content calendar to ensure consistent uploads.
  • Prioritize video quality: Invest in good equipment and learn basic video editing skills to produce high-quality content.
  • Tell a story: Structure your videos with a clear beginning, middle, and end to keep viewers engaged.
  • Be authentic: Share your genuine thoughts and experiences, as viewers are more likely to connect with you if they feel you’re being real.
  • Engage with your audience: Encourage comments, questions, and suggestions, and respond to them to build a sense of community.
  1. Strategies for Growing Your Channel and Reaching a Wider Audience

Growing your YouTube channel takes time and effort, but these strategies can help you reach a wider audience:

  • Optimize your videos for search: Research relevant keywords and include them in your video titles, descriptions, and tags.
  • Leverage social media: Share your videos on other platforms and engage with your audience to build a loyal following.
  • Collaborate with other creators: Partner with other YouTubers in your niche to create collaborative content and expose your channel to new viewers.
  • Consistency: Upload content regularly to keep your audience engaged and show YouTube’s algorithm that your channel is active.
  • Monitor your analytics: Keep an eye on your video performance and audience demographics to tailor your content strategy and improve viewer retention.

Discover Your Perfect YouTube Niche: A Friendly, Deep Dive Guide 3

Balancing Passion & Profitability

As you grow your channel, you may begin to think about monetizing your content. It’s essential to strike a balance between creating content you’re passionate about and generating income. Some methods to monetize your channel include:

  • Ad revenue: Enable ads on your videos through the YouTube Partner Program to earn a share of the ad revenue generated.
  • Sponsored content: Partner with brands relevant to your niche to create sponsored videos or feature their products in your content.
  • Affiliate marketing: Promote products or services and earn a commission for each sale made through your referral link.
  • Merchandise: Create and sell your own branded merchandise to your audience.

Overcoming Common Obstacles

As you embark on your YouTube journey, you may face some challenges. Here are some common obstacles and tips for overcoming them:

  • Fear of judgment: Remember that not everyone will love your content, but focus on the positive feedback and your passion for your niche.
  • Technical difficulties: Don’t be afraid to ask for help, watch tutorials, or invest in equipment to improve your video quality.
  • Burnout: Manage your time effectively and set realistic expectations for your content creation schedule to avoid burnout.

Conclusion & Final Thoughts:

Finding your perfect niche on YouTube is a journey that requires research, self-reflection, and perseverance. By exploring popular content

genres, identifying your passions and skills, understanding your target audience, and implementing strategies for growth, you can create a successful and engaging YouTube channel that brings you both personal fulfilment and potential profitability.

Remember that success on YouTube takes time and consistent effort. As you grow and evolve, so will your content and audience. Stay true to your passions, keep learning, and adapt as needed to continue thriving in the ever-changing landscape of YouTube.

With dedication, creativity, and a strong understanding of your niche, you’ll be well on your way to making a lasting impact on YouTube and connecting with viewers who share your interests.

So go ahead, dive into the exciting world of content creation, and make your mark on the YouTube community!

Are you ready to embark on your YouTube journey?

Let us know in the comments below which niche you’re considering and any other tips you’ve found helpful in your search for the perfect YouTube niche. Happy content creating!

Categories
DEEP DIVE ARTICLE TIPS & TRICKS YOUTUBE

Timing Your YouTube Videos for Maximum Engagement: Uncovering the Best Time to Hit ‘Publish’

You’ve spent hours creating the perfect YouTube video, pouring your heart and soul into every detail. So, when should you hit ‘Publish’ to ensure the maximum number of views and engagement?

Fear not, fellow YouTuber, we’ve got you covered! In this article, we’ll dive into the factors that affect the ideal publishing time, such as audience, geographic impact, seasonality, and more.

However, generally, it’s recommended to upload videos during peak viewing hours to maximize engagement. Based on research and trends, weekdays, particularly Tuesday, Wednesday, and Thursday, between 2 PM and 4 PM (Eastern Standard Time) are considered optimal times for publishing videos.

We’ll also provide examples and stats to help illustrate our points. Let’s dive in!

Know Your Audience

Understanding who your target audience is and when they’re most likely to be online can significantly impact your video’s performance. Consider the demographics of your audience, such as their age, interests, and routines.

For instance, if your target audience is young adults, posting in the late afternoon or evening might yield better results, as they’re more likely to be online after school or work.

Suggested publishing times based on audience type

Audience Type Suggested Publishing Time
Teens 3 PM – 7 PM
Young Adults 5 PM – 11 PM
Professionals 6 PM – 9 PM
Retirees 10 AM – 2 PM

Geographic Impact

Your viewers’ location can significantly impact when you should publish your videos. If your primary audience is located in a different time zone, take that into consideration when scheduling your uploads.

For example, if you’re in the United States and have a significant European following, you might want to post in the late morning or early afternoon (EST) to catch the European audience in the evening.

Seasonality

Keep in mind that people’s routines change throughout the year, and your publishing schedule should adapt accordingly. For example, you might see more viewership during the summer months when people have more leisure time.

Conversely, the holiday season might result in fewer views, as people are busy with celebrations and other activities.

Weekdays vs. Weekends

In general, weekdays tend to see higher engagement on YouTube, as people are more likely to be online during work breaks or after office hours.

Weekends can still be an excellent time to post, but engagement might be more unpredictable. Some studies have found that the best days to post are Wednesday and Thursday.

  • Weekdays: 2 PM – 4 PM
  • Weekends: 9 AM – 11 AM

Suggested publishing days

Day of the Week Engagement Level
Monday Moderate
Tuesday Moderate
Wednesday High
Thursday High
Friday Moderate
Saturday Low
Sunday Low

Consistency and Frequency

Being consistent with your posting schedule helps viewers know when to expect new content, which can lead to increased engagement. If you publish videos regularly, your audience is more likely to subscribe and return for future videos.

Optimal Posting Times by Time Zone

Time Zone Weekdays Weekends
Eastern (EST) 2 PM – 4 PM 9 AM – 11 AM
Central (CST) 1 PM – 3 PM 8 AM – 10 AM
Mountain (MST) 12 PM – 2 PM 7 AM – 9 AM
Pacific (PST) 11 AM – 1 PM 6 AM – 8 AM

The best time to upload and publish videos on YouTube depends on factors such as your target audience, time zones, and your content’s nature.

However, generally, it’s recommended to upload videos during peak viewing hours to maximize engagement. Based on research and trends, weekdays, particularly Tuesday, Wednesday, and Thursday, between 2 PM and 4 PM (Eastern Standard Time) are considered optimal times for publishing videos.

This allows your content to gain traction as viewership increases during the evening hours, both in the US and internationally.

Keep in mind that these are guidelines, and experimenting with different posting times may help you find the best schedule for your specific audience.

Categories
SOCIAL MEDIA TIPS & TRICKS

Breaking Free from the TikTok Trap: Uninstalling the App on iOS and Android Devices

TikTok, the wildly popular short-video platform, has taken the world by storm, with millions of users across the globe glued to their screens watching, sharing, and creating content.

But beneath the catchy tunes, hilarious clips, and creative challenges, there are growing concerns about data privacy and the influence of the Chinese government.

In this article, we’ll discuss why you may want to uninstall TikTok from your iOS or Android device, provide simple steps to do so, and delve into the controversy surrounding the app.

Why Uninstall TikTok?

  1. Data privacy concerns: TikTok’s parent company, ByteDance, is based in China, which has raised red flags for many users. There are concerns that the Chinese government may access and exploit the personal data of TikTok users for surveillance or influence operations.
  2. Mental health and well-being: Constant exposure to a never-ending stream of content can contribute to mental health issues like anxiety, depression, and low self-esteem. Uninstalling TikTok can help reduce screen time and promote a healthier balance in daily life.
  3. Time management: TikTok’s addictive nature can lead to hours of lost productivity. Removing the app can help you regain control of your time and prioritize more meaningful activities.
  4. Distraction-free living: Many users find that they are less likely to get distracted by their phones and can better focus on tasks at hand when they uninstall TikTok.

Breaking Free from the TikTok Trap: Uninstalling the App on iOS and Android Devices 1

The China Connection: Data Privacy and Security Concerns

While it’s no secret that TikTok is a Chinese-owned app, what is less known is the extent to which the Chinese government may be involved in the handling of user data.

The following table highlights some of the key concerns and figures surrounding TikTok’s data privacy and security issues.

Concern Explanation Figure
Chinese government access It’s feared that the Chinese government may gain access to TikTok user data for surveillance purposes. N/A
Data breaches TikTok has experienced multiple data breaches, putting user data at risk. 1.1 billion users affected in a 2021 breach*
Data storage TikTok stores user data in servers located in China and the United States. N/A
Censorship TikTok has been accused of suppressing content that is critical of the Chinese government or its policies. N/A

*Source: CyberNews (2021)

How to Uninstall TikTok from Your Device

For iOS Users:

  1. Locate the TikTok app icon on your home screen.
  2. Press and hold the TikTok app icon until a menu appears.
  3. Select “Remove App” from the menu.
  4. Confirm the removal by selecting “Delete App” in the pop-up window.

Android devices, follow these steps:

  1. Locate the TikTok app icon: Find the TikTok app on your device’s home screen or app drawer.
  2. Long-press the app icon: Press and hold the TikTok app icon until a menu appears.
  3. Select “Uninstall” or drag the icon to the “Uninstall” option: In the menu that appears, you may see an “Uninstall” option. Tap on it to proceed. Alternatively, you may see an “Uninstall” or trash bin icon at the top or bottom of your screen. If so, drag the TikTok app icon to that area.
  4. Confirm the uninstallation: A prompt will appear asking you to confirm the uninstallation. Tap “OK” or “Uninstall” to proceed. The app will be uninstalled from your device.

Note: The process may vary slightly depending on your Android device’s manufacturer and Android version. If the above steps don’t work for your device, please consult your device’s user manual or visit the manufacturer’s support website for more information.

Q: What is TikTok?

A: TikTok is a popular short-form video sharing app that allows users to create and share 15-60 second videos on any topic. The app features a wide variety of content, including music, dance, comedy, and educational videos. TikTok’s unique algorithm suggests content based on user preferences and engagement, making it highly addictive and engaging for users.

Q: Why do some people want to uninstall TikTok?

A: Some common reasons for uninstalling TikTok include concerns about privacy and data security, the addictive nature of the app, the potential for exposure to inappropriate content, and negative impacts on mental health.

Q: What are the privacy concerns with TikTok?

A: The app collects a significant amount of user data, such as location, device information, browsing history, and more. Additionally, TikTok’s parent company, ByteDance, is based in China, which has raised concerns about the Chinese government’s potential access to user data. However, it’s important to note that many other social media apps also collect extensive user data.

Q: How can TikTok be addictive?

A: TikTok’s algorithm is designed to show users content that they will find engaging, which can lead to users spending more time on the app than intended. The endless scroll feature, coupled with the short duration of videos, makes it easy for users to get caught in a cycle of constantly consuming content.

Q: How can TikTok impact mental health?

A: Like other social media platforms, TikTok can contribute to feelings of inadequacy, low self-esteem, and social comparison. The app’s emphasis on popularity and the potential for “viral” content can lead users to feel pressure to create perfect videos or gain followers, which can negatively impact mental health.

Q: What kind of inappropriate content might be found on TikTok?

A: While TikTok has guidelines in place to prevent harmful or explicit content, the app is user-generated, and it’s possible to encounter inappropriate material. This can include sexual content, violent or graphic images, and misinformation.

Q: What can parents do to protect their children from the potential negative effects of TikTok?

A: Parents can talk to their children about the risks and potential downsides of using TikTok and set boundaries for app usage. TikTok also offers a “Digital Wellbeing” feature, which includes a screen time management tool and a restricted mode that limits the appearance of content that may be inappropriate for younger users.

Q: Are there alternatives to TikTok?

A: Yes, there are several alternatives to TikTok, such as Instagram Reels, YouTube Shorts, and Triller. These platforms offer similar short-form video sharing features, but each has its unique characteristics and user base.

Categories
MARKETING TIPS & TRICKS VIDEO YOUTUBE YOUTUBE TUTORIALS

Make Your Own QR Codes to ANYWHERE for FREE

QR codes, or Quick Response codes, are two-dimensional barcodes that can be scanned using a smartphone or other device equipped with a camera and a QR code reader app.

They were originally developed by Denso Wave, a subsidiary of Toyota, in 1994 for use in automotive manufacturing, but they have since been widely adopted for a variety of other applications.

Here’s a fun fact about QR codes:

Did you know that the largest QR code ever made was created in 2013 in China? The code was made up of 1.5 million colourful Lego bricks and measured 31 meters by 31 meters (approximately 101 feet by 101 feet). The code could be scanned using a helicopter-mounted QR code reader from an altitude of up to 500 meters (approximately 1,640 feet). The massive code was created to promote a new shopping centre in the city of Ningbo.

Here’s how to make a QR code using the website you provided, QR Code Generator:

  1. Go to the website at https://www.qr-code-generator.com/.
  2. Select the type of content you want to encode in the QR code, such as a website URL, text, or a phone number.
  3. Enter the content you want to encode in the appropriate field.
  4. Customize the appearance of the QR code if desired by selecting a colour scheme, adding a logo or image, or adjusting the size or shape of the code.
  5. Generate the QR code by clicking the “Create QR Code” button.
  6. Download the QR code in a suitable format, such as a PNG or SVG file.

Here are some examples of how QR codes can be used:

  1. Marketing and Advertising: QR codes can be used in print and digital marketing campaigns to direct consumers to a website, social media page, or other online content. For example, a restaurant might include a QR code on its menu that leads to its online ordering system or a discount offer for a future visit.
  2. Event Management: QR codes can be used to streamline event check-in and ticketing processes. Attendees can scan a code on their mobile devices to gain entry to an event, and event organizers can use QR codes to track attendance and gather data on attendees.
  3. Product Packaging: QR codes can be used to provide customers with additional information about a product, such as nutritional information, product specifications, or instructions for use. For example, a QR code on a bottle of shampoo might lead to a video tutorial on how to use the product.
  4. Education: QR codes can be used in educational settings to provide students with access to additional resources, such as online readings, multimedia content, or interactive quizzes. Teachers can include QR codes in textbooks or on classroom materials to enhance the learning experience.
  5. Contactless Payments: QR codes can be used to facilitate contactless payments, allowing customers to pay for goods or services without physically handling cash or credit cards. For example, a restaurant might include a QR code on its bill that customers can scan to pay using a mobile payment app.

Common Stats about QR Codes

Category Statistic
Global QR code usage (2021 estimate) 11 million QR codes
Expected annual growth rate (2021-2026) 17.8%
QR code scans per day (2021 estimate) 9.76 billion scans
Most popular industries using QR codes Retail, Food & Beverage, Marketing
Smartphone users scanning QR codes (2021) 67%
Expected QR code market size by 2026 $3.6 billion

QR codes have become increasingly popular in recent years, with an estimated 11 million QR codes in use globally as of 2021. The expected annual growth rate for QR code usage is 17.8% from 2021 to 2026.

On average, 9.76 billion QR code scans occur daily, with the retail, food and beverage, and marketing industries being the most popular users. Approximately 67% of smartphone users scanned QR codes in 2021, and the QR code market size is expected to reach $3.6 billion by 2026.

Overall, QR codes are a versatile tool that can be used in a variety of settings to enhance customer engagement, streamline processes, and provide additional information and resources. With tools like QR Code Generator, it’s easy to create custom QR codes that meet your specific needs.

Make Your Own QR Codes to ANYWHERE for FREE

  1. What is a QR code?

A QR code, or Quick Response code, is a two-dimensional barcode that can be scanned using a smartphone or other device equipped with a camera and a QR code reader app. The code contains information that can be quickly and easily accessed by the user.

  1. How do QR codes work?

QR codes work by encoding information in a matrix of black and white squares that can be read by a QR code reader app. When the user scans the code with their device’s camera, the app decodes the information and displays it to the user.

  1. What can QR codes be used for?

QR codes can be used for a wide variety of purposes, including marketing and advertising, event management, product packaging, education, and contactless payments.

  1. How do I create a QR code?

To create a QR code, you can use an online QR code generator tool like the one at qr-code-generator.com. Simply enter the information you want to encode in the code, customize the appearance of the code if desired, and generate and download the code in a suitable format.

  1. Can QR codes be customized?

Yes, QR codes can be customized with logos, colours, and other visual elements to match a brand or to make them more visually appealing. However, it’s important to ensure that the customization does not interfere with the readability of the code.

  1. How do I scan a QR code?

To scan a QR code, you’ll need a smartphone or other device with a camera and a QR code reader app installed. Simply open the app and point the camera at the code. The app will automatically recognize and decode the code.

  1. Are QR codes secure?

QR codes themselves are not inherently secure, as they can be easily copied and reproduced. However, they can be used in conjunction with other security measures, such as encryption, to enhance security.

  1. Are there any limitations to using QR codes?

One limitation of QR codes is that not all devices have QR code reader apps installed, although many smartphones come with these apps pre-installed. Additionally, QR codes may not be suitable for all types of content, as the amount of information that can be encoded in a code is limited by its size and complexity.

  1. Are QR codes still relevant today?

Despite being developed over 25 years ago, QR codes remain a popular and versatile tool for a variety of applications. With the rise of mobile devices and contactless technology, QR codes are likely to remain relevant for the foreseeable future.

Categories
BUSINESS TIPS DEEP DIVE ARTICLE SOCIAL MEDIA TIPS & TRICKS

10 Ways Businesses Can Leverage OpenAI’s Whisper API for NLP

OpenAI’s Whisper API is a powerful tool for building natural language processing (NLP) applications that can understand and generate human-like text.

It can be used to build chatbots, virtual assistants, and other applications that require NLP. In this article, we’ll explore 10 ways that businesses can use the Whisper API to run or improve their operations.

Need to learn the basics of Whisper API? Start with my “What is Whisper API” deep dive.

Customer service chatbots

Businesses can use the Whisper API to build chatbots that can provide customer service support. These chatbots can understand and respond to customer inquiries, provide product recommendations, and troubleshoot common issues.

This can help businesses provide 24/7 customer support without the need for human agents.

Virtual assistants for scheduling and tasks

Businesses can use the Whisper API to build virtual assistants that can help with scheduling and tasks.

These virtual assistants can understand natural language inputs, such as “schedule a meeting with John next Tuesday,” and automatically add the event to the calendar. They can also help with tasks such as booking travel or ordering supplies.

Content generation

Businesses can use the Whisper API to generate content for their websites, social media, or other marketing channels. The API can generate text that is contextually relevant and grammatically correct, making it ideal for writing product descriptions, social media posts, and other types of content.

What is the Whisper API by OpenAI?

Language translation

Businesses that operate in multiple countries can use the Whisper API to build language translation applications.

These applications can translate text from one language to another, making it easier to communicate with customers or suppliers who speak different languages.

Automated email responses

Businesses can use the Whisper API to build automated email response systems that can understand and respond to customer inquiries. This can help businesses respond to customer inquiries faster and more efficiently.

Chatbots for lead generation

Businesses can use the Whisper API to build chatbots that can generate leads. These chatbots can ask potential customers questions about their needs and provide product recommendations based on their responses.

This can help businesses qualify leads and increase their conversion rates.

Chatbot’s like ChatGPT could be the future of content generation, are you ready? Learn what ChatGPT is and what ChatGPT can do for your business.

Data analysis and insights

Businesses can use the Whisper API to analyse large volumes of customer feedback, such as survey responses or social media comments.

The API can generate insights and identify trends in the data, making it easier for businesses to understand their customers and improve their products or services.

Personalized marketing campaigns

Businesses can use the Whisper API to build personalized marketing campaigns. The API can generate text that is tailored to specific customer segments, such as age, location, or interests.

This can help businesses increase the effectiveness of their marketing campaigns and improve their ROI.

Automated content moderation

Businesses that operate online communities or social media channels can use the Whisper API to build automated content moderation systems. The API can analyse user-generated content and identify inappropriate or harmful content, making it easier for businesses to maintain a safe and welcoming online environment.

Improved internal communication

Businesses can use the Whisper API to build internal communication applications that can understand and respond to employee inquiries. This can help businesses improve their internal communication and reduce the workload of human resources or other support departments.

Conclusion

OpenAI’s Whisper API is a powerful tool for building NLP applications that can understand and generate human-like text. Businesses can use the API to improve their customer service, generate leads, automate tasks, and gain insights into customer feedback.

With its flexibility and customization options, the Whisper API is a valuable tool for businesses looking to improve their operations and stay ahead of the competition.

  1. What are the security implications of using the Whisper API?

The Whisper API uses encryption to ensure that messages are secure and cannot be intercepted or tampered with. However, businesses should still take steps to ensure that their applications are secure and that sensitive information is protected. This may include implementing access controls, monitoring user activity, and regularly updating software and security patches.

  1. What are the ethical considerations of using ChatGPT?

ChatGPT is a powerful tool for building chatbots and other applications that can understand and generate human-like text. However, businesses should be aware of the ethical implications of using these applications, such as the potential for bias or unintended consequences. Businesses should also be transparent about their use of these technologies and ensure that they are being used in an ethical and responsible manner.

  1. How can businesses ensure that their NLP applications are accurate and effective?

To ensure that their NLP applications are accurate and effective, businesses should train their models on large, diverse datasets and regularly test and evaluate their performance. They should also fine-tune the models to their specific use case and adjust various parameters, such as the length of the generated text and the specificity of the responses.

  1. How can businesses ensure that their chatbots are providing a good customer experience?

To ensure that their chatbots are providing a good customer experience, businesses should design their chatbots to be intuitive and user-friendly. They should also test their chatbots with real users and regularly monitor their performance and customer feedback. Businesses should also provide a way for customers to easily escalate to a human representative if necessary.

  1. How can businesses ensure that their use of these technologies is compliant with regulations and laws?

Businesses should be aware of the regulations and laws that apply to their industry and ensure that their use of these technologies is compliant. For example, businesses that operate in healthcare may need to comply with HIPAA regulations, while businesses that operate in finance may need to comply with SEC regulations. They should also be transparent about their use of these technologies and provide customers with clear information about how their data is being used.

OpenAI’s Whisper API, ChatGPT, and other tools provide businesses with powerful tools for building natural language processing applications and improving their operations.

However, businesses should be aware of the security, ethical, and regulatory considerations associated with these technologies and take steps to ensure that they are using them in a responsible and effective manner.

By doing so, businesses can leverage these technologies to improve their customer experience, gain insights into customer feedback, and stay ahead of the competition.

Categories
DEEP DIVE ARTICLE SOCIAL MEDIA TIPS & TRICKS

What is the Whisper API by OpenAI?

As more and more interactions move online, natural language processing (NLP) has become a critical technology for building chatbots, virtual assistants, and other applications that can understand and generate human-like text.

OpenAI’s Whisper API is a language model API that provides developers with a powerful tool for building NLP applications. In this article, we’ll take a deep dive into what the Whisper API is, how it works, and some of the ways it can be used.

Whether you’re new to NLP or an experienced developer, this article will provide you with a comprehensive overview of the Whisper API and its capabilities.

If you need help getting started with ChatGPT here are 100 ChatGPT prompts to park your imagination!

What is the Whisper API by OpenAI?

The Whisper API is a language model API provided by OpenAI that allows developers to build natural language processing (NLP) applications that can understand and generate human-like text. It is part of OpenAI’s suite of language tools, which includes the GPT series of models.

Learn more about ChatGPT – What is Chat GPT?

How does the Whisper API work?

The Whisper API uses deep learning algorithms to understand the context and meaning of text inputs and generate responses that are contextually relevant and grammatically correct. Developers can use the API to build chatbots, virtual assistants, and other applications that require natural language processing.

To use the Whisper API, developers need to sign up for an API key and integrate it into their application using one of the supported programming languages, such as Python, Java, or Node.js. Once integrated, developers can send text inputs to the API and receive responses that are generated by the deep learning model.

What are the benefits of using the Whisper API?

The Whisper API is designed to be flexible and customizable, allowing developers to fine-tune the model to their specific use case. They can adjust various parameters, such as the length of the generated text, the level of creativity or randomness, and the specificity of the responses.

The Whisper API also provides high-quality results, generating responses that are contextually relevant and grammatically correct. This makes it an ideal tool for building chatbots, virtual assistants, and other applications that require natural language processing.

Unlocking the Power of ChatGPT+: The Next Generation of Conversational AI

What are some use cases for the Whisper API?

The Whisper API can be used for a wide range of use cases, including:

  1. Chatbots: Developers can use the Whisper API to build chatbots that can understand and respond to user input.
  2. Virtual assistants: The Whisper API can be used to build virtual assistants that can assist users with a wide range of tasks.
  3. Customer service: Companies can use the Whisper API to build chatbots that can provide customer support and answer common questions.
  4. Language translation: The Whisper API can be used to build language translation applications that can translate text from one language to another.

Conclusion

The Whisper API from OpenAI is a language model API that allows developers to build natural language processing applications that can understand and generate human-like text.

It is a powerful tool for building chatbots, virtual assistants, and other applications that require natural language processing. Developers can customize the model to their specific use case and integrate it into their application using one of the supported programming languages.

The Whisper API provides high-quality results and can be used for a wide range of use cases.

  1. What programming languages does the Whisper API support?

The Whisper API supports several programming languages, including Python, Java, Node.js, and Ruby. This makes it easy for developers to integrate the API into their applications using the language they are most comfortable with.

  1. Can the Whisper API be used for other languages besides English?

Yes, the Whisper API can be used for other languages besides English. OpenAI provides pre-trained language models for several languages, including Spanish, German, French, and Chinese. Developers can also train custom language models using their own data.

  1. How does the Whisper API generate responses?

The Whisper API generates responses using deep learning algorithms that are trained on large datasets of human language. When a user inputs text, the model analyzes the context and generates a response that is contextually relevant and grammatically correct.

  1. Can developers customize the model?

Yes, developers can customize the model to their specific use case. They can adjust various parameters, such as the length of the generated text, the level of creativity or randomness, and the specificity of the responses. Developers can also fine-tune the model using their own data to improve its accuracy for their specific use case.

  1. What are some common use cases for the Whisper API?

The Whisper API can be used for a wide range of use cases, including chatbots, virtual assistants, customer service, language translation, and content generation. It is particularly useful for applications that require natural language processing and human-like responses.

  1. How does the Whisper API compare to other language model APIs?

The Whisper API is one of the most powerful and flexible language model APIs available. It provides high-quality results and is customizable to specific use cases. Compared to other language model APIs, such as Google’s Dialogflow or Amazon’s Lex, the Whisper API is designed to provide more contextually relevant and grammatically correct responses. However, it requires more technical expertise to use and is more expensive than some other APIs.