UK Based - YouTube Certified Expert Alan Spicer is a YouTube and Social Media consultant with over 2 Decades of knowledge within web design, community building, content creation and YouTube channel building.
⚡ Quick answer$100M Leads by Alex Hormozi gets 4.7/5 from me. The dense, no-filler follow-up on getting strangers to want what you sell. Anyone with a decent offer who needs more people to see it.
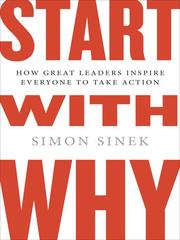
What is $100M Leads about?
The sequel to $100M Offers, this book is about the next problem: once you have a great offer, how do you get enough of the right people to see it? Hormozi lays out the ways to generate leads and multiply them.
$100M Leads summary
Hormozi picks up where Offers left off. A brilliant offer is worthless if nobody sees it, so this book is about lead generation, getting engaged people who might buy. He starts by defining a lead properly and reframing the goal as engaged leads, not just contacts.
He then works through what he calls the core four: the four ways to reach people, which are warm outreach to people you know, posting free content publicly, cold outreach to strangers and paid ads. For each he gives practical detail on how to do it well. Beyond the core four, he covers lead getters, ways to multiply your reach through referrals, affiliates, employees and agencies, so you are not the only person generating leads.
Like its predecessor, it is dense and practical, closer to a manual than a typical business book. It rewards a reader with a pen who is willing to work through it and apply one channel at a time rather than trying everything at once.
Published in 2023 as the sequel to $100M Offers, it extended Hormozi's practical, high-volume approach into lead generation. It is aimed at business owners and freelancers who have something worth selling but not enough people seeing it.
The one idea worth the price: There are only four ways to get people to know you exist. Pick one, get good at it, then add another.
Key ideas and takeaways
Engaged leads. Aim for people who show real interest, not just a list of contacts.
The core four. Warm outreach, content, cold outreach and paid ads are the four ways to get seen.
Lead getters. Multiply reach through referrals, affiliates and others, not just yourself.
Volume with skill. Do more, and do it better, rather than hunting for a single trick.
My honest take
Where Offers fixes what you sell, Leads fixes the pipeline, and for most self-employed people the pipeline is the thing that keeps them up at night. The core four framework is genuinely useful because it strips lead generation down to a small number of levers instead of an overwhelming list of tactics.
The honest value here is in the focus. Rather than dabbling in ten channels badly, Hormozi pushes you to pick one of the four, get properly good at it, and only then add another. For someone drowning in marketing advice, that clarity is a relief.
It is denser than Offers and demands more of you, but the reward matches the effort. Read it with a notepad and a plan to act on one channel, not as a passive skim.
The honest caveat: It is long and dense, and trying to apply everything at once will overwhelm you. The book itself tells you to focus, so do.
Where it falls short
The sheer volume of tactics can overwhelm if you try to do it all.
It works best as a companion to Offers, so reading it alone leaves a gap.
How it compares
$100M Offers is the essential first half: build the offer, then use Leads to fill it with people. Read Offers first, then this. Day Trading Attention pairs well too for the content side.
Who should read it (and who should skip it)
Anyone with a decent offer who needs more people to see it. Skip it if lead generation is already handled and consistent.
Best format: Kindle or paper; it is a working manual you will return to.
How to actually use it if you are self-employed
Pick one of the core four to focus on for the next ninety days.
Set a simple daily action for that channel and track it.
Add one lead getter, such as a referral ask, to multiply your reach.
⚡ The 60-second recap
Chase engaged leads, not just contacts.
Master the core four one at a time.
Multiply reach with lead getters beyond yourself.
A book is a shortcut. A second pair of eyes is faster.
Twenty years self-employed, 500+ people coached. If you want help applying this to your own situation, book a free discovery call.
The four ways to get leads: warm outreach, posting content, cold outreach and paid ads.
Do I need to read $100M Offers first?
It helps a lot. Offers builds what you sell; Leads gets people to it. Read Offers first.
Is it beginner-friendly?
Yes, though it is dense. Focus on one channel rather than trying everything at once.
Which channel should I start with?
Usually the one you can act on today, often warm outreach or content, then add paid once it works.
Is it worth it if I already market well?
If lead generation is consistent, it is less essential. If it is patchy, the focus it brings is valuable.
Final verdict
$100M Leads earns 4.7/5. The dense, no-filler follow-up on getting strangers to want what you sell. If it is the stage you are at, the cheapest way in is a free Audible trial or Kindle Unlimited.
Note: Cover image via the Open Library Covers API. Rating is my own editorial score. Affiliate links are marked and support the site at no cost to you. Publish reminder: set the featured image and meta description; confirm the /book-reviews/ category is assigned.
Is Gyre.pro Safe? Everything You Need to Know (2026)
Before handing any tool access to your YouTube channel, you absolutely should be asking about safety and security. I asked those exact questions before I started using Gyre.pro myself, and I am glad I did my research properly — because the answers are genuinely reassuring, though not without one honest caveat I will get to shortly.
I am Alan Spicer, a YouTube Certified Expert with over 20 years of experience and six Silver Play Buttons. I have been using Gyre.pro to run 24/7 automated livestreams across multiple channels, and I have earned over $10,000 through the Gyre affiliate program. I have put this tool through its paces, and I know its security model in detail. This guide is my honest, complete answer to the safety question.
The short answer: yes, Gyre.pro is safe. But let me show you the evidence rather than just asserting it, because that is what actually helps you make an informed decision.
Try Gyre.pro Risk-Free for 7 Days
No credit card needed for the trial. No YouTube login required — ever. Test the full platform and see why 15,000+ creators trust Gyre.
Safety Point #1: RTMP-Only Access — Gyre Never Gets Your YouTube Password
This is the most important security fact about Gyre.pro, and it is the first thing I tell anyone who asks whether it is safe. Gyre connects to your YouTube channel using only your RTMP stream key — nothing more. It does not ask for your Google account login. It does not ask for your YouTube password. It does not request OAuth access to your account. Your actual credentials never enter Gyre’s system at any point.
An RTMP stream key is a broadcast credential — essentially a one-way pipe that lets authorised systems push video content to your YouTube channel. That is all it can do. An RTMP stream key cannot be used to log into your account, view your analytics, change your settings, upload videos, delete content, or do anything other than push a live stream. This is a fundamental technical constraint, not a promise from Gyre — it is how RTMP works.
Furthermore, you retain full control over this access at all times. If you ever want to revoke Gyre’s ability to stream to your channel — for any reason — you simply generate a new stream key in YouTube Studio. The old key is instantly invalidated. Gyre cannot stream to your channel with a revoked key. Full stop. The access control stays with you, not with Gyre. For a technical walkthrough of setting up the RTMP connection, see my guide to Gyre and YouTube RTMP stream keys.
Safety Point #2: Dedicated Server Per User
Most cloud streaming platforms operate on shared infrastructure — your streams are being processed on the same servers as hundreds or thousands of other users. This creates two problems: stability (your stream quality is affected by other users’ activity) and security (shared infrastructure means shared risk).
Gyre.pro provides each user with a dedicated server and a dedicated IP address. Your videos are stored on your own server, your streams are processed on your own server, and your infrastructure is isolated from other users entirely. This is a significant security and reliability advantage that most Gyre competitors simply do not offer.
What this means practically: a security incident affecting another Gyre user’s account does not put your data at risk. Your server is yours. Your content is isolated. And your stream stability is not dependent on whether some other creator is having an unusually high-traffic day.
Safety Point #3: YouTube-Certified Streaming Provider
YouTube maintains a Services Directory — an officially curated list of third-party tools that YouTube has reviewed and certified as compliant with its platform policies. Gyre.pro is listed in this directory as a certified streaming provider. This is not a self-declared certification or a marketing claim. It is an active endorsement from YouTube itself.
What does YouTube certification require? YouTube vets the tool’s integration with its platform, confirms that it operates within the bounds of YouTube’s Terms of Service, and validates that it does not employ practices that violate platform rules. A tool cannot purchase its way into the Services Directory — it has to earn that listing through genuine compliance review.
This matters enormously from a safety perspective. When you use a YouTube-certified tool, you are using something YouTube itself has approved. The question of whether using Gyre could somehow harm your channel — through a terms violation or a policy conflict — is substantially mitigated by this certification. YouTube has reviewed Gyre and determined it is operating correctly. I cover this in much more depth in my dedicated post on Gyre’s YouTube certification and what it means for creators.
Safety Point #4: Your Videos Are Stored on Your Personal Cloud Server
When you upload videos to Gyre.pro for streaming, they are stored on your personal dedicated cloud server — not in a shared content pool. This means your video files are private to your account. Other users cannot access them, and Gyre does not use your content for any purpose other than streaming it to your specified platforms.
From a data privacy perspective, this is the right architecture. Your content is yours. It lives in your space, on your server, under your account. You can delete it at any time. And since the server is dedicated to you — not shared — there is no risk of another user’s content contaminating your storage or your streaming environment.
Addressing the ScamDoc Low Score (45%) — Context Matters
I want to be completely transparent about something that has caused genuine concern in some online discussions: ScamDoc, an automated website trust-scoring service, has given Gyre.pro a relatively low score — approximately 45%. This has led some people to question Gyre’s legitimacy. I understand why it is alarming at first glance.
But here is the important context you need to understand ScamDoc’s scores properly.
ScamDoc’s scoring algorithm is based primarily on automated technical metrics: domain age, SSL certificate configuration, web infrastructure patterns, and other factors that have nothing to do with whether a business is legitimate or trustworthy from a user perspective. Newer businesses — particularly SaaS companies in their first few years — routinely score poorly on ScamDoc simply because their domains are relatively young and their web infrastructure does not match the patterns of long-established enterprises.
ScamDoc does not evaluate: whether real customers have had positive experiences, whether the company has enterprise-level clients, whether the product actually works, or whether the business is legitimately serving a real market. It is an automated technical check, not a business legitimacy assessment.
The real-world evidence paints a completely different picture from ScamDoc’s automated score. Let me show you what actual users report.
Real Review Scores from Actual Gyre Users
Here are the verified review platform scores for Gyre.pro as of my last check:
Trustpilot — Positive reviews from verified users, consistently positive sentiment around ease of use and stream reliability
RealReviews — 4.9 out of 5 stars
Sitejabber — 4.5 out of 5 stars
These scores come from real people who have purchased and used the product. A 4.9 on RealReviews and 4.5 on Sitejabber are exceptional scores for any SaaS product. The gap between ScamDoc’s automated technical score and these human experience scores tells you clearly which measure reflects reality.
My own personal experience aligns with these reviews. I have been using Gyre.pro for extended periods across multiple channels. My streams have been reliable, customer support has been responsive when I have had questions, and the platform has done exactly what it promises: run my videos as 24/7 live streams without requiring me to maintain any local hardware or be actively online.
The Enterprise Trust Signal: NBCUniversal, BBC Studio, and More
Perhaps the most compelling evidence of Gyre.pro’s legitimacy and safety is its enterprise client base. NBCUniversal, BBC Studio, WildBrain, and AIR Media Tech are among Gyre’s enterprise clients. These are not small companies that might sign up for any tool without due diligence. These are major international media corporations with extensive legal, compliance, and security review processes.
A company like NBCUniversal does not adopt a streaming tool without thoroughly vetting it for security, data privacy, legal compliance, and operational reliability. The fact that Gyre has passed those enterprise vetting processes — and continues to retain these clients — is an institutional endorsement of its safety standards that no individual creator review can match in weight.
If BBC Studio is comfortable streaming through Gyre, a YouTube content creator can be comfortable doing the same.
The One Honest Limitation: The Refund Policy
In the interest of complete transparency — which I think is the whole point of an honest safety review — I need to flag Gyre’s refund policy. Refunds are only available if you have streamed for fewer than 10 hours total. This is a genuinely restrictive policy.
What does this mean practically? If you sign up for a paid plan, use it for more than 10 hours of streaming, and then decide it is not for you, you cannot get a refund. This is not a scam — it is a clearly stated policy — but it is restrictive compared to the 30-day money-back guarantees some other SaaS tools offer.
My recommendation: use the 7-day free trial fully before upgrading to a paid plan. The trial includes one HD stream and up to 15 video files — that is more than enough to genuinely test whether Gyre works for your use case. Run your trial stream for several days, check the analytics, evaluate the platform experience, and only upgrade to a paid plan when you are confident it meets your needs. Do not skip the trial.
Summary: The Safety Verdict
Let me pull together everything we have covered into a clear verdict:
Safety Strengths
RTMP-only access — your YouTube password is never requested or stored
Dedicated server per user — your data is isolated, not shared
YouTube-certified streaming provider — officially vetted and approved
Enterprise clients (NBCUniversal, BBC Studio) — institutional validation
High user review scores — 4.9/5 and 4.5/5 on major review platforms
You control access — revoke stream key anytime to cut off all access instantly
Honest Limitations
Restrictive refund policy (only if under 10 hours streaming) — use the free trial before upgrading
Low ScamDoc automated score (45%) — not indicative of actual risk, but worth understanding the context
Gyre.pro is a legitimate, well-operated SaaS platform with a strong security architecture, official YouTube certification, and real enterprise clients. The concerns raised by automated scoring tools like ScamDoc do not reflect the actual user experience or business legitimacy. I use it myself daily, and I am confident recommending it to creators who want to run 24/7 automated livestreams safely. For more on what Gyre can actually do, see my complete Gyre.pro review.
See for Yourself — Zero Risk, 7-Day Free Trial
No YouTube login required. No password shared. Just your RTMP stream key and 10 minutes to set up your first 24/7 stream. Try it free and make up your own mind.
Yes. Gyre.pro connects to your YouTube channel using only your RTMP stream key — it never requires your Google account login or YouTube password. Your credentials remain completely private. Gyre is also officially listed in YouTube’s Services Directory as a certified streaming provider, confirming it operates in compliance with YouTube’s terms of service.
Does Gyre.pro need my YouTube password?
No. Gyre.pro never asks for or receives your Google or YouTube password. The only access method it uses is your YouTube RTMP stream key, which is a one-directional broadcast credential. If you ever revoke that stream key in YouTube Studio, Gyre loses all access to your channel immediately. Your login credentials are never at risk.
What does it mean that Gyre is YouTube-certified?
YouTube maintains a Services Directory — a list of officially vetted and certified third-party tools. Being listed in this directory means YouTube has reviewed Gyre.pro’s integration and confirmed it operates in compliance with YouTube’s platform policies. This is an active endorsement from YouTube itself, not just a self-claimed certification. See my dedicated post on Gyre’s YouTube certification for the full details.
What is the ScamDoc low score about?
ScamDoc gave Gyre.pro a low trust score (approximately 45%), which has alarmed some potential users. However, ScamDoc’s scores are primarily based on domain age, web infrastructure metrics, and automated checks — not on actual user experience or business legitimacy. Many legitimate newer SaaS businesses score poorly on ScamDoc for purely technical reasons. The real-world review scores tell a completely different story: Trustpilot shows positive reviews, RealReviews rates Gyre 4.9/5, and Sitejabber rates it 4.5/5.
Where is my data stored when I use Gyre.pro?
When you upload videos to Gyre.pro, they are stored on your personal dedicated cloud server — not on shared infrastructure. Each Gyre user gets their own dedicated server and dedicated IP address. Your video files are isolated to your account and are not accessible to or shared with other Gyre users.
What companies use Gyre.pro at the enterprise level?
Gyre.pro’s enterprise clients include NBCUniversal, BBC Studio, WildBrain, and AIR Media Tech. These are major media corporations with strict security, compliance, and vetting requirements. Their adoption of Gyre.pro as a streaming tool is one of the strongest possible signals of its legitimacy and security standards.
What is Gyre.pro’s refund policy?
Gyre.pro offers a refund only if you have streamed for less than 10 hours total. This is a relatively restrictive refund policy, and it is worth being transparent about. The 7-day free trial is the right place to evaluate whether Gyre meets your needs before committing to a paid plan. Use the trial fully before upgrading.
Can I cancel my Gyre.pro subscription at any time?
Yes. Gyre.pro is a subscription service and you can cancel at any time. Monthly subscribers are not locked into annual contracts unless they specifically choose an annual billing plan. After cancellation, your account remains active until the end of the current billing period.
Is it safe to share my YouTube RTMP stream key with Gyre.pro?
Yes, with an important caveat: RTMP stream keys are broadcast-only credentials. They can only be used to push a stream to your channel — they cannot be used to access your channel, view your analytics, modify your settings, or interact with your account in any other way. If you ever have concerns, you can generate a new stream key in YouTube Studio in seconds, which immediately invalidates the old one. Learn more in my guide to YouTube RTMP stream keys and Gyre.
Has Gyre.pro ever been hacked or had a data breach?
There is no public record of a data breach or security incident at Gyre.pro. The company’s architecture — with dedicated servers per user and RTMP-only access for YouTube integration — significantly reduces the attack surface compared to platforms that store login credentials. Concerned about security more broadly? My post on whether Gyre can get you banned on YouTube covers the compliance side in detail.
About Alan Spicer
Alan Spicer is a YouTube Certified Expert and 20+ year content creator with 6 Silver Play Buttons. He uses Gyre.pro daily to run 24/7 livestreams across multiple channels and has earned over $10,000 through the Gyre affiliate program. Follow his YouTube growth strategies at alanspicer.com.
⚡ Quick answer$100M Offers by Alex Hormozi gets 4.8/5 from me. The best book going on building an offer people feel stupid saying no to. Any freelancer or business owner who undercharges or competes on price.
What is $100M Offers about?
Hormozi teaches you how to build what he calls a grand slam offer: a product or service so well constructed and clearly valuable that price stops being the main objection. It is a book about making what you sell irresistible.
$100M Offers summary
Hormozi's starting point is that most businesses compete on price because their offer is ordinary, and that the way out is to make an offer so good that comparison becomes impossible. He begins with pricing, arguing you should charge more, not less, and back it with enough value that the higher price still feels like a bargain.
The heart of the book is the value equation. The perceived value of an offer goes up when you increase the dream outcome and the likelihood of achieving it, and down when you increase the time it takes and the effort or sacrifice involved. Improve the top, reduce the bottom, and value rises. He then walks through building the offer: listing every problem a customer faces, turning each into a solution, and stacking those into a package with bonuses, guarantees and scarcity that make it compelling.
It is dense, practical and free of padding. Hormozi writes the way he speaks, direct and blunt, and nearly every section gives you something you can apply to your own pricing straight away.
Published in 2021, it became a runaway success on the back of Hormozi's blunt, practical content and huge online following. It is aimed at business owners and freelancers who want to charge more and sell more without gimmicks.
The one idea worth the price: Do not compete on price; make the comparison impossible. A great offer beats a cheap one every time.
Key ideas and takeaways
The grand slam offer. Build an offer so good that price stops being the main objection.
The value equation. Raise the dream outcome and likelihood; cut the time and effort.
Charge more. A higher price backed by real value often sells better than a low one.
Stack and guarantee. Bonuses, guarantees and scarcity make a strong offer irresistible.
My honest take
If I could hand every struggling freelancer one book about money, it might be this. So many self-employed people undercharge and then compete on price, which is the fastest route to burnout and resentment. Hormozi hands you a system for building an offer valuable enough that you can charge properly and still be the obvious choice.
The value equation alone changes how you think. Once you see pricing as a function of outcome, likelihood, time and effort, you stop asking what should I charge and start asking how do I make this worth far more. That shift is worth the price of the book many times over.
It is short, dense and completely free of fluff, which I respect. You can read it in a sitting and then spend a week rebuilding your offer around it. Few business books give that kind of return on the time.
The honest caveat: The tone is very direct and the examples lean towards high-ticket and info-product businesses, so service providers translate a little. The core principles apply regardless.
Where it falls short
The style is blunt to the point of brash, which not everyone enjoys.
Examples skew towards high-ticket offers, so lower-priced or service businesses adapt the specifics.
How it compares
$100M Leads is the natural next read: Offers is about making what you sell irresistible, Leads is about getting people to see it. Read Offers first, then Leads to fill the pipeline.
Who should read it (and who should skip it)
Any freelancer or business owner who undercharges or competes on price. Skip it only if your pricing and offer are already dialled in.
Best format: Kindle or paper, because you will want to reread and apply the frameworks.
How to actually use it if you are self-employed
List every problem your customer faces, then turn each into a part of your offer.
Rework your pricing around the value equation rather than your costs.
Add one guarantee or bonus that makes saying yes easier.
⚡ The 60-second recap
Make the offer so good price stops mattering.
Use the value equation to build it.
Charge more and back it with real value.
A book is a shortcut. A second pair of eyes is faster.
Twenty years self-employed, 500+ people coached. If you want help applying this to your own situation, book a free discovery call.
An offer so well built and valuable that price stops being the main objection and comparison becomes hard.
What is the value equation?
Perceived value rises with the dream outcome and likelihood of success, and falls with the time and effort required.
Is it for service businesses?
Yes, though examples lean high-ticket. Service providers adapt the specifics but the principles hold.
Do I need to read $100M Leads too?
They pair well. Offers builds what you sell; Leads gets people to it. Start with Offers.
Is it beginner-friendly?
Yes. It is dense but clearly written, and useful whether you are new or established.
Final verdict
$100M Offers earns 4.8/5. The best book going on building an offer people feel stupid saying no to. If it is the stage you are at, the cheapest way in is a free Audible trial or Kindle Unlimited.
Note: Cover image via the Open Library Covers API. Rating is my own editorial score. Affiliate links are marked and support the site at no cost to you. Publish reminder: set the featured image and meta description; confirm the /book-reviews/ category is assigned.
Every week someone tells me they cannot afford to market their business. They have quoted for Google Ads, they have looked at Meta, they have priced a freelancer to run it for them, and the numbers do not work on a business that is one person and a laptop. So they do nothing, and they wonder why the phone stays quiet.
Here is the part nobody sells you: the most effective lead magnet you will ever build costs nothing but the time you were going to spend worrying about it. And in most cases, it is not a PDF. It is you.
This post is about two things that look separate and are not.
The first is the conventional free lead magnet – the checklist, the template, the calculator, the guide. What it is, how to build one in an afternoon using tools that cost nothing, and the twenty-one formats that still convert in 2026 when most of them stopped working years ago.
The second is the version almost nobody builds properly: using your own content, your own face and your own voice as a permanent lead magnet. This is the model I run. My discovery call calendar fills from YouTube videos I published months or years ago, and I have never paid for an ad to fill it.
Why listen to me on this
I have been self-employed for twenty years. I am a YouTube Certified Expert, I hold six Silver Play Buttons across channels I have built or helped build, and I have coached more than 500 clients through channel growth and going full-time on their own work.
Close to every one of those 500 clients arrived through a free piece of content. Not an ad. Not a cold email. A video that answered their question before they knew my name, with a booking link sitting underneath it. That is the funnel this post describes, and I am describing it from the inside rather than from a case study I read.
⚡ Quick answer A free lead magnet is something of real value you give away in exchange for permission to keep talking to someone. Traditionally that means a checklist, template, calculator or guide traded for an email address. Build it in Google Docs or Canva’s free tier, solve one specific problem end to end, and attach your next step to the asset itself. The version most people miss is content as the magnet. A YouTube video demonstrates your thinking, your face and your competence to a stranger, keeps getting found for years through search and suggested feeds, and carries your booking link permanently in the description. It is a lead magnet with a distribution engine welded to it – which is what a PDF sitting on a landing page will never be.
The short version of this entire post, in four and a half minutes. The written version below goes considerably deeper.
What a free lead magnet actually is
Strip away the marketing language and a lead magnet is a trade. You hand over something useful. The other person hands over a small amount of trust – their email address, their attention, sometimes just five minutes of their time. Neither party has risked much. That is the entire point.
The trade exists because of a problem every service business has: nobody buys from a stranger. When someone lands on your site cold, they have no way to judge whether you know what you are doing. Your testimonials could be fabricated. Your case studies could be exaggerated. Your about page is, by definition, written by you about you.
A lead magnet solves that by letting them test your thinking at zero risk. They take your checklist, they use it, and it either works or it does not. If it works, something important happens – they now have direct evidence that you are competent, gathered themselves, without having to believe your marketing. That is worth more than any testimonial you could put on a page.
The distinction that matters. A lead magnet is not a sample of your work. It is a complete solution to a small problem. A sample leaves someone hanging and hoping they will pay to see the rest – which feels like a bait and switch. A complete solution to a small problem leaves them satisfied and wondering what you could do with a big one. Those two feelings produce very different booking rates.
What separates a lead magnet from ordinary content
Every blog post you write is technically content marketing. Not every blog post is a lead magnet. The difference is in three things.
It is finishable. A lead magnet has a start and an end and a moment where the person is done. A blog post can trail off. A checklist cannot – you either ticked every box or you did not.
It produces an outcome, not an understanding. Content teaches. A lead magnet gets something done. After reading an article on pricing you understand pricing better. After using a pricing calculator you have a number you can send to a client tomorrow morning.
It has a next step baked into it. Ordinary content ends. A lead magnet ends and then points somewhere – a call, a reply, a second asset. If your free thing has no next step, it is a gift, not a magnet. Gifts are lovely. They do not fill a calendar.
The fear of giving away too much is the single biggest reason people never build a lead magnet. This is the counter-argument in ninety seconds.
The objection I hear every single week
“If I give away my best material, why would anyone pay me?”
Twenty years in, I can tell you the answer with some confidence: because knowing what to do and being able to do it are separate skills, and the gap between them is where your entire business lives.
I have published well over a thousand videos explaining exactly how YouTube growth works. Titles, thumbnails, retention, packaging, niche selection, the lot. Nothing is held back. And people still book coaching calls – not because they cannot find the information, but because they cannot apply it to their own channel without someone experienced looking at it. Information is free. Judgement is not.
The people who were never going to pay you take the free thing and leave. That was always going to happen and it costs you nothing. The people who were going to pay you take the free thing, realise you know what you are talking about, and arrive at the enquiry already sold. You have not lost a client. You have removed the sales pitch from your sales process.
The real risk runs the other way. Withholding your knowledge does not protect your business – it makes you invisible. The competitor who explains everything publicly becomes the obvious choice, because they are the only one the buyer has any evidence about. Silence does not read as expertise. It reads as absence.
What happens to businesses that decide content is optional.
The maths that killed paid ads for solo businesses
Before the how-to, it is worth being precise about why free matters so much more than it did five years ago. The case for building a free lead magnet is not sentimental. It is arithmetic.
Paid lead generation has been getting steadily more expensive for years, and the increases are not slowing. Auction competition rises, minimum bids rise, and the cost of buying a single qualified enquiry rises with them.
$237Average blended B2B cost per lead in 2026
$310Cost per lead on paid channels
$164Cost per lead on organic channels
89%Gap between paid and organic acquisition
Source: First Page Sage cost per lead benchmarks, 2026, as compiled by Martal and Prospeo. Figures are blended averages across industries and will vary considerably by sector and region.
That last number is the one worth staring at. Organic acquisition is not marginally cheaper than paid – it costs roughly half as much per lead, and that comparison already includes the cost of producing the content. The gap is structural, not a temporary market inefficiency you have missed your chance to exploit.
Channel
Low
Average
High
What it means for a solo business
Trade shows
$180
$840
$1,500+
Effectively closed to anyone without a marketing budget
Google Ads (PPC)
$175
$463
$751
You need a high ticket offer before the numbers work
LinkedIn Ads
$15
$408
$800+
Enormous spread – easy to burn a budget learning it
Cold email
$150
$225
$300
Cheap per lead, expensive in reputation and time
Webinars
$33
$267
$500
A lead magnet in disguise – and the low end is achievable
SEO and content
$14
$206
$397
The low end is where a well-built free magnet lands
Facebook Ads
$102
$142
$182
Predictable, but stops the day you stop paying
Referrals
–
$25
–
The cheapest of all, and the hardest to scale on purpose
Sources: Prospeo B2B cost per lead benchmarks 2026; Belkins B2B CPL analysis 2026; Sopro B2B benchmark study. Figures in US dollars. UK costs typically run lower on paid social and comparable on paid search.
What the table does not show
Every number above is a recurring cost. Stop paying and the leads stop the same afternoon. There is no residual value in an ad you ran last March – the money is gone and so is the traffic.
A free lead magnet inverts that. The cost is front-loaded and finite. You spend four hours building a checklist, or two hours filming a video, and then the marginal cost of the next thousand leads is approximately nothing. Year one it looks expensive per lead because you are dividing your time by a small number. Year three it looks close to free because the denominator kept growing while the numerator stopped.
This is why the comparison is usually done wrong. People compare four hours of their time against a month of ad spend and decide the ads are better value because they produced leads faster. They are comparing a one-off cost to a recurring one. The correct comparison is four hours against every month of ad spend for the next three years – and on that basis it is not close.
Where your first clients come from when the ad budget is zero.
There is a second effect that never shows up in a cost per lead table: the quality difference. Someone who clicked an ad has demonstrated that they were interested for four seconds. Someone who watched twelve minutes of you explaining a problem, then clicked a booking link, has demonstrated something considerably stronger. My discovery calls from YouTube close at a rate I could not buy, because the qualifying happened before the call started.
Every lead magnet article on the internet gives you the same list. Ebook, checklist, template, webinar, free trial, quiz. All fine. All things I will cover properly further down this page. But all of them share a weakness that nobody names.
They are impersonal. A checklist could have been written by anyone. A template has no voice. A PDF cannot demonstrate that you are the sort of person someone wants to spend six months working with, because a PDF has no personality, no face and no way of showing how you think when a question does not have a clean answer.
For a service business – coaching, consulting, agency work, freelancing, professional services – that gap is the whole problem. Your buyer is not just buying an outcome. They are buying you, specifically, over the eleven other people who claim the same outcome. And nothing on a landing page settles that question.
The reframe. Stop thinking of a lead magnet as an object you produce. Start thinking of it as evidence you leave behind. The most persuasive evidence of competence is watching someone be competent – not reading their claim that they are. Video is the only free format that delivers that at scale.
What a video does that a document cannot
Put a checklist and a twelve-minute video side by side and the checklist looks like the better lead magnet. It is faster to make, faster to consume, easier to measure. On paper it wins.
In practice it loses on four counts.
It proves the person, not the point. Anyone can compile a checklist from three articles and a bit of rewriting. Nobody can fake twelve minutes of unscripted explanation on a topic they do not understand. Watch someone handle a nuance, hedge appropriately, or say “it depends, and here is what it depends on” and you learn more about their competence than any credential communicates.
It gets distributed for you. Your PDF sits on a landing page waiting for someone to arrive. Your video sits inside a recommendation engine that shows it to people who never searched for you, forever, at no cost. This is the difference that swamps every other consideration, and I will come back to it in detail.
It compounds instead of decaying. A checklist downloaded in March is finished in March. A video published in March is still being found in the following March, and the March after that. Videos I filmed four years ago are still producing discovery call bookings. Not many. But some, every month, for free, from work I finished a long time ago.
It removes the sales call from the sales call. By the time someone has watched three of my videos, they know how I think, how I talk, whether I am blunt or diplomatic, and whether they want that in their corner. They arrive at the discovery call to check logistics, not to be convinced. That changes the call from a pitch into a conversation, and the close rate follows.
The choice is not between showing your work and keeping it private. It is between being visible and being replaced by someone who is.
The trade you are making
None of this is free in the sense of being effortless. You are trading time for reach. That is the deal, and it is worth stating plainly because a lot of content marketing advice pretends there is no cost at all.
Two hours filming, editing and publishing a video is two hours you did not spend on client work. If your billable rate is £75 an hour, that video cost you £150 in opportunity. The honest version of this argument is not that content is free – it is that content is a capital expenditure with an unusually long useful life, whereas advertising is an operating expense that expires on contact.
Dimension
Paid advertising
Free content as lead magnet
Cost structure
Recurring, scales with volume
One-off per asset, near-zero marginal cost
Speed to first lead
Hours to days
Weeks to months
What happens when you stop
Leads stop immediately
Leads continue for years, slowly declining
Lead quality
Variable – interest is four seconds deep
High – they consumed you before enquiring
Trust established before contact
Almost none
Substantial
Competitive moat
None – anyone can outbid you tomorrow
Real – your back catalogue cannot be bought
Sales cycle length
Longer – convincing happens on the call
Shorter – convincing happened before it
Best suited to
Funded businesses, proven offers, urgency
Solo businesses, high-ticket services, expertise
If you are weighing up whether this model fits your situation at all, the wider decision – whether to build a business around your own expertise in the first place – is covered in the full be your own boss guide. This post assumes you have made that decision and now need the phone to ring.
How to build a free lead magnet in seven steps
This is the process, and it takes an afternoon. Not a fortnight. If you find yourself on day nine still designing a cover, you have gone wrong somewhere around step three.
Step 1: Find the question you answer forty times a year
Open your sent folder, your DMs and your enquiry form submissions. Write down every question a prospect has asked you more than three times. Do not filter for how interesting the questions are – filter for how often they appear.
The most repeated question is your lead magnet. It is repeated because it is a real obstacle for real buyers, which means solving it has real value, which means people will trade something for the solution. You do not need to invent a topic. You need to notice one.
⚡ Quick answer What topic should my lead magnet cover? The question your prospects ask you most often before they buy. Not the most impressive thing you know – the most repeated obstacle standing between someone and hiring you. Frequency of the question is a direct proxy for demand for the answer.
Step 2: Pick one outcome, not one topic
This is where most lead magnets die. “A guide to pricing” is a topic. “Work out your hourly rate in fifteen minutes” is an outcome. Topics sprawl, take three weeks to write and get abandoned. Outcomes have edges, so you know when you are finished.
Narrow until the promise fits in one sentence and contains something measurable. If you cannot describe what the person will have when they finish, you have a topic and you need to keep cutting.
Step 3: Choose the lightest format that delivers the outcome
Format follows problem type, not preference. Match them:
The problem is…
Best format
Why
They forget steps or miss things
Checklist
Completeness is the value
They cannot produce the thing
Template or swipe file
Removes the blank page
They cannot decide between options
Calculator or scorecard
Turns opinion into a number
They cannot picture the process
Video walkthrough
Demonstration beats description
They do not know what good looks like
Teardown or example set
Standards are learned by comparison
They do not know where they stand
Quiz or audit
Diagnosis creates urgency
They need to persuade someone else
One-page brief or script
You are arming an internal champion
Step 4: Build it in free tools
Google Docs for anything written. Google Sheets for anything that calculates. Canva’s free tier for anything that needs to look designed. YouTube for anything that benefits from being watched. That covers every format in the table above and the total cost is zero.
Budget four hours. If you are heading past six, the promise from step two was too wide and you should go back and cut it rather than push through.
Do not design first. The single most common way a free lead magnet fails to ship is that someone spends eleven hours in Canva perfecting a cover for a document they have not written. Write the thing. Make it useful. Make it look decent afterwards, in about forty minutes. Nobody has ever declined to book a call because the header font was ordinary.
Step 5: Write the delivery page before you finish the magnet
Counterintuitive, and it works. Draft the headline, the one-sentence promise and the next step first. Doing it in this order forces you to articulate the value before you have sunk effort into the asset – which is exactly when you can still change course cheaply.
It also constrains scope. If the page promises three things, the asset delivers three things and stops. Scope creep happens when the asset is written before the promise exists to contain it.
Step 6: Attach the next step to the asset itself
Your booking link goes inside the PDF, on the last page, in the video description, on the thank you page and in the delivery email. Not one of those. All of them.
The reason is that assets get separated from their context immediately. Your checklist gets saved to a downloads folder, opened three weeks later, forwarded to a colleague, printed. By the time it is being used, the landing page it came from is long gone. If the next step is not physically inside the asset, there is no next step.
The forwarding test. If someone emails your lead magnet to a colleague with no message attached, can that colleague work out who made it and how to hire them? If not, you are losing the best leads you will ever get – the ones who arrive pre-endorsed by someone they trust.
Step 7: Publish, then improve one metric
Ship it before it is finished. A live lead magnet that is seventy percent right teaches you more in a week than another fortnight of private polishing.
Then measure one thing: downloads to booked calls. Not downloads. Not page views. The ratio between people who took your free thing and people who then asked to speak to you. That single number tells you whether the magnet attracts the right person, and no other metric on the page can tell you that.
Not sure which lead magnet fits your business?
That is exactly the kind of thing a discovery call sorts out in twenty minutes. No pitch, no pressure – we look at what you sell, who buys it and what free asset would shorten the distance between the two. Book a free discovery call
21 free lead magnet ideas that convert in 2026
Sorted by how well they work for a solo or small service business, with an honest note on effort. Everything here can be built with free tools.
#
Lead magnet
Best for
Build time
Honest verdict
1
Video walkthrough of a real problem
Any service business
2 hrs
The strongest format available. Proves competence, distributes itself
2
One-page checklist
Process-heavy services
2 hrs
Highest completion rate of any written format
3
Fill-in-the-blank template
Anything with a deliverable
3 hrs
Gets used repeatedly, which keeps you in mind
4
Interactive calculator
Pricing, ROI, budgeting
5 hrs
Shareable, linkable, ages well. Worth the extra effort
5
Teardown of a real example
Creative and strategic work
3 hrs
Demonstrates judgement better than any other format
6
Swipe file of proven examples
Copy, design, outreach
4 hrs
Enormous perceived value for modest effort
7
Self-assessment scorecard
Consulting and audit services
4 hrs
Diagnosis creates the urgency your sales page cannot
8
Email or DM script pack
Sales, recruitment, outreach
3 hrs
Solves a real and painful blank page problem
9
Free mini course by email
Education and coaching
8 hrs
Builds relationship over days. Slower, stickier
10
Public YouTube playlist
Anyone already making video
30 mins
Repackaging you have already paid for. Absurd value
11
Comparison table or matrix
Crowded markets
3 hrs
Ranks well in search, answers a real buying question
12
Live workshop or Q and A
Coaching, consulting
4 hrs
High conversion, does not scale, exhausting
13
Notion or Sheets dashboard
Operations and productivity
5 hrs
Gets embedded into someone’s workflow permanently
14
Anonymised case study
Results-driven services
3 hrs
Proof, but only if the numbers are specific
15
Glossary for a jargon-heavy field
Technical and regulated fields
4 hrs
Attracts beginners. Good top of funnel, weak intent
16
Free audit of their thing
High-ticket services
1 hr each
Converts brilliantly, does not scale at all
17
Resource or tool list
Any niche
2 hrs
Easy to make, easy to ignore. Low differentiation
18
Original data or survey
Established audiences
15 hrs
Earns links and citations. The long game
19
One-page cheat sheet
Reference-heavy topics
2 hrs
Printed and pinned. Underrated staying power
20
Your own process, documented openly
Service businesses
3 hrs
Transparency as marketing. Bolder than most will go
21
The ebook
Almost nobody
20 hrs
Downloaded, never read. Included so you can skip it
Notice the pattern. The formats near the top are short, specific and finishable. The formats near the bottom are long, broad and impressive. Perceived effort and actual effectiveness run in opposite directions, which is why so many people build the wrong thing – they optimise for looking generous rather than for being useful.
Case studies work as lead magnets only when the numbers are specific. Vague ones read as marketing.
YouTube as a lead magnet: the full mechanism
Now the part that matters most, and the part almost nobody sets up correctly.
A traditional lead magnet has a structural flaw: it has no distribution. You build the checklist, you put it behind a form, and then you have to solve an entirely separate problem – getting people to the page. Which usually means paying for ads. Which is the thing you were trying to avoid.
A YouTube video does not have that problem. The distribution is built into the platform. You publish, and a recommendation engine starts showing your video to people who have never heard of you, based on what they searched for and what they watched last. You are not buying that reach. You earned it by making something worth watching.
The one-line version. A PDF is a lead magnet with no distribution. An ad is distribution with no lead magnet. A YouTube video is both, welded together, running permanently, at zero marginal cost.
The evidence that this works at scale
The behaviour this relies on is not niche. People use video specifically to reduce the risk of a decision, which is precisely the moment you want to be present.
68%of YouTube users watched YouTube to help make a purchase decision
1.7×more relevant than social platform content, per BCG research
2×more trustworthy than social platforms in the same study
35bnhours of shopping-related video watched in a year
Two of those numbers deserve more weight than they usually get. Content on YouTube being rated 1.7 times more relevant and twice as trustworthy than social platform content is not a vanity statistic. Trust is the entire currency of a service business. If the platform your prospect is on carries a structural trust advantage, that advantage transfers to you the moment you show up on it properly.
How a video functions as a lead magnet, step by step
The mechanism is not complicated once you see it laid out. Each stage does one job.
Stage
What happens
What it replaces
Your job
1. Discovery
Search or suggested feed surfaces your video to a stranger
Paid impressions
Title and thumbnail matching a real query
2. Qualification
They watch. The wrong people leave in thirty seconds
Lead scoring
Be specific early so mismatches self-select out
3. Demonstration
They watch you solve the problem properly
Case studies and testimonials
Solve it completely, on camera, holding nothing back
4. Trust
They watch two or three more of your videos
The sales call
Have a back catalogue worth binging
5. Conversion
They click the booking link in the description
The landing page
Put the link in every description, pinned comment and end screen
6. Compounding
The video keeps doing all of the above for years
Recurring ad spend
Nothing. This part is free
Stage two is the one people underrate. A lead magnet that everybody wants is usually a lead magnet that attracts nobody who will buy. When my video title says something specific about self-employment or channel strategy, the people who are not my buyers do not click – and that is the system working, not failing. Filtering at the top means the calls at the bottom are worth having.
Length is not the variable people think it is. Completeness is.
Why the description field is the most valuable free real estate you own
Every video description is a permanent, indexable, clickable link to your booking page. That is the entire conversion layer, and it costs nothing.
Most people waste it. They write two lines, drop a subscribe link and move on. The description should carry your primary next step in the first two lines – the part visible before someone clicks “more” – and repeat it further down for anyone who expanded it.
I have written a full breakdown of how to structure this properly in the YouTube video description template, and the SEO reasoning behind it in how to write a description that ranks and converts. If you take one action from this entire post, make it fixing your descriptions. It is a two-hour job across your back catalogue and it retroactively converts every video you have ever published into a lead magnet.
The retroactive win. If you already have thirty videos published with weak descriptions, you own thirty lead magnets that are currently not converting. Adding a booking link and a clear next step to all of them takes an afternoon and requires no new content. This is the highest-return two hours available to most people reading this.
Short-form as the top of the funnel
Shorts do something long-form cannot: they reach people who were not looking for you and had no intention of watching anything eight minutes long. What they cannot do is build enough trust to justify a booking.
So the sequence runs Shorts for reach, long-form for trust, description for conversion. Each format does the job it is suited to. Trying to convert directly from a thirty-second video is where most people’s short-form strategy quietly fails – the reach is real and the leads never materialise, so they conclude Shorts do not work.
Experience is the raw material. Most people sitting on twenty years of it have published none of it.
What to make videos about when you have no idea
Same answer as step one of the build process, applied to video: the questions you already answer. Every enquiry email you have ever typed is a video script you have already written and thrown away.
Three sources, in order of usefulness:
Client questions. Anything asked more than twice. These have proven demand and proven buyer relevance – the person asking was already in a buying conversation with you.
Objections. The reasons people give for not hiring you. Making a video that addresses an objection honestly, including the cases where the objection is correct, is disarming in a way marketing copy cannot be.
Mistakes you see repeatedly. You have pattern recognition your audience does not. Naming a mistake before someone makes it is the clearest possible demonstration of expertise, and it costs you nothing to give away.
Enough theory. This is the actual system, in the order it happens, with nothing hidden.
Stage one – Shorts for reach. Short vertical videos on self-employment, freelancing and channel strategy. Thirty to sixty seconds. One idea each. These do not sell anything and are not supposed to. Their job is to put me in front of people who have never heard of me. Stage two – long-form for trust. Eight to twenty-minute videos answering questions I get asked repeatedly. Nothing held back, no gating, no “book a call to find out the rest”. The whole answer, given away. This is where someone decides whether they want me specifically. Stage three – the blog as the deep layer. Long written guides like this one, for the people who want more than a video and arrive through search rather than YouTube. Same principle: complete answers, no gate. Stage four – the booking link, everywhere. Every video description. Every blog post, mid-way and at the end. Pinned comments. Channel page. There is never a moment where someone has decided they want to talk to me and cannot find out how in under five seconds. Stage five – the call. Twenty minutes, free, no pitch. By the time people arrive they have consumed hours of my thinking. The call is about their specifics, not about whether I am any good. That question was settled before I joined.
Why there is no email gate
I do not gate anything behind an email form. That is a deliberate choice and it is not right for everyone.
The logic is offer value. My discovery calls lead to coaching engagements worth substantially more than a typical low-ticket product. When one client is worth four figures, optimising for list size is the wrong objective – I would rather ten thousand people encounter my thinking freely than two hundred join a list I then have to nurture for six months.
If you sell a £29 product, invert this. Gate the magnet, build the list, run the sequence. The economics of low-ticket demand volume and volume demands a list.
If your offer is…
Gate it?
Primary metric
Why
High-ticket service (£1,000+)
No
Booked calls
Reach and trust beat list size. One client covers the year
Mid-ticket (£200-£1,000)
Sometimes
Calls and list growth
Test both. Ungated content, gated deeper assets
Low-ticket product (under £200)
Yes
List growth then revenue per subscriber
Volume is required, and email is how you get repeat purchases
Retainer or subscription
No
Booked calls
Long relationships need trust built before contact
Affiliate or ad revenue
No
Reach
A form is friction between you and the only thing that pays
A channel does not need to be large to produce clients. It needs to be findable and specific.
The numbers nobody talks about
Realistic expectations, because the alternative is you quitting in month four.
This is slow. Video one produces nothing. Videos one through ten typically produce nothing. Somewhere between month three and month nine, if you have picked a specific enough topic and kept publishing, one video starts finding people consistently, and enquiries begin.
The conversion rate is also lower than the marketing world implies. A video with 5,000 views might produce two enquiries. That sounds terrible until you price it – two qualified enquiries for a service business, from an asset that will keep producing them for three years, from a couple of hours of work. Against a $237 blended cost per lead, those two enquiries would have cost roughly $474 to buy, and you would have to buy them again next month.
The failure mode is impatience, not strategy. Most people who tell me content marketing did not work for them published between four and eleven videos over three months and stopped. The system is real but the lag is real too. If you cannot commit to twelve months, buy ads instead – it will be more expensive and it will work faster, and that is a legitimate trade to make.
Two tools. The first tells you what to build. The second tells you what it saved you. Both run in your browser, nothing is stored and nothing is sent anywhere.
Tool 1: Lead Magnet Picker
Answer four questions and get a recommended format, a build estimate and the reasoning behind the recommendation.
Tool 2: Free Lead Magnet ROI Calculator
Compare what a free content lead magnet costs you per lead against buying the same leads. Enter your own numbers – the defaults are conservative.
Read the breakeven number, not the total. The headline saving over two years will always look impressive because you are comparing a one-off cost to a recurring one. The number that decides whether this is viable for you is the breakeven month - if it is under three, build the thing today. If it is over twelve, your lead estimate is probably optimistic and it is worth halving it and running the numbers again.
Nine ways free lead magnets fail
Every one of these I have either done myself or watched a client do.
1. It solves a problem nobody has
Built from what you find interesting rather than what gets asked. The tell is that you had to invent the topic instead of noticing it. If you cannot name three specific people who asked for this, you are guessing.
2. It is a sample, not a solution
Chapter one of something. A partial answer that stops at the useful bit. This reads as manipulation and it damages trust rather than building it - the person leaves feeling handled rather than helped.
3. It is too big to finish
The forty-page ebook. Downloaded with good intentions, opened once, never completed. An unfinished lead magnet builds nothing, because trust is created by the outcome, not the download.
4. There is no next step inside it
The single most common and most expensive mistake. Someone finds your asset useful, wants more, and has no idea how to get it because the only link was on a landing page they closed a fortnight ago.
5. It attracts the wrong person
Broad topics pull broad audiences. If your magnet is "10 productivity tips" you will get downloads from people who will never buy anything from anyone. High download numbers and zero enquiries is the signature of this failure.
How to tell mistake five apart from a patience problem. If downloads are high and calls are zero after a hundred downloads, it is targeting. If downloads are low and calls are low, it is reach, and reach takes months. The two look identical for the first few weeks and need opposite responses, which is why the download-to-call ratio is the only metric worth watching.
6. It took three months to build
Perfectionism disguised as diligence. The version you would have shipped in week one would have taught you something the version you shipped in month three cost you eleven weeks to learn instead.
7. The delivery is broken
Form does not fire, email lands in spam, link expires, PDF will not open on a phone. Test the whole path yourself, on a phone, on a different email address, before you promote anything.
8. You built five instead of one
Five half-optimised magnets pulling five thin audiences beats nothing, but loses badly to one that works. Build one, run it ninety days, and only add a second when you can name the segment the first one misses.
9. You stopped promoting it after week two
A lead magnet is not finished when it is published. It needs a permanent home in your content - linked from posts, mentioned in videos, pinned on your channel. The publish is the start of the work, not the end.
The cost of being hard to find is paid quietly, in enquiries you never knew existed.
How to measure whether it works
Most people measure the wrong thing, conclude the wrong thing, and quit for the wrong reason. Here is the hierarchy that matters, worst metric first.
Metric
What it tells you
How much to weight it
Views or page visits
That the packaging works
Very little on its own
Downloads or watch time
That the promise was appealing
Useful for diagnosing, not for judging
Completion rate
That the asset delivers on the promise
Important - incomplete means no trust built
Downloads to booked calls
That you attracted the right person
The number that decides everything
Calls to clients
That your offer and pricing hold up
Critical, but this is a sales problem, not a magnet problem
Revenue per hour invested
Whether the whole model is worth running
The only long-run judgement
Benchmarks to aim at
20-40%Landing page visits to downloads
60%+Downloads to completion
2-5%Downloads to booked discovery calls
30-50%Discovery calls to clients
Ranges reflect what I see across service businesses I coach, not published industry data. Treat them as sanity checks rather than targets - a two percent download-to-call rate on a high-ticket service can be outstanding, and a five percent rate on a low-ticket product can be a failure.
The one number to track
Downloads to booked calls. Track nothing else for the first ninety days.
If it sits under two percent, the magnet attracted people who were never buying from you - a targeting problem, fixed by narrowing the topic, not by improving the asset. If it sits above five percent and volume is low, you have a reach problem, and reach is fixed by promotion and patience, not by rewriting the checklist.
Those are the only two diagnoses that matter, and they need entirely different responses. Everything else is noise you can look at in year two.
Attribution will be imperfect and that is fine. People will watch four videos over three months, read two blog posts, and then arrive at your booking page via a direct URL they typed. Your analytics will record that as direct traffic and credit nothing. Ask on the call instead - "how did you find me" is worth more than any dashboard, and it is the only attribution model that survives contact with reality.
The full analytics picture for a business-oriented channel, including which YouTube Studio metrics map to commercial outcomes, is in measuring YouTube marketing ROI.
Why the metric on the screen and the money in the bank drift apart.
The zero-cost tool stack
Everything needed to build, host and deliver a free lead magnet, at no cost. There is no version of this where you need to spend money before you have proved the concept.
Job
Free option
Notes
Writing the asset
Google Docs
Exports to PDF directly. No design software needed
Calculators and trackers
Google Sheets
Share as view-only with a copy prompt. Costs nothing, works everywhere
Making it look designed
Canva free tier
Sufficient for a checklist or one-pager. Do not overinvest here
Video hosting and distribution
YouTube
Free hosting plus a recommendation engine. Unmatched
Recording video
Your phone
Modern phone cameras exceed what any of this needs
Recording screen walkthroughs
OBS Studio
Free and open source. Steeper learning curve, no ceiling
Free tier shows search volume and competition. This is how I pick topics
Booking calls
Google Calendar appointment scheduling
What I use. Free, reliable, no third-party tool required
Delivery emails
MailerLite or Brevo free tiers
Only needed if you are gating. Skip entirely if you are not
If video is the direction you are taking and the kit question is bothering you, the honest answer is that your phone is fine to start and the rest can wait. When it stops being fine, the creator equipment guide covers what to upgrade and in what order - deliberately, because buying gear is the most popular way to avoid publishing.
There is a limit to how much process documentation helps. Publishing is the part that does.
People also ask
What is the best free lead magnet?
For a service business, a video that solves one real problem completely. It proves competence in a way a document cannot, and it arrives with distribution attached instead of needing traffic sent to it. For a product business, a template or free tier the buyer can use immediately.
How do I promote a lead magnet with no audience?
Put it on a platform with its own discovery engine rather than on a page nobody visits. YouTube, search-optimised blog content and Pinterest all surface work to people who have never heard of you. A PDF on your website has no such mechanism and will stay unseen.
Do I need a website for a lead magnet?
No. A YouTube video with a booking link in the description is a complete funnel with no website involved. A site helps with search visibility and credibility, but it is not a prerequisite for your first ten clients.
How often should I make a new lead magnet?
Rarely. One that works, promoted relentlessly for a year, beats four built in a year and promoted for a fortnight each. Build a second only when data shows a specific audience segment the first one fails to reach.
Can I use AI to write my lead magnet?
For structure and first drafts, yes. For the substance, no - the value is in judgement your competitors do not have, and a language model can only give you the consensus view that everyone else already has access to. Use it to write faster, not to think for you.
What is the difference between a lead magnet and a tripwire?
A lead magnet is free and buys permission to continue the conversation. A tripwire is cheap - typically under twenty pounds - and buys something more valuable: proof the person will hand over card details. Tripwires suit product businesses. Service businesses generally skip them.
How long does it take for a free lead magnet to work?
A gated magnet promoted to an existing audience can produce leads within days. Content-based magnets on YouTube or search typically take three to nine months before enquiries become consistent. The lag is the price of the asset not expiring.
Should my lead magnet be about my service?
No. It should be about the problem your service solves, handled from the buyer's side. A magnet about your service is a brochure, and nobody trades their attention for a brochure.
Frequently asked questions
What is a free lead magnet?
A free lead magnet is something of real value you give away in exchange for permission to keep talking to someone - usually an email address, sometimes just their attention. It solves one specific problem completely, and it works because it lets a stranger test your thinking before they risk money on you.
How do I create a lead magnet for free?
Take the question your prospects ask most often, answer it properly in a single document or video, and build it in Google Docs, Canva's free tier or YouTube. The cost is four hours of your time. The tools are free, the hosting is free, and the knowledge is already in your head.
Can a YouTube video be a lead magnet?
Yes, and it is the most durable one available. A PDF gets downloaded once and forgotten. A YouTube video keeps getting found through search and suggested feeds for years, demonstrates your face, voice and thinking, and can carry your booking link in the description permanently. It is a lead magnet with a distribution engine attached.
Do lead magnets still work in 2026?
Generic ones do not. Nobody wants another twelve-page PDF of recycled advice in exchange for their email address. Specific ones work better than ever, because the bar has dropped so low that a lead magnet which solves a real problem properly now stands out instead of blending in.
Should I gate my lead magnet behind an email form?
It depends what you sell. If you sell a low-ticket product, gate it and nurture by email. If you sell a high-ticket service where one client is worth thousands, ungate it. Reach matters more than a list, and the fastest path is content that anyone can consume, ending in a booking link.
How long should a free lead magnet be?
Short enough to be finished in one sitting. A one-page checklist that gets used beats a forty-page ebook that gets downloaded and ignored. Length signals effort to you and cost to your reader - and only one of you is deciding whether to book a call.
How much does a lead magnet cost to make?
Nothing but time if you use free tools. Google Docs, Google Sheets, Canva's free tier and YouTube cover every format worth building. The real cost is the four to six hours of thinking required to narrow a broad topic into one solved problem.
What is a good conversion rate for a lead magnet?
Judge it on booked calls, not downloads. A landing page converting visitors to downloads at twenty to forty percent is healthy. Downloads to booked discovery calls at two to five percent is healthy for a service business. If downloads are high and calls are zero, you attracted the wrong audience.
How many lead magnets do I need?
One that works beats five that half-work. Build one, run it for ninety days, and only build a second when you can name the specific segment the first one fails to reach. Most people build a second because the first felt boring, not because the data asked for it.
Is a free lead magnet better than paid advertising?
It is slower and it compounds. Paid ads buy attention that stops the moment you stop paying. A free content lead magnet costs time up front and then keeps producing leads at close to zero marginal cost. For a solo business with more time than budget, content wins on economics every time.
Final thoughts
The reason I keep coming back to this argument is that the alternative is watching capable people stay invisible because they think marketing requires a budget they do not have.
It does not. It requires you to take the thing you already know - the answer you have typed into an email forty times this year - and put it somewhere findable, with a way to reach you attached. That is the whole method. Everything above is elaboration on those two moves.
The reason so few people do it is not that it is difficult. It is that it is slow, and slow feels like failure for the first six months. You publish, nothing happens, you publish again, nothing happens. There is no dashboard lighting up to tell you it is working, because it is not working yet - it is accumulating. And then somewhere around month five a stranger books a call and mentions a video you had forgotten making, and the thing starts to compound.
I have built a twenty-year career on that mechanism. Six Silver Play Buttons, over 500 clients coached, and not one pound spent on advertising to get any of it. Not because ads are bad - they work fine and they are faster - but because I did not have the money when I started, and by the time I did, the free version had already outgrown anything I could have bought.
Twenty minutes, free, no pitch. Bring what you sell and who buys it, and we will work out what free asset would shorten the distance between the two - and whether video is the right route for your situation or the wrong one.
This call is itself the end of the funnel described above. You read the post, you got the whole method for nothing, and now the next step is one click away. That is the model working. Book your free discovery call
Sources and further reading
Cost per lead benchmarks: First Page Sage 2026 cost per lead by industry data, as compiled by Martal and Prospeo; Belkins B2B cost per lead analysis 2026; Sopro B2B benchmark study 2026. Figures quoted in US dollars and represent blended averages across industries.
Video and purchase behaviour: Think with Google, YouTube shopping decision statistics; Boston Consulting Group research on attention, relevance and trust in video, reported via Think with Google, 2026.
Benchmark ranges in the measurement section reflect patterns observed across service businesses coached by the author and are offered as sanity checks, not published industry standards.
Some links in this post are affiliate links. They do not change the price you pay and may earn a commission that helps fund the free content on this site.
Last updated 24 July 2026.
Upgrade your YouTube microphone when you’ve exhausted technique and room optimisation and still hear clear limitations in your recordings — specifically noise floor, frequency response weaknesses, polar pattern mismatches, or connectivity constraints. Don’t upgrade based on subscriber count, revenue milestones, or “next level” marketing — upgrade when your current mic has a specific limitation your content genuinely needs to overcome. Most YouTubers upgrade prematurely (before extracting full value from current gear) or too late (tolerating audible limitations for years). The right moment is when specific problems persist after you’ve optimised everything else.
This guide is based on upgrade advice given across 500+ channel audits where creators asked “should I upgrade my mic”. For the full microphone context, see my Ultimate Creator Equipment Guide 2026.
Signals You’re Ready to Upgrade
Genuine upgrade signals — these indicate your current microphone is the limiting factor:
1. You’ve Optimised Room and Technique
You’re close to the mic (5-10 cm for dynamic, 15-20 cm for condenser), your room has soft furnishings behind the mic, background noise is minimal, and input levels peak at -12 dBFS. If you’ve done all of this and audio still sounds thin, noisy, or mid-range limited, the microphone itself is now the ceiling.
2. You Hear Specific Limitations, Not General Dissatisfaction
“My mic sounds bad” is usually a room/technique problem. “My mic has audible hiss when I compress the signal”, “my mic picks up room echo even 5 cm away”, or “my mic lacks detail on soft speech” are specific limitations of the microphone itself. Specific diagnoses drive good upgrade decisions.
3. Your Content Has Changed
You moved from desk podcasting to vlog-style content and your desk mic no longer fits. You added a co-host and your single mic setup can’t handle multiple voices. You’re shooting outdoor content and need shotgun rather than condenser. Scenario changes legitimately trigger upgrades.
4. Your Current Mic Has Connectivity Limitations
You started with USB and now need to connect to a camera (XLR required). You need multiple inputs for podcasting (audio interface required). You want to upgrade preamps separately from mic (XLR modular path needed). Connectivity limits are legitimate upgrade triggers.
5. Noise Floor Is Audible
Cheap mics (under £100) often have noise floor that becomes audible when you compress or normalise audio. If your processed audio has persistent hiss that you can’t remove without artifacts, the mic’s self-noise is the cause. This is a real technical limit that only better gear fixes.
6. You’re Monetising Seriously
When content is directly generating income (ad revenue, sponsorships, course sales), investment in quality returns on itself. If you’re earning £500+/month from YouTube content, upgrading to broadcast-quality mic ($300-500) is a legitimate business expense with tangible production value return.
Signals You’re NOT Ready to Upgrade
1. You Haven’t Fixed Your Room
Most “I need a better mic” requests are actually “I need to treat my room” requests. A £500 microphone in an untreated bedroom sounds worse than a £150 dynamic mic in the same room. Before upgrading gear, hang a duvet behind the mic, get a rug on the floor, and record with mic 5 cm from your mouth. If that fixes the sound, you saved £500.
2. You’re Not Close Enough to the Mic
Using any mic from 40-80 cm away (because you don’t want it visible on camera) creates thin, distant, echo-y audio that no upgrade fixes. Get close (5-20 cm depending on mic type) with your current mic before considering upgrades. Most distance problems fix 80% of audio issues.
3. Your Input Levels Are Wrong
Recording at -30 dBFS then normalising to -14 LUFS amplifies noise floor along with voice, creating audible hiss. Fix at source — set input gain so peaks hit -12 dBFS during actual performance. If your current mic can’t reach -12 dBFS at max gain on a loud passage, you may need a preamp like Cloudlifter CL-1 (£139) — not a new mic.
4. You’re Chasing Specs
Frequency response, max SPL, self-noise figures, and sensitivity specs matter at the extremes. For YouTube voice work in normal rooms, most mics over £100 are specced beyond what matters. Don’t upgrade because spec sheets say another mic is “better” — upgrade because you hear a specific limitation.
5. You’re Comparing to Top Channels
Top YouTubers often use £800-1,200 mics (Sennheiser MKH 416, Shure SM7B, Neumann U87). This doesn’t mean you need the same mic — it means they’ve optimised for broadcast-quality audio at scale, with treated environments, and professional signal chains. A £200 mic in a treated room with good technique often sounds indistinguishable from £1,000 mics in the same conditions.
6. You’re Hitting a Milestone
“I hit 10k subscribers so I’ll upgrade my mic” is not a sound reason. Subscribers don’t care what mic you use — they care what you sound like. If your current setup sounds professional, subscribers are a sign to reinvest in content, not necessarily gear.
Common Upgrade Paths
USB Starter → USB+XLR Hybrid
Current: Blue Yeti, Samson Q2U, basic USB condenser Upgrade to:Rode PodMic USB (£180) or Shure MV7+ (£240) Why: Dynamic pickup (forgiving of untreated rooms), XLR path for future upgrades, better preamps
USB Hybrid → Full XLR
Current: Rode PodMic USB, Shure MV7+ in USB mode Upgrade to:Shure SM7B (£399) + Cloudlifter CL-1 (£139) + Focusrite Scarlett 2i2 (£199) Why: Separate preamp quality, multi-mic capability, professional signal chain
Current:Rode Wireless Me (£149) or first-gen Rode Wireless Go Upgrade to:Rode Wireless Pro (£369) or similar pro systems Why: Longer range, 32-bit float backup recording, dual transmitter included, timecode
Condenser → Dynamic (Reverse Upgrade)
Current: Large-diaphragm condenser in untreated room Upgrade to:Shure SM7B (£399) or Rode PodMic (£95) Why: Condensers are the wrong tool for untreated bedrooms. “Upgrading” from condenser to dynamic is often the right move, despite being lower-priced in some cases. Tool-matching matters more than nominal tier.
What Upgrades Actually Change
Before buying, know what an upgrade delivers — and doesn’t.
What Upgrades Do
Lower noise floor: Cleaner audio when normalised/compressed
Better frequency response: More natural voice character, less colouration
Better off-axis rejection: Less room sound pickup
More flexible polar patterns: Multi-mic options, figure-8 for co-hosts
Higher max SPL: Handle loud speakers without distortion
Build quality: Better durability, longer lifespan
What Upgrades Don’t Do
Fix room echo: Better mic picks up reflections just as clearly, often more clearly
Remove background noise: Noise sources still get recorded
Compensate for distance: Still need correct mic distance for any mic
Hide bad technique: Plosives, mouth clicks, and poor positioning remain
Guarantee growth: Viewers don’t care about mic brand if content doesn’t resonate
Total Signal Chain Investment
When upgrading, think about the full signal chain, not just the mic:
A £400 mic with £30 interface and laptop speakers will sound worse than £200 mic with £150 interface and £100 headphones. Balance upgrades across the full chain. An audio interface upgrade (£199 Focusrite Scarlett 2i2) often provides more audible improvement than a mic upgrade at similar cost.
Budget Planning for Audio Upgrades
Don’t upgrade piece-by-piece in isolation. Plan the full future setup, then execute over time.
This phased approach spreads cost, lets you learn each component, and gives you meaningful audio improvements at each step rather than one big change all at once.
Reselling Current Gear
Cameras and microphones hold resale value well. When upgrading, sell current gear to offset new purchase:
MPB.com for professional audio gear
eBay for broader audience (more work but higher prices possible)
Local Facebook Marketplace for quick sales
Reverb.com for musical/recording equipment
Typical resale: 50-70% of original purchase price for gear in good condition, 2-3 years old. Budget for resale when planning upgrades — the effective cost of upgrading is often half the list price.
Frequently Asked Questions
At what subscriber count should I upgrade my microphone?
Subscriber count is not an upgrade trigger. What matters is whether you hear specific limitations in your current audio after optimising room and technique, and whether your content is generating revenue that justifies investment. A 100k-subscriber channel with clean audio from a £180 mic doesn’t need to upgrade just for status.
Should I upgrade to SM7B or Shure MV7+?
Shure MV7+ at £240 is a modern hybrid (USB + XLR) with built-in gain processing, enough for most YouTubers. Shure SM7B at £399 is the broadcast standard but requires a Cloudlifter (+£139) and XLR interface (+£199), so total cost is £737+. Only upgrade to SM7B if you specifically want the broadcast sound and have the signal chain to support it.
How do I know if my microphone has noise floor issues?
Record 30 seconds of silence (no speaking, no noise sources). Normalise or boost the recording to -14 LUFS. Listen with headphones. If you hear clear hiss, that’s noise floor. Cheap mics (under £80) have significant self-noise; mics over £200 are usually clean enough for most YouTube use.
Is it worth upgrading from Blue Yeti to Shure SM7B?
Usually not a direct jump — too big a leap in cost and complexity. Better intermediate path: Blue Yeti → Rode PodMic USB (£180) or Shure MV7+ (£240) — dynamic mics that fix untreated room issues without requiring audio interface upgrades. If you still want SM7B after a year with these, make that jump then.
When should I add a Cloudlifter to my setup?
When using passive dynamic mics (SM7B, SM58, Rode PodMic XLR) and running out of gain on your audio interface. Cheaper interfaces (Focusrite Solo, MOTU M2) lack enough clean gain for SM7B — a Cloudlifter adds +25 dB clean gain, fixing the problem. Not needed for USB mics or active dynamics with internal amplifier.
How often should YouTubers upgrade their microphones?
Every 3-5 years typical, if at all. Good microphones last decades. A 2018 Rode PodMic still sounds great in 2026. Upgrade when scenario changes or specific limitations emerge — don’t upgrade on a schedule.
What’s the best first mic upgrade?
Usually environmental, not equipment. Soft furnishings behind the mic (duvet, curtain, bookshelf), rug under desk, and closer mic distance improve audio more than any £100-300 equipment change. Try room/technique fixes before spending on new mics.
Do I need a broadcast microphone for YouTube?
No. Broadcast microphones (Sennheiser MKH 416, Schoeps CMIT) cost £800-1,500+ and serve professional broadcast standards. For YouTube, mic quality above the £300-400 range delivers diminishing returns. Most viewers can’t distinguish SM7B from MKH 416 in blind tests on normal playback systems.
The best microphone upgrade is the one triggered by a specific problem you’ve diagnosed in your current setup, not by general dissatisfaction or milestone marketing. Fix technique and room first — then if limitations remain, upgrade intentionally with full signal chain consideration. Most creators save hundreds of pounds by solving the real problem rather than the assumed one.
⚡ Quick answerKey Person of Influence by Daniel Priestley gets 4.6/5 from me. A clear five-step plan for becoming the obvious choice in your niche. Experts, coaches, consultants and freelancers who are good at the work but not well known.
What is Key Person of Influence about?
Priestley argues that every industry has a handful of people who are well known, well paid and highly influential, and that becoming one is a learnable process rather than luck. He lays out five steps to get there.
Key Person of Influence summary
Priestley's premise is that in any field there is an inner circle of key people of influence, the names everyone knows, who attract the best opportunities, charge the most and are sought out rather than chasing work. He argues this status is built deliberately, and gives a five-step method.
The five steps are pitch, publish, product, profile and partnership. Pitch is being able to explain what you do clearly and compellingly. Publish is putting your ideas into the world through writing and content so people can find and trust you. Product is turning your expertise into things people can buy at different levels. Profile is building visibility and reputation in your niche. Partnership is joining forces with others to grow faster than you could alone.
The book is practical and brisk, aimed at people who are good at what they do but stuck being a well-kept secret. Priestley's own background running businesses gives the advice a grounded, commercial edge.
Published in 2010 and updated since, it became a well-known playbook in the coaching and consulting world. It is aimed at experts who deliver great work but struggle to be known for it.
The one idea worth the price: Being the best-kept secret in your field is a business problem. Publishing your ideas is how you stop being one.
Key ideas and takeaways
Pitch. Explain what you do so clearly that people get it instantly.
Publish. Put your ideas out through content so people can find and trust you.
Product. Turn your expertise into things people can buy at different price points.
Profile and partnership. Build visibility, then grow faster by teaming up with others.
My honest take
This is one of the more directly useful books for a self-employed expert who is good at the work but invisible. The five-step structure is easy to remember and, more importantly, easy to act on, which is not something you can say about every business book.
The pitch and publish steps in particular are where most people leak opportunity. If you cannot explain what you do in a sentence, or you have no body of content people can find, you are relying on luck and referrals. Priestley turns that into a deliberate plan, and for a coach, consultant or freelancer, that plan is worth real money.
It is squarely aimed at people building a personal brand around their expertise, which describes a lot of modern self-employment. If that is you, few books give you a clearer route from unknown to sought-after.
The honest caveat: It doubles as a promotion for Priestley's own programmes, so expect some of that. The framework stands on its own even if you never buy anything else.
Where it falls short
There is a promotional undertone pointing towards the author's paid programmes.
It is stronger on the what than the deep how for each step, so you supply some of the detail.
How it compares
Start with Why helps you find the belief behind your work; Key Person of Influence gives you the practical steps to get that work known and valued. Read Sinek for the why and Priestley for the how of visibility.
Who should read it (and who should skip it)
Experts, coaches, consultants and freelancers who are good at the work but not well known. Skip it if you already have strong visibility and a full pipeline.
Best format: Kindle or audio both work; it is brisk either way.
How to actually use it if you are self-employed
Write and refine a one-sentence pitch for what you do.
Publish one piece of content this week that shows your expertise.
Sketch one product or offer that packages what you know.
⚡ The 60-second recap
Learn to pitch what you do clearly.
Publish your ideas so people can find you.
Build products, profile and partnerships to become the obvious choice.
A book is a shortcut. A second pair of eyes is faster.
Twenty years self-employed, 500+ people coached. If you want help applying this to your own situation, book a free discovery call.
Pitch, publish, product, profile and partnership. Together they take you from unknown to sought-after in your field.
Who is it for?
Experts, coaches and freelancers who are good at the work but not yet well known.
Is it salesy?
There is a promotional undertone towards the author's programmes, but the framework is genuinely useful on its own.
Is it still relevant with modern content platforms?
Yes. If anything, the publish step is easier and more powerful now than when it was written.
Do I need to do all five steps at once?
No. Most people start with pitch and publish, which is where the biggest gains usually are.
Final verdict
Key Person of Influence earns 4.6/5. A clear five-step plan for becoming the obvious choice in your niche. If it is the stage you are at, the cheapest way in is a free Audible trial or Kindle Unlimited.
Note: Cover image via the Open Library Covers API. Rating is my own editorial score. Affiliate links are marked and support the site at no cost to you. Publish reminder: set the featured image and meta description; confirm the /book-reviews/ category is assigned.
YouTube Traffic Redirection — How to Use Streams to Boost Views
Most creators who start running 24/7 livestreams make the same mistake: they set up a stream, watch the viewer numbers with satisfaction, and then do nothing with all that live traffic they are generating. That is like owning a busy restaurant and never telling customers about your other menu items. The stream audience is there — but they are not being guided anywhere.
This is where traffic redirection transforms a passive growth strategy into an active one. I am Alan Spicer, a YouTube Certified Expert with 20+ years of experience and six Silver Play Buttons. I have been using Gyre.pro to run 24/7 streams across multiple channels, and the traffic redirection feature is one of the most underutilised and most powerful tools in the platform.
In this guide, I am going to break down exactly what YouTube traffic redirection is, how Gyre’s implementation of it works, and the strategic frameworks I use to funnel my stream audience toward specific content goals — whether that is boosting views on a new upload, growing channel memberships, or increasing cross-video engagement.
Start Redirecting Your Stream Traffic Today
Get access to Gyre.pro’s traffic redirection feature and start turning stream viewers into subscribers who watch all your content.
YouTube traffic redirection, in the context of 24/7 streaming, is the practice of using your live stream as a funnel to direct viewers toward other specific content on your channel. Think of it as using your stream’s live audience as a captive, engaged group that you can then point toward wherever you most want them to go.
YouTube has built-in features for this — cards, end screens, pinned comments — but these are limited in what they can display and when. Gyre’s traffic redirection feature works differently: it allows you to specify a destination URL that gets integrated into the stream experience, creating a persistent prompt that guides viewers toward your chosen content while they are actively engaged with your channel.
The key insight is timing and intentionality. Rather than hoping viewers randomly click around to your other content, you are actively channelling them. You control the flow of attention within your channel ecosystem.
How Gyre.pro’s Traffic Redirection Feature Works
Inside the Gyre.pro dashboard, the traffic redirection feature is remarkably straightforward to configure. Once your stream is set up and running, you access the redirection settings and specify the destination URL — the video, playlist, or channel page you want viewers to visit. Gyre then integrates this into your stream in a way that creates visible prompts for live viewers.
What makes Gyre’s implementation particularly powerful is that you can update the destination in real time. If you publish a new video today, you can immediately update your stream’s redirection target to that new video. Within minutes, your entire live stream audience — however many concurrent viewers you have at that moment — is being prompted to go watch your newest upload. This is a significant competitive advantage over creators who are not using this feature.
I use this in a very deliberate way: every time I publish a new video, one of my first actions is updating my stream redirection targets. The result is that my new videos get a surge of engaged views within the first 24 hours, which is exactly when YouTube’s algorithm is evaluating whether to push the video to a broader audience. Early engagement signals matter enormously, and stream-redirected traffic is some of the most engaged traffic you can generate. For more on how this integrates with overall strategy, see my guide to building a 24/7 YouTube channel.
The Flywheel Effect: How Streams Build Channel-Wide Momentum
The traffic redirection strategy does not just boost individual video views — it creates a self-reinforcing growth flywheel for your entire channel. Here is how the cycle works:
Stream attracts viewers — your 24/7 stream runs continuously, appearing in YouTube search and recommendations, attracting new viewers who have never encountered your channel before
Viewers engage with stream content — they watch your existing back-catalog content, building familiarity and trust with your brand and style
Traffic redirection introduces them to new content — stream viewers are prompted to watch your latest upload or explore a key playlist
New content converts them to subscribers — viewers who discover your stream and then watch multiple videos are far more likely to subscribe than those who watch a single video
Subscribers watch all future uploads — these new subscribers now see every new video you publish in their subscription feed, amplifying each subsequent upload’s reach
More subscribers and watch time boosts algorithm performance — YouTube’s algorithm interprets sustained engagement as a quality signal and pushes your content to wider audiences
Wider audiences discover your stream — the cycle begins again with even more new viewers entering the top of your funnel
This is not theoretical. Channel YEES (880K subscribers) demonstrated exactly this flywheel in action, achieving +79% watch time in 6 months and gaining +40,090 new subscribers through strategic streaming. Grace Wins (182K subscribers) grew their monthly views from 2.72 million to 6.58 million. These results come from the compound effect of consistently directing engaged stream audiences toward channel content.
Key Insight: Stream viewers who are redirected to additional content and then subscribe are worth significantly more than a cold subscriber who found you through a single video. They have already spent time with your content in the stream context, which means they have stronger channel loyalty from day one.
Strategic Use Cases for Traffic Redirection
Boosting New Upload Performance
This is the most time-sensitive use case and the one I prioritise above all others. Within minutes of publishing a new video, I update my stream redirection to point toward that upload. YouTube’s algorithm evaluates new videos primarily in the first 24-48 hours — the click-through rate, watch time, and overall engagement in that window determines how broadly the algorithm will push the video going forward.
Stream traffic is particularly valuable for this because it is warm traffic — viewers who are already engaged with your channel and content. They are far more likely to watch through a significant portion of your new video than a cold visitor from general YouTube search. High watch time from stream-redirected viewers in the first 24 hours can meaningfully influence the algorithm’s initial evaluation.
Growing Channel Memberships
If you have a channel membership programme, your 24/7 stream audience is some of your most valuable potential members. They are already spending significant time with your content — someone who has been watching your stream for 30, 60, or 90 minutes is clearly engaged enough to consider a membership. Redirecting them to your membership page when they are in that heightened state of engagement can significantly improve conversion rates compared to putting a membership link in a video description that viewers barely read.
I recommend running membership-focused redirection during periods when you have high concurrent stream viewership — typically evenings and weekends in your primary audience timezone. Save the new-upload redirection for when you actually have fresh content to promote.
Driving Traffic to Merch and Affiliate Offers
Stream audiences who have been watching your content for an extended period have some of the highest purchase intent of any YouTube audience segment. Redirecting them to a merch store, an affiliate product, or a digital product during their extended viewing session can generate meaningful revenue that compounds on top of your stream ad income.
This requires careful judgement — you do not want to over-commercialise the stream experience. I use a rotation approach: for a given week, I will set my primary redirection destination and leave it consistent, then change it when I have a specific promotion or new upload to feature. Constant changes in redirection can confuse the audience experience.
Highlighting Evergreen High-Value Content
Not every redirection needs to be about the latest upload. Your channel likely has “cornerstone” content — videos that serve as the best introduction to your niche, your most comprehensive tutorials, or your highest-converting pieces. Redirecting stream traffic to these evergreen assets can build your authority with new viewers even when you are not actively publishing.
Think of it as a sophisticated welcome sequence. New viewers discover your stream, watch enough content to be interested, then get directed to your definitive guide or hero piece. That is a much more intentional introduction to your channel than leaving them to randomly browse.
Step-by-Step: Setting Up Traffic Redirection on Gyre.pro
Step 1: Set Up Your 24/7 Stream on Gyre.pro
If you have not already done so, start by getting your 24/7 stream running. Sign up at Gyre.pro, upload your back-catalog videos, configure a playlist, and connect your YouTube RTMP stream key. The full setup walkthrough is covered in my Gyre.pro setup tutorial if you need step-by-step guidance. The stream needs to be live before traffic redirection becomes relevant — you are directing live traffic, so you first need live traffic to direct.
Step 2: Identify Your Highest-Priority Destination Content
Before configuring redirection, be clear about where you want to send people. The answer should align with your current channel priority. If you just published a new video, that is your destination. If you are focused on growing memberships, that page is your target. If you are running a promotion, the relevant product or affiliate link is your goal. Do not set a redirection destination arbitrarily — every viewer you redirect is an active decision about where your attention is going.
Step 3: Configure Traffic Redirection in the Gyre Dashboard
Inside your Gyre dashboard, locate the traffic redirection settings for your active stream. Enter the full URL of your destination content. Make sure the URL is correct and goes directly to the intended destination — sending viewers to a broken link or wrong page is a wasted opportunity and creates a poor user experience. Confirm the settings are saved and active.
Step 4: Schedule Redirection Around New Uploads
Build a habit around your upload schedule. If you publish videos on Tuesday mornings, make it standard practice to immediately update your stream’s traffic redirection destination right after publishing. I actually add this to my publishing checklist: publish video, share on socials, update Gyre redirection target. It takes 60 seconds and can meaningfully impact how a video performs in its critical early hours.
For channels with multiple simultaneous streams — available on Gyre’s Start+ and Pro+ plans — you can direct different streams toward different destinations. One stream points toward your newest video, another points toward your membership page. This multiplies the strategic options available to you. For a full breakdown of what each Gyre plan includes, see my complete Gyre.pro review.
Step 5: Monitor Cross-Video Traffic in YouTube Analytics
After implementing redirection, check YouTube Studio analytics for your destination content. Look at the traffic sources report — you should see traffic originating from YouTube Live features and from your live stream. Track changes in views, watch time, and subscriber conversion rate on the days you redirect stream traffic versus days you do not. This data will tell you definitively how valuable your stream traffic is.
I have found that stream-referred traffic tends to have unusually high average view duration — often significantly above the channel average — precisely because the viewers are already warm and engaged. High watch time from this traffic source is exactly what YouTube’s algorithm rewards.
Step 6: Iterate and Optimise Your Redirection Strategy
Like all digital marketing, traffic redirection improves with testing and iteration. Experiment with directing to different types of content — long-form versus short-form, tutorials versus entertainment, playlists versus individual videos — and track which generates the best subscriber conversion and watch time. Over several months, you will develop a clear picture of what your stream audience responds to most strongly.
How Stream Viewers Become Long-Term Subscribers
Understanding the psychology of stream viewers helps explain why traffic redirection is so effective. Someone who finds your stream through YouTube search or recommendations and keeps watching for 20, 30, or 60 minutes is demonstrating a much higher level of interest in your content than someone who clicks on a regular video and watches for 3 minutes before dropping off.
Extended stream viewers have already made the implicit decision that your content is worth their time. They are in a lean-back consumption mode, willing to keep watching. When you redirect these viewers to additional content, you are not interrupting their session — you are extending it. The subscriber conversion rate from these highly engaged viewers is consistently higher than from cold video traffic in my experience.
And because these subscribers arrived through an extended engagement with your content rather than a single viral moment, they tend to be higher quality subscribers — people who actually watch your uploads rather than ghost subscribers who never engage again. This matters because YouTube measures subscriber engagement as a channel health signal. A smaller, more engaged subscriber base outperforms a larger disengaged one in terms of algorithmic performance. For more on the mechanics of growing an engaged audience, see my guide to increasing YouTube watch time through livestreams.
Maximising Cross-Video Views: Advanced Strategies
The Upload-Boost Protocol
On the day of a new upload, treat your stream traffic as a launch asset. Here is my exact protocol: I schedule my upload to go live at a time when my stream typically has peak concurrent viewership (I can see this pattern in YouTube Studio analytics). As soon as the video is live, I update my Gyre redirection target and also pin a comment in my stream chat announcing the new video. This double-signal approach — a prompted redirect plus an in-chat announcement — maximises the percentage of live viewers who transition to the new upload.
The Playlist Funnel
Rather than redirecting to a single video, consider redirecting to a carefully constructed playlist. A playlist will auto-play through multiple videos, dramatically increasing total watch time per viewer session. If someone follows your stream redirect to a playlist and watches three or four videos in succession, that session is worth significantly more — in watch time, engagement, and subscriber probability — than a redirect to a single video.
This is particularly effective if your newest upload is the first video in a topically relevant playlist. The viewer watches your latest content, then gets auto-played into your most relevant existing content. This is an ideal journey for new viewers and a high-value session for returning ones.
Multi-Stream Traffic Splitting
If you are on a Gyre plan that allows multiple simultaneous streams, you can run a sophisticated traffic architecture across different streams. For example: Stream A (your main content loop) redirects to your newest upload. Stream B (a highlights compilation) redirects to your membership page. Stream C (a genre-specific collection) redirects to an affiliate product relevant to that audience segment. Each stream becomes a targeted funnel, not a generic content loop.
This level of strategic control over your channel’s traffic flows is what separates channels that grow deliberately from channels that grow randomly. If you want to understand how to use multiple streams effectively, my post on running multiple livestreams on one YouTube channel goes deep on the mechanics.
What the Numbers Say
The data from Gyre’s platform validates the traffic redirection strategy comprehensively. Gyre reports that on average, creators using its platform see a 30% increase in views and a 30% increase in revenue. But the channels that actively use traffic redirection — rather than just running a passive stream — tend to see results at the higher end of that range and beyond.
One unnamed channel on Gyre’s platform achieved a staggering +824% increase in views, +847% increase in watch time, and +1,100% increase in revenue. That channel earned $17,936 from streams alone — 14.3 times more revenue than all its other videos combined. While exceptional, this illustrates what is possible when you use streaming not as a passive background strategy but as an active traffic architecture. See the full breakdown in my Gyre.pro case studies analysis.
Integrating Traffic Redirection with Your Broader YouTube Strategy
Traffic redirection works best when it is integrated into your overall channel strategy rather than treated as an isolated tactic. Think of your 24/7 stream as the top of your YouTube funnel. It is always running, always attracting viewers from across the platform. Your job is to ensure that as many of those viewers as possible travel further down the funnel — watching more content, subscribing, and eventually becoming loyal members of your audience.
This means keeping a consistent stream running rather than starting and stopping it, maintaining fresh redirection targets that reflect your current priorities, and measuring the results in your YouTube analytics to continuously refine the strategy. When it works well — and with Gyre it works very well — the stream becomes the engine that powers everything else on your channel.
Gyre.pro’s traffic redirection feature turns passive stream viewers into active subscribers and engaged fans. Start your free trial and see the flywheel in action.
Alan Spicer is a YouTube Certified Expert and 20+ year content creator with 6 Silver Play Buttons. He uses Gyre.pro daily to run 24/7 livestreams across multiple channels and has earned over $10,000 through the Gyre affiliate program. Follow his YouTube growth strategies at alanspicer.com.
⚡ Quick answerRework by Jason Fried & David Heinemeier Hansson gets 4.5/5 from me. Short, blunt and refreshingly contrarian for anyone running lean. Solo operators and small teams tired of the grow-at-all-costs script.
What is Rework about?
The Basecamp founders reject much of the received wisdom about how businesses should be run, arguing for simplicity, saying no, staying small and shipping real work over planning, meetings and growth for its own sake.
Rework summary
Rework is deliberately unlike a normal business book. It is a collection of short, punchy chapters, each making a single contrarian point, with no filler between them. The founders of Basecamp draw on how they actually built a profitable software company without following the standard startup script.
The arguments come thick and fast. Planning is guessing, so stop obsessing over long plans. Meetings and interruptions are toxic to real work. You do not need outside funding, a big team or an office to succeed. Build half a product rather than a half-baked one. Say no by default. Underneath the provocations sits a consistent philosophy: keep things small, simple and focused on making something people will pay for.
Because each chapter is a page or two, you can read it in an afternoon or dip in and out. Not every point will fit your situation, but the cumulative effect is a useful shake-up of assumptions you probably did not know you were carrying.
Published in 2010 by the founders of Basecamp, it became a manifesto for the small, profitable, anti-hype software business. It is aimed at people who suspect the standard startup advice does not fit how they want to work.
The one idea worth the price: Do half a product, not a half-baked product. Ruthless focus beats a long feature list every time.
Key ideas and takeaways
Planning is guessing. Long plans are fiction. Decide as you go with real information.
Say no by default. Protect focus by refusing most requests and features.
Build less. Do half as much, but do it well, rather than piling on features.
You need less than you think. No big team, funding or office required to build something real.
My honest take
For a team of one or a small operation, this is a genuine tonic. So much business advice assumes you want to raise money, hire fast and grow at all costs, and Rework calmly points out that none of that is compulsory.
The short-chapter format means you can read it in a sitting and keep coming back. Not every point applies to every business, and some are more provocation than instruction, but the overall effect is to give you permission to run things simply and ignore a lot of the noise. I recommend it often to people who feel they are doing it wrong because they are not following the startup playbook.
It sits nicely beside Company of One and The E-Myth, all three pushing back on the idea that bigger and more complicated is automatically better. Read together, they make a strong case for the deliberately small business.
The honest caveat: Some advice is easier for an established, profitable company like Basecamp to give than for someone still fighting for their first customers. Take what fits your stage.
Where it falls short
A few points are provocations more than practical guidance.
The confident tone glosses over how much easier some of this is once you are already successful.
How it compares
Company of One shares the stay-small philosophy but goes deeper on the why; Rework is the faster, blunter hit of the same spirit. Read Rework for the jolt and Jarvis for the fuller argument.
Who should read it (and who should skip it)
Solo operators and small teams tired of the grow-at-all-costs script. Skip it if you want detailed, step-by-step processes.
Best format: Any format; the short chapters suit audio, Kindle or a paper copy you dip into.
How to actually use it if you are self-employed
Cancel or shorten one recurring meeting this week.
Cut one feature or service that adds complexity without much return.
Say no to the next request that does not fit your focus.
⚡ The 60-second recap
Stop over-planning; decide as you go.
Say no and build less, better.
You need far less than the startup script claims.
A book is a shortcut. A second pair of eyes is faster.
Twenty years self-employed, 500+ people coached. If you want help applying this to your own situation, book a free discovery call.
It comes from software, but most of the advice about focus, planning and saying no applies broadly.
Is it a quick read?
Very. Short chapters mean you can finish it in an afternoon or dip in and out.
Is the advice practical?
Mostly, though some points are provocations. Take what fits your situation.
Do I need to read it in order?
No. The short, self-contained chapters make it easy to jump around.
Is it still relevant?
Yes. The push for simplicity and focus has arguably aged better than the growth-at-all-costs advice it argues against.
Final verdict
Rework earns 4.5/5. Short, blunt and refreshingly contrarian for anyone running lean. If it is the stage you are at, the cheapest way in is a free Audible trial or Kindle Unlimited.
Note: Cover image via the Open Library Covers API. Rating is my own editorial score. Affiliate links are marked and support the site at no cost to you. Publish reminder: set the featured image and meta description; confirm the /book-reviews/ category is assigned.
To choose a microphone for YouTube, identify your filming scenario (desk, vlog, outdoor, multi-person), decide between dynamic or condenser based on your room acoustics, pick USB if you’re only recording voice to computer or XLR if you’re using a camera or multi-input interface, and match polar pattern to your setup (cardioid for solo use, supercardioid for untreated rooms). Microphone choice is where most YouTubers go wrong — buying condensers for untreated rooms, USB mics when they need XLR flexibility, or expensive mics where cheap ones would work better. Matching mic type to scenario matters more than price.
This guide is based on microphone selection logic from 500+ channel audits and setup consultations. For specific product recommendations, see my Ultimate Creator Equipment Guide 2026.
Step 1: Identify Your Filming Scenario
Different scenarios need different microphone categories. Nail this first.
Desk-Based Talking Head / Podcast / Streaming
Best fit: Dynamic microphone on boom arm
Why: You’re close to the mic, in a potentially untreated room, and need to reject keyboard/room sound
Default recommendation for YouTube: dynamic unless you have a treated room. Dynamic microphones produce better YouTube audio in 80%+ of home recording scenarios.
Best of both — start USB, upgrade to XLR path later. Options: Shure MV7+ (£240), Rode PodMic USB (£180). These are excellent future-proof choices for creators who might grow their setup.
Step 4: Polar Pattern
Polar pattern determines directionality — where the mic picks up sound from.
Cardioid: Heart-shaped pickup in front, rejects rear — the default for solo YouTube
Supercardioid: Narrower front pickup, rejects more off-axis — better for untreated rooms
Hypercardioid: Even narrower, picks up rear — used in shotgun mics
Omnidirectional: 360-degree pickup — lavaliers, field recording, NOT solo YouTube voice
For solo YouTube voice work, cardioid is the universal correct answer unless you have a specific reason otherwise. If your untreated room is reflective, supercardioid helps. Bidirectional is niche (two-person face-to-face podcasts).
Step 5: Consider Additional Requirements
After the main type/connection/pattern decisions, think about:
Phantom power (+48V): Most XLR condensers need it. Interfaces provide it. USB mics don’t need external phantom power.
Preamp gain: Shure SM7B famously needs high gain — pair with Cloudlifter CL-1 (£139) for clean +25 dB
Battery or USB power for wireless: Rechargeable USB is easier; AA batteries are more reliable for long shoots
Frequency range: Human voice is 80 Hz-8 kHz — any decent mic covers this, don’t obsess over extended frequency specs
Mount type: Stand mount, boom arm mount, shock mount — different mounts for different setups
Shock mounting: Reduces vibration through desk/stand — essential for sensitive condensers
Windshield/deadcat: Essential for outdoor shotgun use
Common Microphone Mistakes
Buying a Blue Yeti for an Untreated Bedroom
The Blue Yeti is a huge-selling beginner mic — but it’s a large-diaphragm condenser that picks up every reflection in a typical bedroom. Result: echo-y, room-sound-heavy audio. For the same £130-150, a Rode PodMic + Focusrite 2i2 combo sounds dramatically better.
Buying Expensive Before Treating the Room
Spending £400+ on a Shure SM7B while filming in a hard-surfaced untreated room wastes the microphone’s capability. Treat the room first (£50-100 of soft furnishings), then upgrade the mic. An SM7B in a treated closet sounds broadcast-quality. A Neumann in an untreated bathroom sounds amateur.
Using an On-Camera Shotgun for Desk Work
Shotgun mics are designed for mid-distance (30-50 cm) on-camera use. Using one on a desk stand 40 cm away produces hollow, distant audio. For desk work, use dynamic or condenser at 5-20 cm, not a shotgun.
Buying Wireless Lavs for Stationary Setups
If you never move from your desk, wireless lavs waste their wireless capability and typically sound worse than a dedicated desk mic. Save wireless for when you actually need mobility.
Ignoring Cable and Phantom Power Requirements
Buying a Shure SM7B without planning for the Cloudlifter preamp means you have a great mic that sounds underwhelming due to insufficient gain. Research the full signal chain before purchase.
Cheap vs Expensive: When Does Price Matter?
Microphone prices span £30 to £5,000+. For YouTube voice work, the quality curve flattens above ~£250:
£50-100: Basic usability — noticeable hiss, limited frequency range
£100-250: Professional-quality voice work — indistinguishable from pro mics to most ears
£250-500: Broadcast quality — used in professional podcasts and YouTube
£500-1,500: Specialist scenarios — studio recording, broadcast, audiophile quality
£1,500+: Neumann territory — marginal improvements for specific scenarios
For most YouTubers, £150-300 is the sweet spot. Below £100 you hear the difference. Above £500, you hear the difference only in dedicated comparison listening on professional monitoring.
For most beginners in untreated rooms, the Rode PodMic USB at £180 is the current default — dynamic (forgiving of room), hybrid USB+XLR (grows with you), decent price. For vlogging or mobile use, the Rode VideoMicro II at £79 is the beginner shotgun.
Is Blue Yeti still a good mic for YouTube in 2026?
It’s acceptable but outdated. The Yeti is a condenser that struggles in untreated rooms where most YouTubers record. Better options at similar price: Rode PodMic USB, Shure MV7+, or AudioTechnica AT2020+ (condenser but less sensitive than Yeti). If you already own a Yeti, use it — don’t rush to replace it.
Do I need phantom power for a YouTube microphone?
Only for XLR condenser microphones. Dynamic XLR mics don’t need phantom power. USB mics don’t need external phantom power (they’re USB powered). If you’re using an audio interface, it provides phantom power when needed.
Can I use a gaming headset mic for YouTube?
Yes, for casual content, but quality is limited. Gaming headset mics are optimised for clarity in voice chat, not for recording fidelity. For serious YouTube work, even a £80 dedicated mic is a significant upgrade over a £200 gaming headset’s mic.
What mic does MrBeast use?
MrBeast and most major YouTube creators use Sennheiser MKH 416 shotgun microphones (£980) for talking head and field work, often on boom poles above camera frame. This is broadcast-standard shotgun quality. Most YouTubers don’t need this level — it’s overkill for starter or mid-tier channels.
Is a shotgun microphone good for desk podcasting?
No. Shotgun microphones are designed for mid-distance on-camera use (30-50 cm). Used at close desk range, they sound thin and hollow. For desk podcasting, use dynamic mics (Rode PodMic, Shure SM7B) at 5-10 cm distance instead.
How do I know if a microphone will work with my setup?
Check: (1) connection type (USB works with any computer; XLR needs audio interface); (2) power requirements (phantom power for most XLR condensers); (3) mounting compatibility (stand mount, shock mount); (4) software compatibility (most USB mics are plug-and-play with Windows/Mac). Manufacturers publish full specs — read before buying.
Should I buy a wireless lavalier for YouTube?
Only if you move around while filming. Wireless lavs are excellent for vloggy content, multi-participant interviews, or filming in locations. For stationary desk work, a dynamic mic on boom arm will sound as good or better at similar price. Match tool to task.
Microphone choice is scenario-matching first, budget-matching second. Buy the right type for your room, your connection setup, and your filming scenario. Within that correct type, modest budget differences (£150 vs £300) matter less than type-mismatch at any price. A £180 Rode PodMic USB in a bedroom beats an £800 Neumann in the same room — the PodMic was made for that environment.
⚡ Quick answerThe 4-Hour Work Week by Timothy Ferriss gets 4.4/5 from me. Half of it dated badly, half of it reset how a generation thinks about work. Anyone stuck in a conventional work model who needs their assumptions shaken.
What is The 4-Hour Work Week about?
Ferriss argues you do not need to wait for retirement to live well. Through automation, outsourcing and focusing only on what matters, he says you can design a life of freedom now rather than deferring it for decades.
The 4-Hour Work Week summary
The book is organised around a framework Ferriss calls DEAL: Definition, Elimination, Automation and Liberation. Definition is about redefining what you want, replacing the retire-rich dream with mini-retirements and lifestyle design. Elimination applies the 80-20 rule and time-management thinking to cut the busywork that fills most days.
Automation is the famous part: building income sources, which he calls muses, that run with minimal input, and outsourcing tasks to virtual assistants. Liberation is about breaking free of the office, negotiating remote work or running a business from anywhere.
The examples are of their late-2000s moment and some, such as the specific outsourcing tactics, have dated or been done to death since. But the underlying reframe, that you can design your work around your life rather than the other way round, was genuinely radical at the time and still shifts how people think.
Published in 2007, it became a defining book of the early lifestyle-business movement and made outsourcing and passive income mainstream ideas. It is aimed at people who feel trapped in a conventional career and suspect there is another way.
The one idea worth the price: Design the life first, then build the work to fit it. Most people do it the other way round and wonder why they feel trapped.
Key ideas and takeaways
Lifestyle design. Build your work around the life you want, not the reverse.
The 80-20 cut. Most results come from a few activities. Ruthlessly cut the rest.
Build a muse. Create income that runs with little ongoing input.
Mini-retirements. Take freedom in chunks now rather than deferring it all to old age.
My honest take
It is easy to be cynical about this book now, partly because so many of its tactics were copied into the ground. But it is worth remembering how genuinely fresh the core idea was: that you could arrange work around living instead of postponing life until retirement.
Read it for that reframe rather than the specific tactics. The outsourcing and automation chapters have aged, and the lifestyle it sells is very of its era. But the question it forces, why are you organising your whole life around a job you plan to escape decades from now, is one every self-employed person should sit with.
I take it as a mindset book rather than a manual. The four-hour promise is a hook, not a literal target, and treating it that way lets you keep the valuable part without rolling your eyes at the rest.
The honest caveat: Plenty of the tactics have dated or been overdone, and the tone can grate. Keep the reframe and treat the specific hacks with scepticism.
Where it falls short
Several tactics are outdated or now saturated, so do not follow them literally.
The tone is boastful in places, which puts some readers off the genuinely useful ideas.
How it compares
Company of One is the calmer, more current take on building work around freedom; The 4-Hour Work Week is the louder original that started the conversation. Read Ferriss for the spark and Jarvis for the sustainable version.
Who should read it (and who should skip it)
Anyone stuck in a conventional work model who needs their assumptions shaken. Skip it if you want current, practical tactics rather than a mindset jolt.
Best format: Audio for the ideas, though the specific how-to chapters read better on Kindle.
How to actually use it if you are self-employed
List the few activities that drive most of your results and protect them.
Identify one recurring task you could automate or outsource.
Plan one short break now instead of deferring all rest to the future.
⚡ The 60-second recap
Design your life, then build work to fit it.
Cut the busywork with the 80-20 rule.
Take freedom now, not only at retirement.
A book is a shortcut. A second pair of eyes is faster.
Twenty years self-employed, 500+ people coached. If you want help applying this to your own situation, book a free discovery call.
For the mindset shift, yes. For the specific tactics, read them with caution, as many have dated.
Can you really work four hours a week?
It is a hook, not a literal promise. Treat it as lifestyle design, not a guarantee.
Is it outdated?
Parts are, especially the tactics. The core idea about designing life around work still lands.
Who is it best for?
People stuck in a traditional job or mindset who need their assumptions challenged.
Should I follow the outsourcing advice?
Take the principle, not the specifics. That part of the book has aged the most.
Final verdict
The 4-Hour Work Week earns 4.4/5. Half of it dated badly, half of it reset how a generation thinks about work. If it is the stage you are at, the cheapest way in is a free Audible trial or Kindle Unlimited.
Note: Cover image via the Open Library Covers API. Rating is my own editorial score. Affiliate links are marked and support the site at no cost to you. Publish reminder: set the featured image and meta description; confirm the /book-reviews/ category is assigned.
How to Grow Your YouTube Channel Without Making New Videos
Let me ask you something: what if the videos you already made — sitting in your back-catalog right now — could be working 24 hours a day, seven days a week, pulling in new subscribers, watch time, and ad revenue while you sleep, go on holiday, or simply take a break from content creation?
I know it sounds too good to be true. But I have been doing exactly this for years, and the results are real. I am a YouTube Certified Expert with 20+ years of experience and six Silver Play Buttons, and one of the biggest shifts in my YouTube strategy came when I stopped thinking about growth as purely a function of how many new videos I could produce each week.
The truth is, most YouTube channels are sitting on a goldmine of existing content that is barely being used. Hundreds of videos, thousands of hours of material — all just sitting there, being surfaced occasionally by the algorithm and then forgotten. What if you could turn that dormant library into a living, breathing 24/7 channel that is always discoverable, always accumulating watch time, and always attracting new viewers?
That is exactly what 24/7 automated livestreaming does — and it is the strategy I am going to walk you through in this guide. The tool I use to make this happen is Gyre.pro, a cloud-based streaming platform that takes your existing videos and loops them as a live stream around the clock, completely automatically.
Turn Your Existing Videos Into a 24/7 Growth Engine
Start streaming your back-catalog automatically with Gyre.pro. No new videos needed — just your existing content working around the clock.
Why YouTube Growth Is Not Just About Publishing New Videos
There is a persistent myth in the YouTube creator community: that growth only comes from publishing new videos consistently. Upload more, grow more. Stop uploading, stop growing. I believed this for years, and it burned me out repeatedly.
The reality is more nuanced. YouTube’s algorithm rewards channels that keep viewers on the platform. If your content — regardless of when it was made — keeps people watching, YouTube will continue to surface it. The problem is that regular uploaded videos have a lifecycle: they spike in views when published, get surfaced to subscribers and some search traffic, and then gradually fade into the background unless they happen to rank really well for specific keywords.
Livestreams work differently. Live content is prominently featured in YouTube’s interface — it shows up in search results, gets placed on the homepage, and benefits from the social proof of a real-time viewer count. When you run a 24/7 stream, your channel suddenly has a permanently live presence that is continuously being discovered by new viewers who may never have found your regular uploads.
The compound effect of this is dramatic. One creator on Gyre’s platform — a music channel with just 8,450 subscribers — generated 1.88 million views with an average view duration of 1 hour and 30 minutes from streams alone. That channel generated 99.3% of its total watch time from streams. Those are not new videos; that is existing content, repurposed and running automatically.
How Old Content Becomes “New” Through Livestreaming
Here is the conceptual shift you need to make: when you stream an existing video as part of a 24/7 livestream, it is not being presented as an old upload. It is live content. New viewers discovering your stream today are watching it as a live event, not as a three-year-old video. This completely reframes how they perceive and engage with your content.
I have personally seen viewers jump into a 24/7 stream of content I made two or three years ago, engage with it in the live chat, subscribe, and then go binge-watch my regular uploads. They did not know or care that the stream content was old. To them, it was just great content that was on right now.
This is the core insight: livestreaming gives old content a permanent present tense. It is always “now.” It is always discoverable. And because Gyre keeps your stream running 24/7 automatically, every time someone in a different timezone searches for content in your niche, there is a real chance your live stream appears at the top of results.
The Compound Growth Effect
Always discoverable means always growing. That is the fundamental principle here. Here is how the compounding works:
More watch time — streams accumulate watch time continuously, not just in the first 48 hours after publishing
Higher channel velocity — sustained activity signals to YouTube’s algorithm that your channel is worth promoting
New subscriber acquisition — stream viewers who enjoy your content become subscribers who then watch your regular uploads
Improved search visibility — more watch time and engagement improves your overall channel authority in YouTube search
Revenue from existing assets — ad revenue from streams is layered on top of your regular upload revenue, not instead of it
The data from Gyre’s platform backs this up. On average, creators who run 24/7 streams see a 30% increase in watch time, a 30% increase in views, a 20% increase in RPM, a 30% increase in revenue, and a 20% increase in subscribers — all from content they already had.
Key Takeaway: The 24/7 streaming strategy works because it converts your finite back-catalog into an infinite content engine. Each loop of your playlist is another opportunity to be discovered, another hour of watch time accumulated, another potential subscriber gained.
Who This Strategy Is Perfect For
I want to be clear about who benefits most from this approach, because it is not just for one type of creator.
Creators on Hiatus or Taking a Break
If you are stepping back from content creation — for health reasons, a new job, a baby, or simply burnout — a 24/7 stream keeps your channel alive and growing while you are away. I have taken breaks from active uploading and returned to find my channel had actually gained subscribers and watch time during my absence because my streams were still running. That is peace of mind you cannot put a price on.
Creators with Large Back-Catalogs
If you have been creating for five, ten, or fifteen years, you likely have hundreds of videos gathering dust. A 24/7 stream is a way to systematically bring that content back to life, serving it to audiences who never discovered it the first time around. This is particularly powerful for educational channels, tutorial channels, and music channels where older content remains as relevant as the day it was published.
Creators Suffering from Content Burnout
The pressure to constantly produce new content is one of the leading causes of creator burnout. When you implement a 24/7 stream, you relieve that pressure significantly. Your channel continues to grow even when you are not actively producing. This gives you the breathing room to create less frequently but more intentionally — which usually results in better content anyway.
Niche Channels with Evergreen Content
Music channels, lo-fi channels, ambient channels, meditation channels, cooking channels, tutorial channels — any niche where content does not expire quickly is perfect for 24/7 streaming. I have seen music channels with under 10,000 subscribers absolutely dominate their niche in terms of watch time through strategic streaming of their existing catalog.
Step-by-Step: How to Grow Without New Videos
Step 1: Audit Your Existing Video Catalog
The first thing I do with any channel I am optimizing is a proper catalog audit. Go into YouTube Studio, look at your analytics, and identify:
Top performers by total views — these are your proven audience magnets
Top performers by watch time and average view duration — these are your most engaging videos
Evergreen content — videos where the information or entertainment value has not expired
High click-through rate videos — content with compelling thumbnails that attract new viewers
Long-form content — videos over 10-15 minutes are ideal for streams as they naturally create longer viewing sessions
Flag any content that is time-sensitive (news, trends, dated references) as unsuitable for streaming. You want material that a new viewer discovering it today will find just as valuable as someone who watched it on the day of release.
Step 2: Select Your Best-Performing and Evergreen Videos
From your audit, curate a shortlist of 10-20 videos that tick the boxes above. For a first stream, I recommend starting with your absolute best content — the videos you are most proud of, that have proven engagement. Do not stream mediocre content just to fill time. A stream of your greatest hits will outperform a stream of everything you have ever made.
Think about what a new viewer who has never seen your content would think watching this playlist for the first time. That is your bar. If you would be proud for that new viewer to watch that video, it belongs in the stream.
Step 3: Create Thematic Playlists for Streaming
Rather than streaming everything in a random order, organise your content into themed playlists. A tutorial channel might run “Beginner Tutorials” as one stream and “Advanced Techniques” as another. A music channel might have a “Morning Focus” playlist and an “Evening Relaxation” playlist. Themed streams attract more consistent audiences because they signal clearly what the viewer will get by tuning in.
Gyre’s playlist management feature (available on Start+ and Pro+ plans) lets you create ordered playlists that loop automatically. This gives you full control over the viewing experience you are creating.
Step 4: Sign Up for Gyre.pro and Upload Your Videos
Head to Gyre.pro and start your 7-day free trial. Once inside, upload your selected videos directly to your personal dedicated Gyre cloud server. The upload process is straightforward, and Gyre’s built-in video converter automatically optimises your files for streaming — preventing buffering issues that could hurt viewer experience.
This is one of the things I appreciate most about Gyre compared to other streaming tools: each user gets a dedicated server and dedicated IP address, not shared infrastructure. That means your stream is not competing for bandwidth with thousands of other creators on the same server. Your stream quality is consistent and reliable.
Step 5: Configure and Launch Your 24/7 Stream
In YouTube Studio, go to Go Live and generate an RTMP stream key. Copy that key into your Gyre dashboard. That is all the access Gyre needs — it never requires your Google login or YouTube password. This is a critical security feature I always highlight: your account credentials stay completely private. See my guide on Gyre.pro security for a full breakdown of why this matters.
With the RTMP key connected, configure your playlist and hit start. Gyre takes over from there. Your stream launches from Gyre’s servers and will continue running 24/7 without any further input from you. You can literally close your laptop and go to bed — the stream keeps going.
Step 6: Optimise Your Stream Title, Description, and Thumbnail
Just because you are not making new content does not mean SEO goes out the window. Your stream title is what appears in YouTube search results and on the homepage. Include relevant keywords, be clear about what the stream contains, and make it compelling enough that someone would click.
Your stream description should be treated like a video description — include keywords, a brief explanation of what viewers will find, links to your best content, and your standard channel information. Your thumbnail should be visually clear and indicate the content type at a glance. Do not use clickbait thumbnails; they hurt click-through quality and can flag your content for review. For a full walkthrough of setup, see my Gyre.pro setup tutorial.
Step 7: Enable Traffic Redirection to New Content
Gyre includes a traffic redirection feature that I consider essential for any serious streaming strategy. It allows you to display cards, overlays, or end-screen-style prompts within your stream that direct viewers to other videos, your channel page, or specific content you want to highlight.
For creators who are on a hiatus, this is a powerful way to direct stream viewers toward your best existing uploads. For creators who are actively producing, it is an incredible tool for funnelling live stream audiences toward your latest videos — ensuring your new uploads get a boost in views within hours of publishing. I cover this in much more depth in my dedicated guide to increasing watch time through livestreams.
Step 8: Monitor, Iterate, and Scale
Once your stream is live, check back weekly to review performance. YouTube Studio will show you stream analytics including concurrent viewers, peak viewership times, watch time, and subscriber conversions. Use this data to refine your playlist — swap out lower-performing videos, add content that resonates with your audience, and experiment with different stream titles to see what attracts more viewers.
As your channel grows and you gain confidence in the strategy, consider scaling to multiple simultaneous streams. Running separate streams for different content themes, targeting different times of day or different global audiences, can multiply your results significantly. Gyre’s Pro+ plan allows up to 8 simultaneous streams, which is what I personally use across my channels.
The Types of Content That Work Best in 24/7 Streams
Not all back-catalog content is equally suited to 24/7 streaming. Over years of experimenting with this strategy, I have identified the content categories that consistently perform best:
Music and Audio Content
Lo-fi music, ambient sounds, study playlists, relaxation music, nature sounds — this category absolutely dominates in 24/7 streaming. The average view duration is naturally very long because people use these streams as background listening, often for hours at a time. One music channel on Gyre went from 8,450 subscribers to generating 1.88 million views with a 1 hour 30 minute average view duration. If you have any music content in your back-catalog, stream it immediately.
Educational Tutorials and How-To Content
Tutorial content ages well if it covers fundamentals rather than specific software versions or current events. A video on “How to Write a Business Plan” from three years ago is just as valuable today. Stream your tutorial library, organised by skill level or topic, and you create an always-on educational resource that attracts search traffic around the clock.
Gaming Highlights and Compilations
Gaming content is hugely popular in live format. Viewers who stumble onto a gaming stream tend to watch for long sessions, especially if the content is entertaining and varied. Even footage from older games retains an audience — retro gaming content in particular has a passionate following. Gaming channel StrEat Gaming (2.78 million subscribers) generates 87% of its watch time and 82.4% of its revenue from Gyre streams.
Kids’ Content and Family Entertainment
Children’s content is made for streaming. Kids will happily watch the same content repeatedly, and parents will leave streams running for hours. One kids’ channel on Gyre generated 787,207 hours of watch time in just 90 days from streams — 40.1% of their entire channel watch time contribution coming from automated streams of existing content.
Meditation, Yoga, and Wellness Content
Wellness content has extremely high watch time potential. A 30-minute guided meditation session, streamed as part of a 24/7 loop, can generate hours of cumulative watch time from viewers who use it as a daily practice. The content does not go out of date, and the audience is highly loyal.
What to Avoid: Content That Does Not Work in 24/7 Streams
In the interest of being completely honest with you — because E-E-A-T demands it and because I have made these mistakes myself — here is content that does not perform well in streams and can actually hurt your results:
News and current events content — dated immediately, drives viewers away when they realise the information is old
Trend-based content — anything tied to a specific moment in culture or social media tends to age poorly
Content with expired timestamps — videos where you mention specific dates or “this week” create a jarring experience for live viewers
Promotional content for products that no longer exist — streams about discontinued products or closed businesses are confusing and frustrating for viewers
Very short videos under 5 minutes — multiple rapid transitions in a stream can feel disjointed; longer videos create a more immersive experience
Important: Never stream content that includes copyrighted music you do not have the rights to, even if it is in your back-catalog. YouTube’s Content ID system will flag it and could result in strikes or demonetisation of your stream. Use only original content or properly licensed material. See my full guide on whether Gyre can get you banned for complete guidance.
Real Results: What Channels Are Actually Achieving
I want to share some real data from channels using this strategy, because numbers speak louder than theory. These are not cherry-picked outliers — these are representative examples from Gyre’s published case studies:
Lesnoy (393K subscribers): +1.15 million views in 2 months, +2,120 subscribers, 13 minutes 33 seconds average view duration from streams
YEES (880K subscribers): +79% watch time in 6 months, +40,090 new subscribers, approximately 1.5x RPM increase
Grace Wins (182K subscribers): Views grew from 2.72 million to 6.58 million; average view duration increased from 5 minutes 44 seconds to 31 minutes 10 seconds
Unnamed music channel: +824% views, +847% watch time, +1,100% revenue, $17,936 in revenue from streams alone — 14.3 times more than all other videos combined
These results come from channels that used their existing content, not new productions. They set up streams, let them run, and watched their analytics transform. The common thread is that they committed to the strategy and gave it time to compound. For more case studies, see my Gyre.pro case study deep-dive.
How This Integrates with an Active Upload Schedule
I want to address the misconception that 24/7 streaming is only for creators who have stopped making new content. It is equally powerful — possibly more powerful — as a complement to an active upload schedule.
Here is how I personally use it: I maintain a 24/7 stream running on several of my channels. When I publish a new video, I use Gyre’s traffic redirection feature to point stream viewers toward that new upload within hours of it going live. The result is that my new videos get a surge of views from an engaged audience that my stream has already warmed up — these are people who are already on my channel, already trust my content, and are highly likely to watch a new upload.
This is the flywheel in action: streams build an audience, that audience watches new uploads, new uploads perform better, better performance attracts more viewers, more viewers discover the streams. Once the flywheel starts spinning, it accelerates under its own momentum. I go into this strategy in much more detail in my post on building a 24/7 YouTube channel with Gyre.pro.
Gyre.pro: The Tool That Makes This Possible
I have tested a lot of streaming tools over the years, and Gyre.pro is the one I keep coming back to for automated 24/7 streaming. Here is why it stands out for the back-catalog strategy specifically:
Fully cloud-based — no software, no local hardware, works from any device, keeps streaming even when you are offline
Dedicated server per user — stable, reliable streams that do not drop out because of shared infrastructure issues
RTMP-only access — your YouTube password and login credentials are never required or exposed
YouTube-certified — officially listed in YouTube’s Services Directory, meaning it is compliant by definition
True 24/7 automation — set it once and it runs indefinitely, looping your playlist automatically
Traffic redirection built in — channel new viewers toward your priorities without manual intervention
Plans start from $49/month for a single stream, with a 7-day free trial that includes one HD stream. For full comparison of what each plan includes, see my complete Gyre.pro review. If you are just starting out, the free trial is more than enough to prove the concept and see real results before committing to a paid plan.
Ready to Put Your Back-Catalog to Work?
Start your 7-day free trial today. No new videos needed — just your existing content and 10 minutes to set up your first 24/7 stream.
Can I really grow my YouTube channel without making new videos?
Yes. By running 24/7 livestreams using your existing back-catalog, you create always-on content that is discoverable around the clock. YouTube treats these as live content, which often receives preferential placement in search and recommendations, driving new viewers to your channel without any new production. I have grown multiple channels this way.
What types of videos work best in a 24/7 stream?
Evergreen content works best — tutorials, how-to guides, music, ambient videos, gaming highlights, educational content, and compilations. Avoid news or time-sensitive content that quickly becomes outdated. The best test is to ask: “Would a new viewer finding this content today find it just as valuable as someone who watched it on release day?”
Will running old videos as a stream hurt my channel?
No, quite the opposite. Streaming old videos as 24/7 content adds watch time, attracts new subscribers, and increases visibility without cannibalising your existing video views. It complements your regular upload strategy rather than competing with it.
How does Gyre.pro stream my videos without me being online?
Gyre.pro is a cloud-based tool. You upload your videos to your dedicated Gyre cloud server, configure a playlist, and Gyre streams everything from its servers using your YouTube RTMP stream key. Your computer does not need to be on. The stream runs completely independently on Gyre’s infrastructure.
Does YouTube count stream watch time toward monetization?
Yes. Watch time accumulated during 24/7 livestreams counts toward your channel’s total watch time for YouTube Partner Program eligibility, and stream ad revenue counts as part of your overall channel monetization. For more information on the monetization mechanics, see my post on whether Gyre can make passive income.
How many videos do I need in my back-catalog to start?
You can start with as few as 3-5 videos, though 10-20 videos creates a more varied and engaging stream experience. The Gyre free trial allows up to 15 files, which is more than enough to test the strategy effectively and see real results before committing to a paid plan.
Is this strategy suitable for creators on a break or hiatus?
Absolutely. This is one of the best use cases for 24/7 streaming. If you are burned out, on holiday, or taking a break from production, a Gyre stream keeps your channel active, growing, and earning without any ongoing effort from you. I have personally used this to maintain channel momentum during extended breaks.
How much does Gyre.pro cost to run 24/7 streams?
Gyre.pro starts at $49/month for one simultaneous stream on the Start plan, with a 7-day free trial available. Plans with multiple streams and playlist management start at $99/month. Annual plans offer up to 40% savings, which significantly improves the return on investment. The revenue potential from streaming old videos typically covers the subscription cost within weeks.
About Alan Spicer
Alan Spicer is a YouTube Certified Expert and 20+ year content creator with 6 Silver Play Buttons. He uses Gyre.pro daily to run 24/7 livestreams across multiple channels and has earned over $10,000 through the Gyre affiliate program. Follow his YouTube growth strategies at alanspicer.com.
⚡ Quick answerWill It Fly? by Pat Flynn gets 4.5/5 from me. A calm, practical way to test a business idea before you bet on it. First-timers with an idea who want to test it properly before quitting anything.
What is Will It Fly? about?
Flynn gives you a structured process to test a business idea before you invest serious time or money, combining self-examination, market research and a real-world validation step so you launch with evidence rather than hope.
Will It Fly? summary
Flynn splits the book into sections that move from you to the market. It starts with a mission-design exercise, checking whether the idea fits the life and goals you actually want, because a business that succeeds but makes you miserable is not a win.
From there he moves into market research: mapping who the idea serves, sizing up the competition and looking honestly at whether there is room and demand. The most valuable part is the validation step, where he pushes you to test the idea with real people, ideally getting them to commit money or a clear signal before you build anything.
Throughout, Flynn shares his own examples and templates and keeps the tone grounded and free of hype. The book reads like a friendly mentor walking you through a checklist, which is exactly what someone standing on the edge of an idea usually needs.
Published in 2016 by a well-known online entrepreneur, it draws on Flynn's own public experiments in building businesses. It is aimed at people who have an idea and want a sensible, low-hype way to test it.
The one idea worth the price: Get someone to commit money or a clear yes before you build the thing. Real validation beats a hundred encouraging opinions.
Key ideas and takeaways
Fit it to your life. Test the idea against the life you want before the market at all.
Research honestly. Map the audience and competition without flattering your own idea.
Validate with real people. Get a genuine signal, ideally money, before you build.
Evidence over hope. Launch because the data says go, not because you are excited.
My honest take
This is the antidote to the most expensive mistake in self-employment: spending months building something nobody wanted. Flynn's process is not glamorous, but it is exactly the kind of unsexy homework that saves people from a painful, quiet failure.
What I like is the tone. There is no hype and no promise of easy riches, just a sensible mentor walking you through the checks you should run before you commit. For anyone with an idea and a lot of nervous energy, it turns that energy into something structured.
It sits well alongside The Lean Startup for a solo audience. Where Ries can feel corporate, Flynn is plain and human, which makes the same validate-before-you-build discipline far easier to actually follow.
The honest caveat: It is practical rather than deep, and if you have validated ideas before, some of it will feel basic. That is fine; it is aimed at first-timers.
Where it falls short
It covers familiar validation ground and will feel introductory to experienced founders.
Some templates feel of their time, so use the thinking rather than copying them exactly.
How it compares
The Lean Startup gives you the theory of testing and iterating; Will It Fly gives you the friendly, step-by-step version for a solo starter. Read Flynn first if the corporate tone of Ries puts you off.
Who should read it (and who should skip it)
First-timers with an idea who want to test it properly before quitting anything. Skip it if you have launched several businesses already.
Best format: Kindle, because you will want to work through the exercises.
How to actually use it if you are self-employed
Write down whether this idea fits the life you actually want.
Find five potential customers and ask them to commit, not just to comment.
Set a clear go or no-go signal before you start building.
⚡ The 60-second recap
Check the idea against the life you want.
Research the market honestly.
Validate with real commitment before building.
A book is a shortcut. A second pair of eyes is faster.
Twenty years self-employed, 500+ people coached. If you want help applying this to your own situation, book a free discovery call.
It leans that way in examples, but the validation process applies to almost any business idea.
Is it beginner-friendly?
Very. It is written for people testing their first serious idea.
Does it include templates?
Yes, though the value is in the process more than the specific worksheets.
How is it different from The Lean Startup?
Same core discipline, friendlier delivery. Flynn is plainer and better suited to a solo, non-tech reader.
Will it tell me if my idea is good?
It gives you a process to find out for yourself, which is more useful than a verdict.
Final verdict
Will It Fly? earns 4.5/5. A calm, practical way to test a business idea before you bet on it. If it is the stage you are at, the cheapest way in is a free Audible trial or Kindle Unlimited.
Note: Cover image via the Open Library Covers API. Rating is my own editorial score. Affiliate links are marked and support the site at no cost to you. Publish reminder: set the featured image and meta description; confirm the /book-reviews/ category is assigned.
To choose a camera for YouTube, identify your primary filming scenario (desk, vlog, studio, outdoor), set a realistic budget including lens and battery costs, prioritise features that matter (autofocus, recording limits, battery life, mic input) over megapixels or marketing specs, and buy the cheapest camera that hits your feature list rather than the most expensive you can afford. Camera choice is where most YouTubers overspend — buying for theoretical capability rather than actual filming scenario. A Sony ZV-E10 used correctly produces better videos than an A7S III used incorrectly.
This guide is based on camera recommendations across 500+ channel audits and setup consultations with creators at every level. For specific models, see my Ultimate Creator Equipment Guide 2026.
Step 1: Identify Your Primary Filming Scenario
This is the most important question — and the one most creators skip. Different scenarios need different cameras:
Desk/Studio Talking Head
You’ll film at a consistent distance, with good lighting, from a fixed position. Priorities: reliable autofocus, good low-light performance, HDMI clean output for streaming capability, long recording times, and external microphone input. Size and weight don’t matter — it’s on a tripod.
You’ll film while moving, often holding the camera in one hand or on a gimbal. Priorities: lightweight, flip-out screen, face-tracking autofocus, in-body stabilisation, battery life, weather resistance. Small sensors are acceptable because you’re probably in good daylight.
Good options: Sony ZV-E10 (£550) — designed for vlogging, DJI Osmo Pocket 3 (£519) — all-in-one gimbal camera, or Sony ZV-1 Mark II (£899) for fixed-lens pocket vlogging.
Outdoor / Nature / Travel
You’ll film in variable light conditions, need weather resistance, longer lens options, and battery life. Priorities: weather sealing, interchangeable lenses with telephoto options, dual card slots for backup, good battery life.
Good options: Sony A7C II (£2,100), Sony A7 IV (£2,499), or Fuji X-T5 (£1,699). For aerial content, add a DJI Mini 4 Pro (£689).
Gaming / Streaming
Your camera is pointing at you while you focus on screen. Priorities: consistent 1080p or 4K output via USB or HDMI, clean HDMI, automatic exposure that handles screen-lit face, webcam-style simplicity.
Good options: Webcam like Logitech Brio 4K, or mirrorless with HDMI output like Sony ZV-E10 via Elgato Cam Link 4K (£119).
Multi-Camera Production
You’ll film with 2+ cameras for interviews, podcasts, or complex setups. Priorities: camera matching (same brand ideal), consistent autofocus behaviour, synchronisation support, same media type.
Good options: Two matched Sony ZV-E10s, or Canon R50s, or Blackmagic Pocket Cinema cameras for cinematic multi-cam.
Step 2: Set a Realistic Total Budget
Camera body price is never the final cost. Always budget for:
Extra batteries: 2-3 additional batteries at £30-80 each (~£90-240)
SD card: V60 or V90 UHS-II card for 4K recording (~£50-150)
Lens(es): Kit lens minimum, primes or zooms additional (~£100-800)
Microphone: Shotgun, lavalier, or boom arm setup (~£80-400)
Tripod: Stable tripod suited to camera weight (~£100-200)
Memory card reader: Fast USB-C UHS-II reader (~£30)
Lighting: At least one quality light (~£130-300)
Cage/rig (optional): For mounting accessories (~£80-200)
A camera priced at £550 often costs £1,200-1,500 all-in once you’ve added what you actually need. A £1,500 camera becomes £2,500+ complete. Set total-kit budgets, not body-only budgets.
Step 3: Identify Must-Have Features
Make a list of features that actually matter for your use case. Common priorities:
Must-Haves for Most YouTubers
Flip-out or fully articulating screen: Essential for solo filming — you need to see yourself
External microphone input (3.5mm or XLR via adapter): Built-in mics are inadequate
Clean HDMI output: For streaming, reference monitoring, or capture
Good autofocus with face/eye detection: Dramatically more important than manual focus skills for YouTube
Unlimited or 30+ minute recording: Older cameras had 29:59 limits — avoid them
USB-C charging: Power via USB saves battery swaps
Nice-to-Have
4K recording: Standard by 2026 but not essential if you deliver at 1080p
Log recording (S-Log, V-Log, C-Log): For colour grading
In-body image stabilisation (IBIS): For handheld work — skippable for tripod
Dual card slots: For backup — nice for pro work, not critical for YouTube
Full-frame sensor: Nice for shallow DOF and low light — not essential
Weather sealing: Important for outdoor, skippable for studio
Often Ignored but Important
Battery life: Sony cameras get 1-1.5 hours per battery — bring spares
Overheating behaviour: Some cameras overheat in 4K after 20-40 minutes
Menu/UX quality: Sony and Panasonic menus are complex; Canon and Fuji are simpler
Lens ecosystem cost: Sony E-mount is cheap and wide; Canon RF is expensive
Resale value: Sony and Canon hold value well; Panasonic S-series depreciates faster
Step 4: Choose Your Mount System
Your mount system decision outlasts any individual camera body — you’ll probably upgrade the body before switching mounts. Consider:
Sony E-mount: Widest lens ecosystem (native + third-party Tamron, Sigma, Samyang). Best value proposition.
Fuji X-mount: APS-C only but excellent lenses, unique colour science
Micro Four Thirds: Smallest sensor major system, cheapest lenses, compact setups
Panasonic L-mount: Growing ecosystem, co-developed with Leica and Sigma
For most YouTubers, Sony E-mount is the pragmatic choice — you can start with ZV-E10 (£550) and upgrade to A7C II (£2,100) keeping all your lenses.
Step 5: Consider Autofocus Carefully
Autofocus performance varies dramatically between brands. For YouTube, where you’re often alone in front of the camera, autofocus does work that manual focus cannot:
Sony: Class-leading Real-Time Eye AF — arguably the best in mirrorless for face/eye tracking
Canon: Dual Pixel AF is excellent, close second to Sony
Fuji: Much improved but still behind Sony/Canon for aggressive tracking
Panasonic: Historically weakest for video autofocus, improved with newer bodies but still behind
Nikon: Improved dramatically with Z-series, approaching Canon/Sony
If you’re solo-filming talking-head content, autofocus is the single most important camera feature. Don’t compromise here.
Step 6: Don’t Overbuy Sensor Size
The march from phone → Micro Four Thirds → APS-C → full-frame is mostly about low-light performance and shallow depth of field, not image “quality” in general conditions. For YouTube:
Phone sensors: Fine for well-lit scenarios, limited shallow DOF, struggle in low light
Micro Four Thirds: Small, cheap, good for travel, weaker shallow DOF
APS-C: Sweet spot for most YouTubers — good shallow DOF, acceptable low-light, affordable lenses
Full-frame: Premium option — genuinely better low light and shallow DOF, but heavier and more expensive at every step
Full-frame is not necessary for YouTube. APS-C produces cinematic results at half the price. Don’t let “full-frame is professional” marketing push you to overspend.
Step 7: Second-Hand vs New
For YouTube use, second-hand cameras are excellent value. Most YouTubers don’t push cameras to their limits — shutter counts, autofocus motor wear, and sensor degradation from commercial use don’t affect casual filmmaking. Look at:
MPB.com: UK’s main used photography/video retailer — graded conditions, warranties
WEX Photo Video used: Professional grading, tested equipment
eBay with seller ratings: Cheapest but risk-taking
Typical savings: 20-40% off new for mint condition, 40-60% off for lightly used. A 1-2 year-old Sony A7C (original, not II) at £800 beats a new budget camera at £600 for video quality.
Common Mistakes to Avoid
Buying for theoretical scenarios: “What if I want to do wildlife photography someday” — buy for what you film now
Chasing specs: 8K recording sounds impressive, but you’ll never deliver 8K on YouTube
Matching pro YouTubers: Channels shooting on £5k+ cameras have different needs than you
Ignoring lens ecosystem: Cheap camera with expensive-only lens mount is worse than balanced kit
Underestimating ancillary costs: Lenses, audio, lighting, tripod add up to camera-body cost again
Upgrading too soon: Master your first camera fully before upgrading — you learn more from limitations than features
Simple Camera Recommendations by Budget
Total kit budgets (camera + first lens + basic audio + tripod):
The Sony ZV-E10 at £550 is the current beginner default — designed specifically for vlogging, has flip-out screen, excellent autofocus, mic input, and a wide cheap lens ecosystem. You can grow with it for 2-3 years before needing to upgrade.
Do I need a full-frame camera for YouTube?
No. Full-frame offers better low-light and shallower depth of field, but APS-C cameras produce cinematic YouTube footage at half the cost. Full-frame becomes worthwhile for professional video work, extreme low-light filming, or maximum shallow DOF. For most YouTubers, APS-C is enough.
Should I buy new or used camera for YouTube?
Used is excellent value. UK retailers like MPB.com or WEX Used offer warranties on used gear with 20-40% savings. YouTube use rarely stresses cameras beyond their design life. Consider one-generation-old bodies used for the best value.
Can I use my phone as a YouTube camera?
Yes, modern flagship phones (iPhone 15 Pro, Galaxy S24 Ultra, Pixel 8 Pro) shoot 4K video with quality approaching dedicated cameras. Limitations: smaller sensor limits shallow DOF, harder to add external audio cleanly, battery drains during long recording. For casual or travel YouTube, phones are legitimate. For studio/desk work, dedicated cameras give better results.
How important is 4K for YouTube?
Standard by 2026 but not essential. YouTube streams at up to 4K, which gives cleaner delivery even if viewers watch at 1080p. Shooting 4K gives you reframe-in-post flexibility. Still, 1080p content with excellent lighting and audio outperforms 4K content with poor fundamentals.
What camera do most YouTubers use?
Most mid-tier YouTubers film on Sony APS-C bodies (ZV-E10, ZV-E1, A6700), Sony full-frame (A7 IV, FX3, A7C II), Canon mirrorless (R6, R7, R8, R50), or dedicated podcast cameras. Top YouTubers often use Sony FX3, FX6, or Canon C70/R5C for cinematic production.
Do I need interchangeable lenses for YouTube?
Depends on your content. Talking head at one distance: a single prime lens is enough. Vlogging: you want a wide lens for close self-filming. Varied content: interchangeable lenses give flexibility. Start with kit lens and add one prime (50mm f/1.8) — that covers most YouTube scenarios.
How often should I upgrade my YouTube camera?
Every 3-5 years is typical. Cameras don’t become unusable — they become superseded. If your current camera produces acceptable quality and meets your scenario needs, there’s no urgency. Upgrade when you have a specific scenario you can’t handle (needing better low light, longer recording, better autofocus), not because new models exist.
Camera choice is less important than most creators think — most cameras in the £500+ range shoot professional-quality YouTube. Focus on matching your camera to your actual filming scenario rather than the scenarios you dream about. Start simple, use the camera thoroughly, and upgrade only when specific limitations block specific projects.
⚡ Quick answerStart with Why by Simon Sinek gets 4.5/5 from me. A powerful core idea, wrapped in a bit more repetition than it needs. Anyone whose offer blends into the crowd and needs a clearer reason for people to choose them.
What is Start with Why about?
Sinek argues that the most influential leaders and businesses think, act and communicate starting from why they do what they do, not what they do. The why is the purpose or belief that inspires people to follow or buy.
Start with Why summary
Sinek builds the book around what he calls the Golden Circle: three rings, with why at the centre, then how, then what on the outside. Most businesses communicate from the outside in, leading with what they do and how they do it. The rare, magnetic ones communicate from the inside out, leading with why they exist and the belief behind the work.
He uses examples, most famously Apple, to argue that people do not buy what you do, they buy why you do it. A clear why attracts customers and staff who share the belief, creates loyalty that price alone cannot, and gives decisions a consistent compass. Without one, a business competes only on features and price, which is a race to the bottom.
The later chapters look at how a why can be discovered, communicated and, crucially, protected as an organisation grows, since Sinek argues many companies lose their way when the what drifts away from the original why.
Published in 2009 and boosted by one of the most-watched TED talks ever, it turned start with why into a business catchphrase. It is aimed at leaders and businesses that want loyalty and meaning rather than competing on price alone.
The one idea worth the price: Lead with why you do what you do, not what you sell. The belief is what people actually connect with.
Key ideas and takeaways
The Golden Circle. Why at the centre, then how, then what. Start from the middle.
People buy why. Customers are drawn to the belief behind a product more than its specifications.
Clarity attracts. A clear why pulls in the right customers and the right people to work with.
Protect the why. As you grow, keep decisions anchored to the original purpose or you drift.
My honest take
The core idea genuinely holds, and it matters most when your offer looks like everyone else's. When you and three competitors sell roughly the same service at roughly the same price, the why is often the only thing that makes someone choose you.
For the self-employed, this is useful in a very practical way: it shapes how you talk about yourself. Once you can say why you do this work, not just what you do, your marketing stops sounding like a menu and starts sounding like a reason to care.
I will be honest, Sinek stretches one strong idea across a whole book and it can tip into repetition, and the Apple worship gets thick. But the central point is sound and, applied properly, it changes how you position yourself. Take the idea, skim the padding.
The honest caveat: It is one idea inflated to book length, and the examples lean heavily on a handful of famous companies. You can get the essence quickly, then apply it.
Where it falls short
The single concept is repeated more than it needs to be.
The examples are cherry-picked survivors, which makes the argument feel neater than reality.
How it compares
Building a StoryBrand is the more practical sibling: where Sinek tells you to find your why, Miller gives you the exact framework to say it. Read Sinek for the concept and StoryBrand for the how.
Who should read it (and who should skip it)
Anyone whose offer blends into the crowd and needs a clearer reason for people to choose them. Skip it if you already have sharp, purpose-led positioning.
Best format: Audio works well; it is more concept than reference.
How to actually use it if you are self-employed
Write one sentence explaining why you do your work, beyond making money.
Rewrite your bio or homepage opener to lead with that why.
Test it on a few clients and watch which version they respond to.
⚡ The 60-second recap
Start from why, not what.
People connect with the belief behind the work.
Keep growth anchored to your original purpose.
A book is a shortcut. A second pair of eyes is faster.
Twenty years self-employed, 500+ people coached. If you want help applying this to your own situation, book a free discovery call.
A model with why at the centre, then how, then what. Sinek says the best communicators start from the why.
Is it practical or theoretical?
More conceptual than tactical. It gives you the idea; you supply the application.
Do I need the whole book?
The core lands early. If short on time, the first third gives you the working model.
Is the TED talk enough?
The talk covers the central idea well. The book adds examples and depth, but the essence is in the talk.
Does it apply to a one-person business?
Yes. A clear why is arguably even more powerful when the business is just you.
Final verdict
Start with Why earns 4.5/5. A powerful core idea, wrapped in a bit more repetition than it needs. If it is the stage you are at, the cheapest way in is a free Audible trial or Kindle Unlimited.
Note: Cover image via the Open Library Covers API. Rating is my own editorial score. Affiliate links are marked and support the site at no cost to you. Publish reminder: set the featured image and meta description; confirm the /book-reviews/ category is assigned.
How to Increase Your YouTube RPM with Livestreaming
Most YouTube creators focus obsessively on view counts and subscriber numbers. But after 20+ years in this industry and six Silver Play Buttons, the metric I care about most is RPM — Revenue Per Mille, or how much you actually earn per thousand views. RPM is the true measure of your channel’s earning efficiency, and it is the number that determines whether your YouTube income is sustainable.
What most creators do not realise is that 24/7 livestreaming — specifically using Gyre.pro — is one of the most effective ways to increase RPM, not just total watch time or revenue. The YEES channel documented approximately a 1.5x RPM increase after implementing 24/7 streams, and Gyre’s average user data shows a 20% RPM improvement across the platform. These are not trivial numbers.
In this post I am going to explain exactly why livestreaming improves RPM — not just revenue — and give you the specific strategies I use to maximise earning efficiency from 24/7 streams. Whether you are in a high-RPM niche like finance or trying to extract more revenue from a lower-RPM category, there is a clear path to better numbers through continuous streaming.
Boost Your YouTube RPM with 24/7 Streaming
Gyre.pro users average a 20% RPM increase. Try it free for 7 days and see what it does to your earning efficiency.
Let me clarify the terminology because there is consistent confusion in the creator community around RPM versus CPM:
CPM (Cost Per Mille): What advertisers pay YouTube per 1,000 ad impressions. This is the gross rate before YouTube takes its share.
RPM (Revenue Per Mille): What you, the creator, actually receive per 1,000 video views — after YouTube’s 45% cut, accounting for unmonetised views, and including all revenue sources (ads, memberships, Super Chat).
RPM is the number that appears in your YouTube Analytics under “Revenue” → “RPM.” It is the honest measure of your channel’s earning efficiency. A channel with high CPM but many unmonetised views might have a lower RPM than expected. A channel with lower CPM but very high view duration and few unmonetised views might have a surprisingly strong RPM.
Why does RPM improvement matter more than just revenue growth? Because RPM improvement is scalable. If you increase your RPM from $3 to $4.50 — a 50% increase — every future view you earn is 50% more valuable. That compounds with every additional view you attract. A higher RPM is a permanently improved earning rate, not a one-time revenue boost.
Why 24/7 Livestreaming Increases RPM (Not Just Revenue)
There are several distinct mechanisms through which 24/7 streaming improves RPM — the per-view earning rate — rather than just total revenue volume. Understanding each one helps you optimise for the most impactful effects.
Mechanism 1: Mid-Roll Ad Multiplication from Extended Sessions
This is the most direct RPM mechanism from livestreaming. In standard uploaded videos, you get a limited number of ad placements based on video length — typically one pre-roll and mid-rolls every few minutes for longer content. In a livestream, mid-roll ads can be set to fire automatically at regular intervals throughout an extended viewing session.
Here is the RPM implication: if a viewer watches your uploaded 10-minute video, they might see 1-2 ads. If the same viewer watches your 24/7 stream for 2 hours, they might see 8-15 ads. The viewer counts as a single view in both cases — but the stream generates multiple times more ad impressions per view. Since RPM is calculated based on total revenue divided by total views, generating more ad revenue per view directly increases RPM.
The average view duration jump documented in the Grace Wins case study — from 5 minutes 44 seconds to 31 minutes 10 seconds — represents a roughly 5.4x increase in viewing time per view. Even at the same underlying CPM rate, that extended session generates dramatically more ad impressions per view, which directly translates to a higher RPM.
YouTube’s algorithm uses watch time and engagement signals to determine which audiences see your content. Channels that generate strong watch time data tend to be recommended to audiences with similar profiles — often including higher-income viewers who are more likely to click on premium advertiser offers and command higher CPM rates.
As your 24/7 stream improves your channel’s algorithmic standing, it can gradually shift the composition of your audience toward viewers who generate higher-value ad impressions. This is a secondary effect that develops over months, but the YEES channel’s approximately 1.5x RPM improvement — documented over a multi-month period of streaming — reflects exactly this kind of gradual algorithmic audience quality improvement.
Mechanism 3: Reduced “Dead” Views
Not all views generate ad revenue. Very short views (a few seconds), views from logged-out users, views from regions with low advertiser activity, and views with ad blockers active all contribute to your view count without contributing proportionally to revenue. This dilutes RPM.
24/7 stream views tend to be longer, from logged-in users actively watching content, and in higher-value geographic markets (because your always-on stream is available to these audiences at times when they are typically online). The viewer profile that discovers and stays with a 24/7 educational or ambient stream tends to be a higher-quality ad audience than the casual clicker who watches 15 seconds of a short video before bouncing.
Niche Selection: The Biggest RPM Lever
While 24/7 streaming improves RPM across all niches, the absolute RPM you achieve is primarily determined by your niche. This is worth discussing explicitly because the spread between high and low RPM niches is enormous — and choosing to position your stream content in a higher-RPM category can multiply the value of every mechanism discussed above.
Niche
Typical RPM Range
Key Advertiser Types
Finance / Crypto
$15 – $30+
Banks, exchanges, investment platforms
Technology / SaaS
$8 – $15
Software, hardware, B2B tools
Education / Courses
$6 – $12
Online learning, tutoring, books
Health / Wellness
$5 – $10
Supplements, insurance, healthcare
Gaming
$2 – $6
Games, peripherals, energy drinks
Entertainment
$1 – $4
Consumer goods, general retail
The implication is dramatic. A 24/7 finance stream at $20 RPM generating 100,000 monthly views earns $2,000 per month. The same 100,000 views on a gaming stream at $4 RPM earns $400. If you have content that could reasonably be categorised as educational or financial — even tangentially — positioning your stream in a higher-RPM niche is the single most impactful RPM lever available to you.
Mid-Roll Ad Placement in 24/7 Streams: Getting It Right
Mid-roll ads in livestreams are configured in YouTube Studio under your live stream’s monetisation settings. The key decisions are ad frequency and timing — getting these right maximises revenue without tanking viewer retention.
Automatic vs. Manual Ad Breaks
YouTube offers automatic ad break placement for livestreams, which fires ads at algorithmically determined intervals based on natural pauses in content. For a 24/7 looping stream where you are not physically present to trigger manual ad breaks, automatic placement is the only practical option — and it works well for most content types.
Optimal Ad Frequency
There is a tension between maximising ad impressions and maintaining viewer retention. Too frequent ads cause viewers to leave, which reduces total watch time and ultimately hurts both revenue and RPM. The sweet spot for most content types is approximately one ad break every 8-15 minutes for music or ambient content, or every 15-25 minutes for educational and interview content where ad interruptions are more disruptive.
I recommend starting with longer intervals — every 20 minutes — and monitoring retention curves in YouTube Analytics. If retention holds well, experiment with slightly more frequent placements. If you see sharp drops after ad placements, increase the intervals.
Content Pacing and Ad Break Tolerance
Different content types have different ad break tolerance. Music streams can sustain frequent ad breaks because the audio interruption is relatively minor. Deep educational content or engrossing interviews may see higher drop-off after ad breaks because the interruption is more disruptive to viewer concentration. Match your ad frequency to your content type and audience behavior data.
Super Chat and Channel Memberships: Inflating Effective RPM
Standard RPM as reported in YouTube Analytics is primarily ad-based. But your effective revenue per view — what you actually earn per thousand views when you account for all monetisation sources — can be significantly higher when Super Chat and memberships are included.
Super Chat in 24/7 Streams
Super Chat — paid viewer messages that are highlighted in the live chat — is only available during active livestreams. A 24/7 stream creates an always-available Super Chat opportunity. Regular viewers who tune in daily or weekly can develop the habit of supporting through Super Chat, creating a recurring revenue stream that runs alongside your ad revenue.
Finance and educational channels in particular tend to attract engaged audiences willing to pay for highlighted questions or feedback. An always-on finance stream where engaged viewers can pay to have their investment questions highlighted in chat is a powerful community and monetisation combination.
Channel Memberships
An always-live channel creates a natural home for your member community. Promote membership perks in your stream’s pinned comment and description. Consider creating members-only content — exclusive analysis, early access, members-only Q&A sessions — that is distinct from your free stream. The 24/7 stream serves as the free sample that converts viewers into paying members.
When calculating your true revenue per view, include Super Chat and membership revenue. A channel that earns $3 RPM in ads but generates an additional $1 in Super Chat and membership revenue per thousand views has an effective RPM of $4 — a 33% improvement that does not show in standard RPM analytics but absolutely shows in your bank account.
The YEES Channel: A 1.5x RPM Increase in Action
The most directly relevant RPM case study in Gyre’s documented library is the YEES channel, which achieved approximately a 1.5x RPM increase over six months of implementing 24/7 streams. Let me unpack why that happened and what you can replicate:
Watch time increased by 79% — more total watch hours improved the channel’s algorithmic standing, attracting higher-quality audience segments
40,090 new subscribers — growth in audience size expanded the pool of high-value viewers
Longer average view duration — extended sessions generated more ad impressions per view, directly increasing RPM
Improved algorithmic positioning — better watch time signals led YouTube to recommend the channel to higher-intent audiences
The 1.5x RPM improvement means every view the channel earns is now worth 50% more than before streaming. Combined with the 79% watch time increase, the total revenue impact is substantially greater than either metric alone would suggest. This is the compounding power of improving both the quantity of views and the RPM at which those views monetise.
“RPM improvement is the most scalable revenue lever available to YouTube creators. Every percentage point of RPM improvement pays dividends on every future view. A 24/7 stream that systematically improves RPM is not just earning more today — it is permanently raising your earning rate.”
How to Set Up Gyre.pro to Maximise RPM
The configuration choices you make in Gyre.pro directly affect your RPM performance. Here is how I set up streams specifically for RPM optimisation rather than just raw watch time:
Choose Your Highest-RPM Content
If your channel spans multiple topic areas, prioritise the highest-RPM content for your stream. A tech YouTuber who also covers gaming should stream the tech content — the RPM differential is enormous. A finance creator with some entertainment content should stream the finance material. RPM is directly tied to advertiser category, so stream content that attracts premium advertisers.
Sequence for Maximum Session Length
Use Gyre.pro’s playlist management (Start+ and above) to sequence your videos for maximum viewing session duration. Start with your most accessible content, transition to longer deep-dives, include your most compelling interview or documentary content in the middle of the playlist. A viewer who stays for 2 hours sees many more ads than one who stays for 30 minutes — and RPM is ultimately about revenue per view, which is maximised when viewers watch for longer.
Enable All Monetisation Features
In YouTube Studio, ensure you have enabled all available monetisation features for your livestream: mid-roll ads, Super Chat, channel memberships, and Super Thanks. Each active feature contributes to your effective revenue per view. Many creators leave Super Chat or memberships disabled on their streams, missing a significant effective RPM improvement.
Target High-Value Geographic Audiences
RPM varies dramatically by country. US, UK, Australian, and Canadian viewers typically generate 5-10x higher CPM than viewers from many other regions. If your content and promotion strategy currently attracts a predominantly low-CPM audience, the continuous availability of your 24/7 stream — particularly during US/UK/Australia business hours — can gradually improve your geographic audience mix toward higher-value markets.
Use Gyre’s Analytics Dashboard
Gyre’s analytics dashboard lets you monitor stream performance metrics. Track concurrent viewers over time to understand your peak periods, and compare these to your YouTube Analytics RPM data. If you see RPM spikes during certain hours or content types, use Gyre’s scheduler to ensure your best content runs during those high-value windows.
RPM Optimisation: Common Mistakes
In my work with creators, these are the most frequent RPM mistakes I see on 24/7 streams:
Streaming low-RPM content in a high-RPM niche channel. If your channel is known for finance, streaming entertainment content depresses your audience quality signals and advertiser targeting, reducing RPM.
Too-frequent ad breaks driving viewers away. An aggressive ad schedule that triggers viewer drop-off reduces total watch time, which ultimately hurts both RPM and revenue. Better to have slightly fewer ad breaks on a long session than many breaks on a short one.
Not enabling Super Chat on streams. Super Chat is easy money that requires no additional effort from you — it is simply available for viewers to use. Leaving it disabled is leaving revenue on the table.
Ignoring geographic peak hours. Your target audience’s waking hours are your peak RPM hours. Scheduling your best content for 9am-9pm US Eastern time (if targeting US audiences) maximises the chances of high-value viewers finding your stream.
Not tracking RPM trends over time. RPM improvement from streaming is gradual. Check your RPM in YouTube Analytics monthly and trend it over 3-6 months to see the improvement curve. Week-to-week variation obscures the underlying trend.
The Gyre.pro Plan That Makes Sense for RPM Optimisation
For RPM-focused streaming, the plan you choose affects your ability to implement the RPM-maximising strategies I have described:
Start ($49/month): Single stream, no playlist management. You can loop a single long compilation but cannot curate a sophisticated playlist sequence. Works for simple RPM improvement but limits your optimisation options.
Start+ ($99/month): Four streams with playlist management and scheduling. This is my recommended starting point for serious RPM optimisation — you can curate your playlist for maximum session length, run multiple themed streams targeting different high-RPM audience segments, and use the scheduler for peak-hour optimisation.
Pro+ ($169/month): Eight streams. If you are managing multiple channels or running parallel experiments to A/B test content and ad frequency configurations, this is the tier that gives you that capability.
In a high-RPM niche like finance, the platform cost pays for itself very quickly once your stream is generating meaningful watch hours at $15-30+ RPM. See my full cost analysis in the Gyre.pro pricing breakdown.
Putting It All Together: Your RPM Improvement Plan
Here is the complete RPM improvement framework I would implement if I were starting a 24/7 stream focused specifically on maximising earning efficiency:
Choose the highest-RPM niche content from your library — if you have any educational, financial, or technical content, prioritise it
Build a playlist for maximum session length — long-form content, logical sequencing, aim for 8+ hours before the loop repeats
Enable all monetisation features — ads, Super Chat, memberships, Super Thanks
Set ad frequency conservatively at first — every 15-20 minutes, then adjust based on retention data
Join 15,000+ creators who have already improved their YouTube RPM with 24/7 streaming. Start your free 7-day trial today — no commitment, no credit card required.
What is YouTube RPM and how is it different from CPM?
RPM (Revenue Per Mille) is the revenue you actually earn per 1,000 views after YouTube takes its 45% cut and accounting for all monetisation sources including ads, memberships, and Super Chat. CPM (Cost Per Mille) is what advertisers pay before YouTube’s share. RPM is the number that matters most to creators because it reflects your actual take-home revenue per thousand views.
Can livestreaming increase my YouTube RPM?
Yes. The YEES channel documented approximately a 1.5x RPM increase after implementing 24/7 streams via Gyre.pro, and Gyre’s average user data shows a 20% RPM improvement. Livestreams increase RPM through multiple mechanisms: longer viewing sessions that trigger more mid-roll ads, improved algorithmic positioning that attracts higher-value audiences, and additional revenue streams like Super Chat that inflate effective RPM.
How do mid-roll ads work on a 24/7 livestream?
Mid-roll ads in YouTube livestreams can be set to fire automatically at regular intervals — typically every 8 to 30 minutes depending on your settings and audience tolerance. A viewer who watches your stream for 2 hours will see significantly more ad impressions than a viewer who watches a 10-minute uploaded video. More ad impressions per viewer session means more total ad revenue even at the same RPM rate.
Which YouTube niches have the highest RPM?
Finance and crypto consistently command the highest RPM at $15-30+ per thousand views. Technology follows at $8-15, then education at $6-12. Gaming and entertainment are at the lower end at $2-6. If you are in a high-RPM niche, a 24/7 stream multiplies your advantage by accumulating massive watch hours at those premium rates.
Does Super Chat count toward my YouTube RPM?
Super Chat revenue is not technically included in the standard RPM metric (which primarily reflects ad revenue). However, it adds to your total revenue per view when you calculate it manually. An always-on 24/7 stream creates more opportunities for Super Chat engagement than a channel that is only occasionally live, which can meaningfully boost your effective revenue per view.
How long does it take to see an RPM increase from 24/7 streaming?
RPM improvements from 24/7 streaming typically take 4-12 weeks to become clearly measurable. The mechanism — improved watch time signals leading to better algorithmic positioning leading to higher-value audience targeting — takes time to develop. The YEES channel’s approximately 1.5x RPM improvement was measured over a multi-month period. Set your expectations accordingly and track your RPM trend monthly rather than week-to-week.
About Alan Spicer
Alan Spicer is a YouTube Certified Expert and 20+ year content creator with 6 Silver Play Buttons. He uses Gyre.pro daily to run 24/7 livestreams across multiple channels and has earned over $10,000 through the Gyre affiliate program. Follow his work at alanspicer.com.
Once you outgrow Amazon, every brand you want to promote seems to run its own separate programme. Affiliate networks fix that — one login, hundreds of advertisers, often paying far better than Amazon. Here’s how they work and which to join first.
An affiliate network is a marketplace sitting between you and thousands of brands. You apply once to the network, then request access to individual advertisers from a single dashboard — with one login, one set of reports and one payment.
The advantage isn’t only convenience. It’s discovery: you’ll find brands paying real money that you never knew ran an affiliate programme. This is method three of eight in the make money on social media pillar.
Who’s writing this? I’m Alan Spicer — a YouTube Certified Expert with 20+ years making content, six Silver Play Buttons and 500+ creators coached. Every method here is one I’m paid by, not one I read about.
⚡ QUICK ANSWER
The three affiliate networks worth knowing are Awin, CJ (Commission Junction) and Impact. You apply once, then get approved by individual brands inside the platform. Awin is strongest for UK and European retailers. Commission rates and cookie windows are set by each advertiser, and they typically pay far better than Amazon. Some networks charge a small (often refundable) verification fee to join.
What a network actually does for you
Think of the problem networks solve. Promote ten brands directly and you have ten logins, ten payment thresholds, ten sets of terms and ten cheques for small amounts you may never reach. A network consolidates all of that: one relationship, one dashboard, one payout that combines every brand’s commission. It also handles the tracking and the disputes, so you’re not chasing a brand for a sale that didn’t register.
There’s a quieter advantage too: cookie windows. Amazon gives you 24 hours. Many brands on networks run 30, 60 or even 90-day cookies, meaning a viewer who clicks today and buys three weeks later still earns you commission. For considered purchases — software, higher-ticket gear, anything people research before buying — that longer window can be the difference between a tracked sale and nothing, and it’s set per advertiser so it’s worth checking before you commit your content to a brand.
The three that matter
Network
Strongest for
Notes
Awin
UK & European retailers
Huge UK brand roster; small verification fee that is typically refunded on your first payout.
CJ (Commission Junction)
Large US & global brands
One of the oldest networks; deep catalogue, more corporate advertisers.
Impact
SaaS & modern D2C brands
Clean interface; where many software and subscription brands run their programmes.
Explore each: Awin, CJ, Impact. You don’t have to pick one — experienced creators sit on all three and go wherever the brand they want lives.
Analytical note: networks take a cut from advertisers and some charge brands to join, which filters out the lowest-quality merchants. That’s a feature. The brands inside tend to have real budgets and proper tracking, which is exactly what you want when you’re committing your audience’s trust to a recommendation.
Getting approved (and not rejected)
Two approval gates exist: joining the network, and getting accepted by individual brands. The network gate is usually light. The brand gate is where creators get knocked back, and the reason is almost always the same — an empty or vague profile. Before you apply to brands, have a channel or site with real content, a clear niche, and a short description of how you’d promote them. Brands approve creators who look like they’ll actually drive sales.
Not sure which brands fit your audience?
Choosing the wrong programmes wastes months. Book a free discovery call and we’ll match your niche to the networks and brands most likely to convert for you.
Networks are the layer that turns “I recommend things sometimes” into “I have a portfolio of brands I can match to any piece of content.” They pair naturally with the two streams either side of them: start on Amazon Associates to learn the mechanics, then use networks to find better-paying brands, and layer recurring SaaS commissions on top for income that compounds. If your audience leans health or lifestyle, some of the best-fitting brands sit in wellness affiliate programmes. The whole map is in the pillar guide.
A worked earning example
The clearest case for networks is a side-by-side. Say you recommend a £120 product your audience wants. On Amazon at roughly 3% you earn about £3.60 a sale. The same class of product from a brand on Awin paying 8% earns you £9.60 a sale — nearly three times as much for identical effort.
Scale it to 20 sales a month and the gap is £72 versus £192. Over a year that is the difference between £864 and £2,304 from the same recommendation to the same audience. Multiply across several brands and you see why creators graduate from Amazon to networks the moment their traffic is worth more than pennies.
The compounding is in the portfolio. Once you sit on a network, matching a brand to each piece of content becomes routine: a review here, a comparison there, a “best tools for X” list somewhere else, each pointing at a brand paying a proper rate. Five modest brand relationships each earning £100–£200 a month is a £500–£1,000 monthly line that Amazon’s percentages would never reach on the same traffic. Actual rates vary by advertiser — always check the programme terms inside the network before you promote.
People also ask
Can you use Amazon and an affiliate network at the same time?
Yes, and most creators do. Keep Amazon for the products that live there and use networks for brands that pay better. They are complementary rather than competing.
How do affiliate networks pay you?
A network consolidates commissions from every brand you promote into a single payout, usually monthly once you clear a threshold, by bank transfer or PayPal. That is a big part of their convenience.
Do you need a lot of traffic to join an affiliate network?
Joining the network itself is usually straightforward with a real, focused profile. Individual brands set their own approval bars, and some want to see traffic, but many accept newer creators who look serious.
How many affiliate networks should a creator join?
Start with one that fits your region and niche, usually Awin for UK creators, and add others as you find brands that live on them. There is no penalty for being on several, and experienced creators go wherever the brand they want is hosted.
Frequently asked questions
What is an affiliate network?
An affiliate network is a marketplace that connects creators with many brands at once. You apply to the network, then request approval from individual advertisers inside it, and manage all your links, tracking and payments from one dashboard instead of dealing with each brand separately.
Which affiliate network is best for UK creators?
Awin is usually the strongest starting point for UK creators because it has the deepest roster of UK and European retailers. CJ suits larger global brands, and Impact is where many software and subscription companies run their programmes. Most experienced creators join more than one.
Do affiliate networks cost money to join?
Most are free for creators, though some charge a small verification fee that is often refunded once you earn your first commission. The advertisers pay the network, which is part of why the brands inside tend to have real budgets and proper tracking.
Why do brands reject affiliate applications?
Almost always because the creator's profile looks empty or unfocused. Brands approve creators who look likely to drive sales, so a clear niche, real published content and a short note on how you would promote them makes approval far more likely.
Are affiliate networks better than Amazon Associates?
For pay, usually yes, because individual brands set their own rates and cookie windows and many pay far more than Amazon's low percentages. Amazon is still worth keeping for the products that live there. The two work together rather than replacing each other.
In a free 30-minute call I’ll help you match your niche to the networks and programmes most likely to convert — so you spend your effort where it pays.
Disclosure: Awin, CJ and Impact are named as examples of affiliate networks; the links to them are standard external links, not affiliate links. Commission rates and joining terms are set by each network and advertiser and change over time — check current terms on each network’s site.
Amazon Associates is the fastest affiliate income to switch on and the easiest to do badly. Here’s how it works in the UK, the one linking habit that stops your links dying, and the point where you should stop relying on it.
If ad revenue is the slowest income to start, Amazon Associates is the fastest. No follower threshold, no waiting. You recommend something, link it with your tag, and earn when people buy.
The catch is that the rates are low and the tracking window is short, so Amazon rewards volume and buying intent. Get the mechanics right and it’s a brilliant first rung. Treat it as your whole plan and you’ll cap yourself early. This is one of eight methods in the social media income pillar.
Who’s writing this? I’m Alan Spicer — a YouTube Certified Expert with 20+ years making content, six Silver Play Buttons and 500+ creators coached. Every method here is one I’m paid by, not one I read about.
⚡ QUICK ANSWER
Amazon Associates pays UK creators roughly 1–10% commission depending on category, with a 24-hour tracking cookie (extended to 90 days if the shopper adds the item to their basket). You earn on anything the shopper buys in that session, not just the item you linked. Sign-up is free with no follower minimum. Two rules: link to a search results page (not a single listing, which breaks), and always disclose the link.
How the money actually works
Amazon’s model has one quirk that works in your favour and one that works against you. In your favour: once someone clicks your link, you earn commission on their entire basket for that session, not only the product you linked. Recommend a £15 microphone, and if they also buy a £400 monitor in the same visit, you earn on both.
Against you: the standard cookie lasts just 24 hours (it stretches to 90 days only if they add your item to the basket within that window), and UK commission rates are modest — low single digits in many categories. So Amazon rewards intent and volume: people who click ready to buy, in numbers.
Analytical note: because you earn on the whole basket, the best-performing Amazon content isn’t always about expensive items. A “what’s in my kit” video that sends viewers to Amazon in a buying mood can out-earn a single high-ticket review, because those viewers fill a basket once they land.
The search-link habit that stops your links dying
Here’s the mistake that quietly costs creators money: linking to a single product listing. Listings go out of stock, get relisted under a new code, or vanish — and your link 404s months after the video went up, on exactly the content still pulling traffic. Link to a search results page instead and it never breaks, because Amazon always has results for a search.
The format I use on every post is amazon.co.uk/s?k=product+name&tag=yourtag. For example, a light I recommend: softbox lighting kit on Amazon UK, or a starter mic: USB condenser microphone. Same tag, same tracking, zero broken links.
Disclosure: not optional, and it protects you
UK advertising rules require you to make any commercial relationship clear. A one-line note that a link is an affiliate link covers you, and it costs you nothing because audiences respect the honesty. Pair disclosure with only ever recommending things you use, and you keep the trust that makes the click happen in the first place.
Not sure Amazon is where your money is?
Amazon is a starting point, not a destination. Book a free discovery call and we’ll map which affiliate income actually fits your niche and audience.
The one exception that pays better: books and audio
If your content touches reading, learning or self-development, Amazon’s Audible free trial and Kindle Unlimited often pay better than physical products, because you’re paid for a sign-up rather than a slim percentage of a cheap item. It’s the approach behind my book recommendations for the self-employed.
When to graduate
Amazon teaches you linking, disclosure and tracking with almost no barrier. Once you’ve learned those on Amazon’s pennies, the move is to keep the Amazon links where they fit and add better-paying programmes on top. Two directions: join an affiliate network to reach hundreds of brands that pay more, and add recurring commissions so one referral pays for months. See how the pieces fit in the pillar guide. If you want Amazon done well across a real buying niche, my YouTube starter kit under £1,000 is built on this exact structure.
A worked earning example
Here is a realistic month. Suppose a video sends 1,000 clicks to your Amazon links, and 4% of those clickers buy something. That is 40 orders. If your average commission is £1.50, that is £60 for the month from one video’s links.
Now the basket effect. Because you earn on the whole session, one shopper who lands for a £15 microphone and also grabs a £250 monitor adds roughly £7–£9 on that single order. A handful of those a month can quietly double the headline figure. This is why “what’s in my kit” content out-earns a single pricey review: it puts people into a buying session, then Amazon does the rest. The rates are still modest, which is the whole reason to layer better-paying programmes on top.
People also ask
Can you put Amazon affiliate links in a YouTube description?
Yes. YouTube descriptions are a common and allowed place for Amazon affiliate links, as long as you disclose that they are affiliate links. The same applies to a blog or many social profiles.
How does Amazon Associates pay you?
Amazon pays roughly 60 days after the end of the month in which you earned, once you clear the payment threshold. In the UK you can take payment by bank transfer or as an Amazon gift card.
Do Amazon affiliate links work for buyers in other countries?
Your UK tag earns on amazon.co.uk. A shopper sent to the UK store from abroad may not convert or track. Amazon’s OneLink tool, or separate country tags, handle international audiences.
Frequently asked questions
How much do Amazon Associates pay in the UK?
Commission rates vary by category and sit in the low single digits to around 10% for most product types. You also earn on anything else the shopper buys in the same session, not just the item you linked, which can lift your effective earnings above the headline rate.
How long does the Amazon affiliate cookie last?
The standard tracking cookie lasts 24 hours. If the shopper adds your linked item to their basket within that window, the tracking extends to 90 days for that item. This short window is why Amazon rewards buying intent and volume rather than slow-burn recommendations.
Do you need a website to join Amazon Associates?
You need at least one qualifying place to share links, which can be a website, a YouTube channel, or certain social accounts. There is no follower minimum to apply, but Amazon reviews your account and expects you to make some qualifying sales within a set period to stay active.
Should I use Amazon product links or search links?
Search links. A link to a single product listing breaks when the item goes out of stock or gets relisted, often on your best-performing older content. A search-results link never breaks because Amazon always returns results, and it still carries your tracking tag.
Is Amazon Associates worth it for small creators?
Yes, as a first step. It has no barrier to entry and teaches you how affiliate linking, disclosure and tracking work. The low rates mean you should not rely on it long term, but it is the cleanest way to earn your first affiliate pound and learn the mechanics.
In a free 30-minute call I’ll show you which higher-paying affiliate streams fit your content — and how to layer them on top of what you’re already doing.
Disclosure: Some links on this page are Amazon affiliate links carrying my tracking tag; I may earn a commission at no extra cost to you, and I only recommend items I use or would use. Amazon commission rates and cookie terms are set by Amazon and change — check current rates in your Associates dashboard.
Ad revenue is the income stream every new creator fixates on — and the one that pays slowest and least reliably. Here’s exactly how the YouTube Partner Programme works in the UK, what it pays, and where it fits in a sane monetisation plan.
Getting into the YouTube Partner Programme (YPP) feels like the finish line. It’s the start line. Passing the threshold unlocks ad revenue, but the money is governed by your niche and your view count, not by a pat on the back from the algorithm.
This is the honest version: the current requirements, how UK RPM really behaves, and the monetisation streams that should sit alongside it from day one. For the full menu, start with the make money on social media pillar.
Who’s writing this? I’m Alan Spicer — a YouTube Certified Expert with 20+ years making content, six Silver Play Buttons and 500+ creators coached. Every method here is one I’m paid by, not one I read about.
⚡ QUICK ANSWER
To earn ad revenue on YouTube in the UK you need 1,000 subscribers plus either 4,000 public watch hours in 12 months or 10 million Shorts views in 90 days. There’s also an earlier tier at 500 subscribers that unlocks fan funding but not ad revenue. Once you’re in, your income depends on RPM — what you earn per 1,000 views — which swings hugely by niche. Treat ad revenue as a bonus and build affiliate and product income alongside it.
The eligibility thresholds, in plain English
YouTube runs two doors into the Partner Programme, and most guides only mention one.
Tier
Subscribers
Plus one of
Unlocks
Early access
500
3,000 watch hours (12 mo) or 3M Shorts views (90 days), plus 3 uploads in 90 days
You’ll also need two-step verification on, no active Community Guidelines strikes, a linked AdSense account, and to live in a country where YPP operates. Full detail is on the official YouTube eligibility page.
RPM: the number that decides your pay
Once you’re monetised, YouTube shares ad income with you and reports it as RPM — revenue per 1,000 views, after YouTube’s cut. RPM is where the “how much does YouTube pay” question gets its wildly different answers, because it’s driven by what advertisers will pay to reach your audience.
A UK finance or business channel can earn several times the RPM of a gaming or entertainment channel for identical view counts, because a viewer researching pensions is worth more to an advertiser than one watching a let’s-play. Your niche sets your ceiling long before your view count does. Season matters too — advertiser budgets swell in Q4 and thin out in January, so the same video earns more in December than it does after the new year.
The truth most won’t tell you: ad revenue is the stream you control least. One policy change, one demonetised topic, one algorithm shift and your “salary” moves without warning. Creators who live on RPM alone are one bad month from a crisis. Build it, bank it, but never lean your whole weight on it.
Reaching the threshold faster (the legitimate way)
The watch-hours requirement is the wall most people hit. There’s no trick to it — you need people watching for longer — but there are levers. Longer, properly watchable videos bank hours faster than a pile of 90-second clips. A back catalogue that keeps getting recommended earns hours while you sleep.
One tool I use here is Gyre, which streams your existing videos as 24/7 live content. Those live viewing minutes count as watch time, so a well-set-up stream can quietly move you toward the 4,000-hour line using content you’ve already made. For finding topics people actually search, vidIQ and TubeBuddy are the two I lean on.
Stuck below the monetisation line?
I’ve coached 500+ creators past this exact wall. Book a free discovery call and we’ll look at your channel’s numbers and the fastest legitimate path to your first payout.
Here’s the reframe that changes everything: the day you’re monetised, your viewers are already worth more through other methods than through the ads YouTube runs against them. A single affiliate sale can out-earn thousands of ad impressions. That’s not an argument against ad revenue — take it, it’s money for content you were making anyway — it’s an argument for stacking.
Numbers make the niche point concrete. Say you earn 100,000 views a month once monetised. Your pay depends almost entirely on your RPM:
Niche
Typical UK RPM
100k views/month
Gaming / entertainment
~£1.50
~£150
General / lifestyle
~£4.00
~£400
Finance / business
~£12.00
~£1,200
Same 100,000 views, an eight-fold spread in pay. That gap is set by your niche before you upload a single video, which is exactly why picking a higher-value subject matters more than chasing raw views. RPM figures are illustrative and move with season and audience location, so treat them as a shape, not a promise.
People also ask
Does YouTube pay you every month?
Yes, once your earnings pass the AdSense payment threshold (around £60). YouTube tallies the previous month’s revenue and pays out around the 21st, provided your account is verified and your payment details are set up.
Do Shorts views count toward the 4,000 watch hours?
No. Watch time from the Shorts feed does not count toward the 4,000 long-form watch hours. Shorts have their own separate path to monetisation — 10 million valid Shorts views in 90 days.
Can you lose YouTube monetisation once you have it?
Yes. If your channel falls below the thresholds, breaches monetisation policies, or picks up strikes, YouTube can suspend or remove monetisation. Consistency and policy compliance keep it switched on.
Frequently asked questions
How many subscribers do you need to make money on YouTube?
For ad revenue you need 1,000 subscribers plus either 4,000 public watch hours in the past 12 months or 10 million Shorts views in the past 90 days. There is an earlier tier at 500 subscribers that unlocks fan funding features but not ad revenue. Affiliate income, by contrast, has no subscriber requirement at all.
How much does YouTube pay per 1,000 views in the UK?
There is no fixed rate. Your pay is measured as RPM, revenue per 1,000 views after YouTube's cut, and it depends heavily on your niche and the time of year. High-value niches like finance and business earn far more per view than entertainment or gaming, and advertiser budgets rise in the final quarter of the year.
How long does it take to reach 4,000 watch hours?
Most creators posting consistently reach it somewhere between six and eighteen months, depending on video length, niche and how often their back catalogue gets recommended. Longer, watchable videos and an evergreen catalogue bank hours faster than short one-off clips.
Can you make money on YouTube Shorts?
Yes. You can qualify for full monetisation through Shorts alone by hitting 1,000 subscribers and 10 million valid Shorts views in 90 days. Shorts ad revenue per view is lower than long-form, so many creators use Shorts to grow reach and long-form plus affiliates to earn.
Is ad revenue enough to go full-time?
For most creators, no, at least not on its own. Ad revenue is volatile and you control it least. The creators who go full-time almost always stack it with affiliate income, brand deals and their own products, so that no single stream disappearing ends their income.
Ad revenue is one stream of eight. In a free 30-minute call I’ll help you pick the two or three that fit your channel now — and the order to build them.
Sources & disclosure: YPP eligibility thresholds per YouTube Help (verified 2026). Some links are affiliate links: I may earn a commission at no extra cost to you, and I only recommend tools I use. Programme terms change — always check current requirements before relying on any figure here.