Categories
DEEP DIVE ARTICLE SOCIAL MEDIA TIPS & TRICKS YOUTUBE YOUTUBE TUTORIALS

Gyre: The Ultimate Tool for Running 24/7 Streams on YouTube and Beyond

Are you a YouTube content creator looking to increase views, retention, and subscribers on your channel? If so, Gyre might be the perfect tool for you!

Gyre is a multi-functional service that enables you to run continuous streams, which can help you achieve your goals, regardless of your channel’s size or the type of content you create.

What is Gyre?

Gyre is a cloud service that allows you to create and launch continuous streams. Looped (or continuous) streams are a universal tool that can help you achieve your objectives, depending on your individual needs.

The service is designed to be easy to use and requires only your videos, a computer, and an internet connection.

How does Gyre work?

The basis of looped streaming is pre-recorded content. Your older videos or pre-recorded/edited content can be perfect for streaming. Gyre helps you to create a continuous stream of your pre-recorded content, which plays 24/7 in a continuous loop.

You can run as many as 8 streams on your channel on multiple platforms, such as YouTube, Twitch, Vimeo, and Facebook/Instagram.

Why should you use continuous streams?

Continuous streams can help you to achieve several goals, such as attracting new traffic to your channel, accelerating your channel’s promotion, and increasing revenue.

They can also help you to promote and monetize your pre-recorded content, which is a win-win way to improve your channel’s performance and make the most of all the content you have.

How do continuous streams affect the development of a YouTube channel?

Continuous streams can help you to attract new viewers, increase retention, and generate new traffic for your channel.

They can also help you to monetize your content, promote your pre-recorded videos, and generate more revenue for your channel.

What channels are suitable for continuous streams?

Gyre is suitable for all types of YouTube channels, regardless of the topic or the number of subscribers. The primary factor is relevant and high-quality content.

How to start a Gyre continuous stream?

Starting a continuous stream is easy with Gyre. You need to register with Gyre, choose your plan, prepare your content for streaming, upload videos to your personal server, create playlists, and enjoy improved channel metrics.

Here are a few additional things to know about Gyre:

  • Gyre offers a flexible subscription system depending on your needs, with both monthly and annual packages available. Plus, there’s a free 7-day trial period so you can try the service out before committing.
  • Continuous streams are perfectly legal and safe to use. Gyre follows the requirements of the platforms where it offers users to run continuous streams and does not violate the policies of video hosting sites and social media.
  • Gyre helps you to create and run streams without using your channel data. Authorization only requires your email, so access to accounts and content remains only with the owners of the YouTube channels or social media accounts.
  • In addition to YouTube, Gyre now also supports other popular platforms such as Twitch, Vimeo, and Fb/Inst. This means that Gyre users can reach and interact with their target audiences on these platforms as well.
  • Gyre’s Knowledge Base includes video tutorials that can help you understand how to create and run continuous streams, as well as an FAQ and support chat if you need additional help.

Overall, Gyre is a useful tool for content creators looking to maximize the potential of their existing content and attract new viewers to their channel. It’s easy to use and offers a variety of features that can help you achieve your goals.

What is live streaming?

Live streaming refers to the process of broadcasting video content over the internet in real-time. This allows viewers to watch an event, show, or activity as it’s happening, rather than watching a pre-recorded video.

What are some benefits of live streaming?

Live streaming can help you connect with your audience in a more immediate and interactive way, as viewers can comment and ask questions in real-time. It can also increase audience engagement and help build a community around your content.

What equipment do I need to live stream?

At a minimum, you will need a camera and an internet connection. Depending on the complexity of your live stream, you may also need additional equipment such as microphones, lighting, and software.

What platforms can I use to live stream?

There are many platforms available for live streaming, including YouTube, Facebook, Twitch, and Vimeo. Gyre is a service that allows you to create and launch continuous streams on multiple platforms, including YouTube, Twitch, Vimeo, and Fb/Inst.

What are looped or continuous streams?

Looped or continuous streams are a type of live stream that plays pre-recorded content on a loop, creating a 24/7 stream of your existing videos. Gyre is a cloud service that allows you to create and launch continuous streams.

Why should I use Gyre for continuous streaming?

Gyre offers a flexible subscription system and is easy to use, with video tutorials and a knowledge base available to help you get started. It also allows you to create 24/7 streams from your pre-recorded content, saving you time and effort. Additionally, Gyre offers the ability to stream on multiple platforms, increasing your potential audience reach.

Is it legal to use continuous streams on YouTube and other platforms?

Yes, continuous streams are legal and can be a valuable tool for content creators. Gyre follows the requirements of the platforms where it offers users to run continuous streams, and does not violate the policies of video hosting sites and social media.

How can I monetize my live streams?

There are several ways to monetize your live streams, including ads, sponsorships, and merchandise sales. To monetize your content on YouTube, you will need to meet the platform’s requirements for the YouTube Partner Program, including having at least 1,000 subscribers and 4,000 hours of watch time in the past 12 months.

How can I improve the quality of my live streams?

To improve the quality of your live streams, you can invest in better equipment, such as high-quality cameras and microphones. You can also optimize your internet connection to ensure a stable and uninterrupted stream. Additionally, Gyre allows you to optimize and prepare your pre-recorded content to ensure that it is suitable for continuous streaming.

Categories
TIPS & TRICKS YOUTUBE TUTORIALS

How to Download Music from YouTube

YouTube is the largest video hosting platform in the world, and it’s also a great source of music.

With millions of songs and videos uploaded, you can find almost any track you’re looking for on the site.

However, downloading music from YouTube can be a bit of a challenge. Here’s a step-by-step guide to help you download your favourite music from YouTube to your device.

Step 1: Find the Music on YouTube

The first step is to find the music you want to download on YouTube. You can use the search bar on the top of the page to search for a specific song or artist. Once you’ve found the music you want, click on the video to play it.

Step 2: Copy the Video Link

Next, you need to copy the link of the video you want to download. To do this, click on the “Share” button below the video and select “Copy link.” This will copy the video’s URL to your clipboard, which you’ll need in the next step.

Step 3: Use a YouTube to MP3 Converter

There are many websites and tools that allow you to convert YouTube videos to MP3 files, which you can then download to your device. One of the most popular and free tools is OnlineYouTubeMP3.

To use this tool, simply paste the copied link into the “YouTube Video URL” field, and then click “Convert.” The website will then convert the video to an MP3 file, which you can then download to your device.

Step 4: Download the MP3 File

Once the MP3 file has been generated, you’ll see a “Download” button. Click on this button to download the file to your device. You can then play the MP3 file using your preferred music player.

Step 5: Enjoy Your Music

That’s it! You’ve successfully downloaded your favourite music from YouTube. You can now enjoy your music without having to be connected to the internet.

So, in summary… downloading music from YouTube is a simple process that can be done in just a few steps.

By using a YouTube to MP3 converter, you can easily convert videos to MP3 files, which you can then download to your device.

Enjoy your music!

Frequently Asked Questions About Downloading Music from YouTube

  1. Is downloading music from YouTube legal?

The legality of downloading music from YouTube depends on the specific circumstances and laws of your country. In most cases, it is considered copyright infringement to download copyrighted material without permission from the owner. However, there are some exceptions, such as for personal use or for educational purposes. It is always best to check the specific laws in your country before downloading music from YouTube.

  1. Are there any risks associated with downloading music from YouTube?

There are some risks associated with downloading music from YouTube, including the possibility of downloading malware or a virus, or of downloading a low-quality or incorrect version of the song. Additionally, some YouTube to MP3 converters may collect personal information or display ads, which can be both annoying and potentially harmful. To minimize these risks, it is important to use a reputable and reliable YouTube to MP3 converter.

  1. Can I download music from YouTube to my iPhone or Android device?

Yes, you can download music from YouTube to your iPhone or Android device. The process is similar to downloading to a computer, but you will need to use a compatible YouTube to MP3 converter that works with your device. Once the MP3 file has been generated, you can transfer it to your device and play it using your preferred music player.

  1. How do I know if the MP3 file I downloaded is of good quality?

The quality of the MP3 file you download from YouTube will depend on the quality of the original video and the YouTube to MP3 converter you use. Some YouTube to MP3 converters claim to offer high-quality MP3 files, but in some cases, the quality may still be lower than expected. To ensure the best quality, it is important to choose a reputable and reliable YouTube to MP3 converter and to verify that the original video is of high quality.

  1. Can I download a full album from YouTube?

Yes, you can download a full album from YouTube, but it will require downloading each individual song from the album. To download an album, you will need to find each song on YouTube, copy the link, and then convert each song to an MP3 file using a YouTube to MP3 converter. Once you have all the MP3 files, you can then organize them into an album on your device.

In conclusion, downloading music from YouTube can be a great way to access your favorite songs and music, but it is important to be aware of the potential risks and to ensure that you are using a reputable and reliable YouTube to MP3 converter. By following the steps outlined in this guide, you can safely and easily download music from YouTube to your device.

Categories
TIPS & TRICKS YOUTUBE YOUTUBE TUTORIALS

iPhone Screen Recording: A Beginner’s Guide to Recording Like a Pro

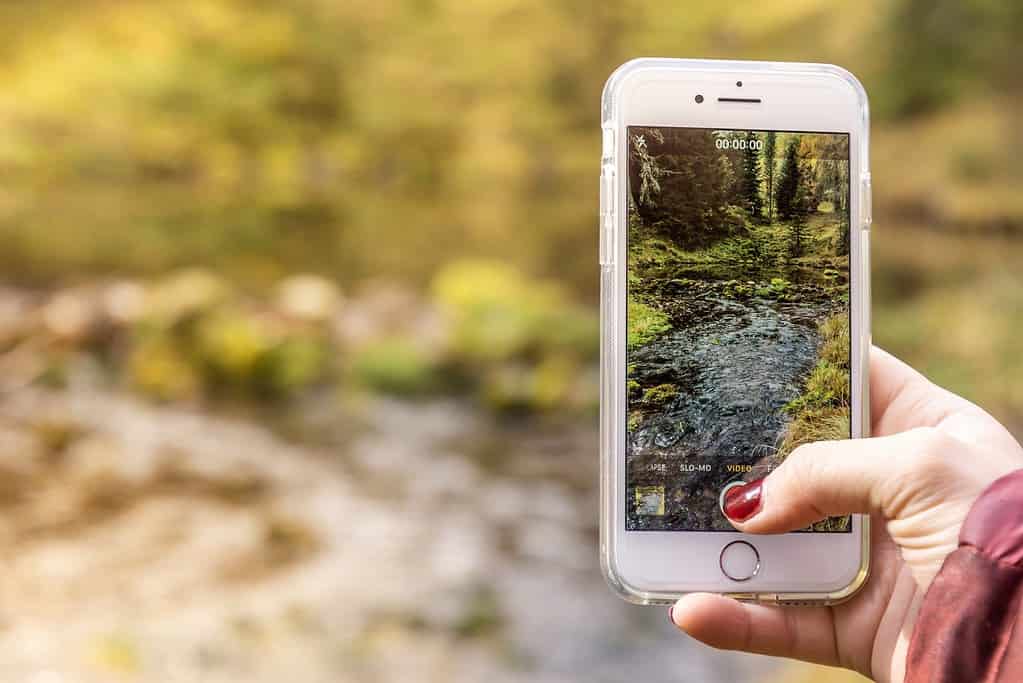
Screen recording is a great way to capture what’s happening on your iPhone, whether it’s a tutorial, a high score in a game, or a funny conversation.

Here’s a step-by-step guide on how to screen record on an iPhone:

  1. Open the Control Center: Swipe down from the top-right corner of your iPhone screen (or up from the bottom on iPhone X and later) to open the Control Center.
  2. Tap the “Screen Recording” icon: It looks like a small circle with two concentric circles inside. You’ll see a countdown timer appear on the screen, giving you a few seconds to get to the screen or app you want to record.
  3. Start recording: Once the countdown timer ends, the screen recording will begin. You’ll see a red bar at the top of your screen, indicating that the recording is in progress. To stop the recording, tap the red bar and then tap “Stop.”
  4. Edit and share your recording: Once you’ve stopped the recording, it will be saved in the Photos app. You can then edit and share the recording with your friends and family.

Some additional tips:

  • To record audio while recording your screen, press deeply (3D Touch) or long press on the Screen Recording icon in the Control Center and turn on the Microphone Audio toggle switch.
  • To record a specific portion of your screen, use the Markup feature to draw a frame around the area you want to record.
  • To add a video of yourself to the recording, use the Picture in Picture feature to display a video of yourself as you record the screen.

And that’s it! You are now a pro at screen recording on your iPhone. You can now create your own tutorials, record funny moments with your friends, or even create a reaction video to your favourite TikToks.

iPhone Screen Recording: A Beginner's Guide to Recording Like a Pro 1

Here are some frequently asked questions (FAQs) about screen recording on an iPhone:

How do I find my screen recordings?

Once you stop a screen recording, it will be saved in the Photos app. You can access your recordings by opening the Photos app and navigating to the “Videos” album.

How can I edit my screen recordings?

You can edit your screen recordings using the built-in editing tools in the Photos app. You can trim the video, add filters, and adjust the volume. For more advanced editing, you can use third-party video editing apps.

Can I record my voice while recording the screen?

Yes, you can record your voice while recording the screen. To do this, open the Control Center, press deeply (3D Touch) or long press on the Screen Recording icon, and turn on the Microphone Audio toggle switch.

Can I record a specific part of the screen?

Yes, you can record a specific part of the screen. To do this, open the Control Center, press deeply (3D Touch) or long press on the Screen Recording icon, and use the Markup feature to draw a frame around the area you want to record.

Can I add a video of myself to the recording?

Yes, you can add a video of yourself to the recording using the Picture in Picture feature. To do this, open the Control Center, press deeply (3D Touch) or long press on the Screen Recording icon, and turn on the Picture in Picture toggle switch.

Can I record games or apps with a subscription?

It depends on the terms of service of the app or game, some apps don’t allow to record content, or can have their own restrictions. You should check the app or game’s terms of service before attempting to record it.

How long can my screen recording be?

The maximum recording length is limited to the amount of storage space on your iPhone. If you run out of storage space during a recording, the recording will automatically stop.

Categories
TIPS & TRICKS YOUTUBE YOUTUBE TUTORIALS

YouTube Family Plan: Sharing is Caring (and Cost-Effective!)

YouTube is a great platform for watching videos, sharing content, and connecting with people from all over the world. But did you know that YouTube also offers a family plan?

This plan is designed for families who want to share a YouTube account without having to worry about sharing passwords or watching age-inappropriate content.

A YouTube family plan allows multiple users to share one account. This means that family members can all have their own personalized YouTube experiences, with their own watch history, recommended videos, and subscriptions.

This can be particularly useful for families with children, as parents can set up restricted mode to prevent their kids from watching age-inappropriate content.

One of the main benefits of a YouTube family plan is that it’s more cost-effective than having multiple individual accounts. With a family plan, each member gets their own YouTube account, but the cost is shared among all members. This means that you only have to pay for one account, rather than multiple accounts.

Another benefit is that parents can have more control over what their children are watching on YouTube. With restricted mode, parents can block specific channels or videos, and set up a passcode to prevent children from turning off the restriction.

This can give parents peace of mind when it comes to their children’s online safety.

When it comes to a comparison between a solo account and a family plan, a family plan is more suitable for a family, especially when there are children involved.

With a solo account, one user has access to the account, and the content watched, recommendations, subscriptions, and other features are personalized for that user, while with a family plan, multiple users can have access to the same account, and it can be customized to fit the needs of each member.

Maximizing Your Instagram Presence: A Guide to Optimizing Your Account 1

In conclusion

A YouTube family plan is a great option for families who want to share a YouTube account while maintaining individualized experiences and parental controls.

It’s more cost-effective than having multiple individual accounts, and can give parents peace of mind when it comes to their children’s online safety.

If you’re part of a family and you’re considering a YouTube family plan, it’s definitely worth checking out!

Frequently asked questions (FAQs) about the YouTube family plan

How do I set up a YouTube family plan?

You can set up a YouTube family plan by going to the YouTube settings, and then click on “Family Link” section, follow the prompts and invite the members of your family to join the plan.

How many people can be on a YouTube family plan?

A YouTube family plan can have up to six members.

Can I remove a member from my YouTube family plan?

Yes, you can remove a member from your YouTube family plan by going to the Family Link section on YouTube settings, and then click on the “Remove” button.

Can I have a family plan for a YouTube channel?

No, a family plan is for a YouTube account, not a channel. Each member of the plan can have their own channels.

Will the members of my YouTube family plan be able to see my watch history and subscriptions?

No, each member of a YouTube family plan has their own watch history and subscriptions.

Can I set up restricted mode for my children on a YouTube family plan?

Yes, parents can set up restricted mode for their children on a YouTube family plan and set a passcode to prevent children from turning off the restriction.

Can I have a YouTube family plan and a YouTube Premium account?

Yes, members of a YouTube family plan can also have their own YouTube Premium accounts.

How much does a YouTube family plan cost?

A YouTube family plan costs the same as a single account, but it can be shared among multiple members, so the cost per member is less than an individual account.

Categories
LISTS YOUTUBE YOUTUBE TUTORIALS

100 Unique YouTube Channel Ideas

Having a unique and interesting YouTube channel idea is important because it helps you stand out from the millions of other channels on the platform. A unique theme or focus for your channel can help attract and retain viewers, as it gives them a reason to watch your content rather than someone else’s. It also helps you establish your brand and identity on the platform, and allows you to build a loyal audience of followers who are interested in the specific content you create.

Additionally, having a unique channel idea can make it easier to come up with content ideas, as it gives you a specific theme or focus to work with. It can also make it easier to monetize your channel, as you can create content and products that are tailored to your specific audience and theme.

Overall, having a unique and well-defined channel idea can help you create content that resonates with viewers, build a strong and loyal audience, and establish your brand on the platform.

Here are 100 unique YouTube channel ideas to get you inspired…

  • A cooking channel featuring healthy and easy recipes
  • A DIY home improvement channel with tutorials and projects
  • A fashion channel with style tips and outfit ideas
  • A travel channel showcasing different destinations and cultures
  • A beauty channel with makeup tutorials and skincare tips
  • A comedy channel with sketches and stand-up comedy
  • A sports channel with analysis and highlights
  • A gaming channel with video game reviews and Let’s Plays
  • A health and wellness channel with exercise routines and nutrition advice
  • An educational channel with lessons on various subjects
  • A gardening channel with tips and tricks for growing plants
  • A music channel with music performances and interviews
  • A personal finance channel with money management advice
  • A science and technology channel with discussions on current events and innovations
  • A food and drink channel with restaurant reviews and recipes
  • A car enthusiast channel with vehicle reviews and modifications
  • A parenting and family channel with advice and activities for families
  • A fitness channel with workout routines and fitness challenges
  • A home and garden channel with home decor and landscaping ideas
  • A business and entrepreneurship channel with tips and strategies for starting and running a business
  • A history channel with documentaries and lectures on historical events and figures
  • An art channel with tutorials and interviews with artists
  • A literature and book club channel with book reviews and discussions
  • A parenting and family channel with tips and advice for raising children
  • A beauty and fashion channel with makeup tutorials and style tips
  • A cooking and food channel with recipes and restaurant reviews
  • A travel and adventure channel with destination guides and travel vlogs
  • A health and wellness channel with exercise routines and nutrition advice
  • A sports and fitness channel with workout routines and sports analysis
  • A personal development and self-care channel with tips and strategies for personal growth
  • A home and garden channel with DIY home improvement projects and landscaping ideas
  • A business and entrepreneurship channel with tips and strategies for starting and running a business
  • A science and technology channel with discussions on current events and innovations
  • A gaming channel with video game reviews and Let’s Plays
  • A music and entertainment channel with concerts and celebrity interviews
  • An educational channel with lessons on various subjects
  • A pet and animal channel with tips and advice for caring for pets
  • A fashion and beauty channel with style tips and makeup tutorials
  • A travel and adventure channel with destination guides and travel vlogs
  • A personal finance and money management channel with tips and strategies for managing finances.
  • A DIY and craft channel with tutorials and projects
  • A cooking and recipe channel with healthy and easy recipes
  • A gardening and landscaping channel with tips and tricks for growing plants
  • A health and wellness channel with exercise routines and nutrition advice
  • A beauty and skincare channel with tutorials and product recommendations
  • A comedy and entertainment channel with sketches and stand-up comedy
  • A sports and fitness channel with workout routines and sports analysis
  • A gaming and technology channel with video game reviews and tech reviews
  • A personal development and self-care channel with tips and strategies for personal growth
  • A home and garden channel with DIY home improvement projects and landscaping ideas
  • A business and entrepreneurship channel with tips and strategies for starting and running a business
  • A science and technology channel with discussions on current events and innovations
  • A music and entertainment channel with concerts and celebrity interviews
  • An educational channel with lessons on various subjects
  • A pet and animal channel with tips and advice for caring for pets
  • A fashion and beauty channel with style tips and makeup tutorials
  • A travel and adventure channel with destination guides and travel vlogs
  • A personal finance and money management channel with tips and strategies for managing finances
  • A cooking and food channel with restaurant reviews and recipes
  • A DIY and home improvement channel with tutorials and projects.
  • A health and wellness channel with exercises routines and nutrition advice
  • A beauty and skincare channel with tutorials and product recommendations
  • A comedy and entertainment channel with sketches and stand-up comedy
  • A sports and fitness channel with workout routines and sports analysis
  • A gaming and technology channel with video game reviews and tech reviews
  • A personal development and self-care channel with tips and strategies for personal growth
  • A home and garden channel with DIY home improvement projects and landscaping ideas
  • A business and entrepreneurship channel with tips and strategies for starting and running a business
  • A science and technology channel with discussions on current events and innovations
  • A music and entertainment channel with concerts and celebrity interviews
  • An educational channel with lessons on various subjects
  • A pet and animal channel with tips and advice for caring for pets
  • A fashion and beauty channel with style tips and makeup tutorials
  • A travel and adventure channel with destination guides and travel vlogs
  • A personal finance and money management channel with tips and strategies for managing finances
  • A cooking and food channel with restaurant reviews and recipes
  • A DIY and home improvement channel with tutorials and projects
  • A gardening and landscaping channel with tips and tricks for growing plants
  • A health and wellness channel with exercises routines and nutrition advice
  • A beauty and skincare channel with tutorials and product recommendations.
  • A comedy and entertainment channel with sketches and stand-up comedy
  • A sports and fitness channel with workout routines and sports analysis
  • A gaming and technology channel with video game reviews and tech reviews
  • A personal development and self-care channel with tips and strategies for personal growth
  • A home and garden channel with DIY home improvement projects and landscaping ideas
  • A business and entrepreneurship channel with tips and strategies for starting and running a business
  • A science and technology channel with discussions on current events and innovations
  • A music and entertainment channel with concerts and celebrity interviews
  • An educational channel with lessons on various subjects
  • A pet and animal channel with tips and advice for caring for pets
  • A fashion and beauty channel with style tips and makeup tutorials
  • A travel and adventure channel with destination guides and travel vlogs
  • A personal finance and money management channel with tips and strategies for managing finances
  • A cooking and food channel with restaurant reviews and recipes
  • A DIY and home improvement channel with tutorials and projects
  • A gardening and landscaping channel with tips and tricks for growing plants
  • A health and wellness channel with exercises routines and nutrition advice
  • A beauty and skincare channel with tutorials and product recommendations
  • A sports and outdoor adventure channel with tips and advice for various outdoor activities
  • A personal growth and self-improvement channel with tips and strategies for personal development.
Categories
YOUTUBE YOUTUBE TUTORIALS

YouTube Channel ID and User ID [What is it? & How to use it]

A YouTube channel ID is a string of letters and numbers that uniquely identifies a YouTube channel. It is used to distinguish one channel from another and to associate a channel with its owner.

To find your YouTube channel ID:

  1. Go to YouTube and sign in to your account.
  2. Click on your profile picture in the top right corner of the screen and select “My channel” from the dropdown menu.
  3. Your channel ID will be displayed in the URL of your channel page. It will be a string of letters and numbers after “channel/”. For example, if the URL of your channel page is “https://www.youtube.com/channel/UC1234567890“, then your channel ID is “UC1234567890”.

There are several reasons why you might need to find your YouTube channel ID:

  1. To link your channel with other social media accounts or websites, you may need to provide your channel ID.
  2. Some YouTube features and tools, such as channel art templates and channel analytics, require you to enter your channel ID.
  3. Some third-party apps and services, such as YouTube marketing tools, may ask you to provide your channel ID to access certain features or data.

There are several ways you can use your YouTube channel ID:

  1. You can use it to create a custom URL for your channel, which makes it easier for people to find and remember your channel.
  2. You can use it to track the performance of your channel and its videos using YouTube Analytics.
  3. You can use it to promote your channel and its videos on other websites and social media platforms by sharing links that include your channel ID.
  4. You can use it to access YouTube API services and build custom tools and integrations for your channel.

A YouTube user ID is a string of letters and numbers that uniquely identifies a YouTube user. It is used to distinguish one user from another and to associate a user with their account.

To find your YouTube user ID:

  1. Go to YouTube and sign in to your account.
  2. Click on your profile picture in the top right corner of the screen and select “My channel” from the dropdown menu.
  3. Your user ID will be displayed in the URL of your channel page. It will be a string of letters and numbers after “user/”. For example, if the URL of your channel page is “https://www.youtube.com/user/abc123“, then your user ID is “abc123”.

There are several reasons why you might need to find your YouTube user ID:

  1. Some YouTube features and tools, such as channel art templates and channel analytics, require you to enter your user ID.
  2. Some third-party apps and services, such as YouTube marketing tools, may ask you to provide your user ID to access certain features or data.
  3. You may need to provide your user ID to link your account with other social media accounts or websites.

There are several ways you can use your YouTube user ID:

  1. You can use it to create a custom URL for your channel, which makes it easier for people to find and remember your channel.
  2. You can use it to track the performance of your channel and its videos using YouTube Analytics.
  3. You can use it to promote your channel and its videos on other websites and social media platforms by sharing links that include your user ID.
  4. You can use it to access YouTube API services and build custom tools and integrations for your channel.

Note that the YouTube user ID is different from the YouTube channel ID, which is a separate string of letters and numbers that identifies a YouTube channel. The channel ID is usually longer and begins with “UC”, while the user ID is usually shorter and does not begin with “UC”.

I hope this information is helpful! Let me know if you have any other questions.

Categories
HOW TO MAKE MONEY ONLINE YOUTUBE YOUTUBE TUTORIALS

How To Sell Merchandise Directly on YouTube

To set up the merchandise shelf on your YouTube channel, follow these steps:

  1. Make sure you have a Google Merchandise Store account. You’ll need to use this account to manage your merchandise on YouTube.
  2. Go to your YouTube channel’s dashboard and click on the “Channel” tab.
  3. Under the “Channel” tab, click on the “Merchandise” option.
  4. Click on the “Connect a Merchandise Store” button.
  5. Select the Google Merchandise Store account that you want to use for your merchandise shelf.
  6. Once you’ve connected your store, you can start adding products to your merchandise shelf by clicking on the “Add Product” button.
  7. Fill out the product information, including the product name, price, and description. You can also upload an image of the product.
  8. When you’re finished, click on the “Publish” button to add the product to your merchandise shelf.
  9. Repeat this process to add more products to your merchandise shelf. You can also edit or delete existing products by clicking on the “Edit” or “Delete” buttons next to the product.

That’s it! Your merchandise shelf should now be set up and ready to go. You can promote your merchandise to your viewers by including links to your merchandise shelf in your video descriptions, or by promoting your products in your videos.

How To Sell Merchandise Directly on YouTube

In addition to the Google Merchandise Store, there are a number of other platforms that you can use to sell merchandise on your YouTube channel, such as:

  1. Teespring: This platform allows you to design and sell a wide range of custom merchandise, including t-shirts, hoodies, and more.
  2. Redbubble: This platform offers a variety of customizable products, including t-shirts, phone cases, stickers, and more.
  3. Society6: This platform offers a wide range of customizable products, including art prints, phone cases, and home decor items.
  4. Zazzle: This platform allows you to create custom merchandise, including t-shirts, mugs, and more.
  5. Printful: This platform allows you to design and sell custom merchandise, including t-shirts, hats, and more.

You can also consider using a fulfillment service, such as Printify or Printful, which will handle the production and shipping of your merchandise for you. This can be a good option if you don’t want to deal with the logistical aspects of merchandise sales.

To use one of these platforms or services to sell merchandise on your YouTube channel, you’ll need to sign up for an account and create a store. You’ll then be able to add products to your store and link to them from your YouTube channel.


Categories
HOW TO GET MORE VIEWS ON YOUTUBE TIPS & TRICKS YOUTUBE YOUTUBE TUTORIALS

Why Do YouTubers Zoom in and Out?

If you’ve ever watched a YouTuber in the conventional mould of YouTubers—the kind of frenetic, upbeat YouTuber who talks fast and stares directly into the camera in front of a carefully arranged background—you’ve probably noticed the way they frequently zoom in on their face. Perhaps you’ve even wondered why.

If you are an aspiring YouTuber, you hopefully have wondered why, since it is something that is used all over YouTube, implying there is a good reason for it.

But it is not enough to simply ape things you see if you want to be successful; you need to understand those things. Otherwise, you may find yourself using them wrong, and looking pretty silly in the process.

In this post, we are going to take a closer look (pun very much intended) at YouTubers’ tendency to zoom in and out during their videos, why they do it, what benefits it might have, and whether you should use it in your videos. So, without further preamble, let’s expose the truth!

Why do YouTubers zoom in and out? – Zooming in and out can help with the pace of the video and hide mistakes. You can also use it to add emphasis to something said like jokes or something dramatic. Zoom cuts can also make for a more distinct look and feel in some niches verses simple stand and shoot videos.

YouTube Best Time to Upload 4

Why Do YouTubers Zoom in and Out?

There are several reasons why YouTubers work zooming in and out into their videos, and we’re going take a look at some specific examples in a second, but we can confidently say that almost all of the time you see a zoom-in used in a YouTube video, it is for aesthetic reasons. This is a very broad reason, of course, but it covers just about every instance of using a zoom-in in a video. The aesthetics of your video play a huge part in how successful they are, so it makes sense that a popular technique for editing would be used by a lot of YouTubers. So let’s take a look at why it’s popular.

Hiding Cuts

Starting off with one of the least likely reasons a YouTuber might use this technique, zooming in and out can help to disguise cuts in the video. Any time you make a small cut in a video, it is incredibly obvious to the viewer if the scene remains the same. This is because you get an instant change from one frame to the next, and it is a little jarring for the viewer. If you change the next frame more substantially—for example, if you cut to a zoomed-in shot—the fact that the next frame is significantly different to the previous one makes the fact that there was a cut less obvious.

Now, we said that this is one of the least common reasons that a YouTuber might use zooming in their videos, and that is because jump cuts have become a regular part of YouTube, so there isn’t typically much of a need to hide them. Still, for the YouTubers who want to maintain a little more mystery about their editing process, this is one method to do that.

Emphasis

From time to time, a YouTuber will make a pointed facial expression. It may be during a video talking about current events, and the YouTuber has just mentioned someone doing something particularly silly, for example. In these instances, a quick zoom in on the YouTuber’s face adds emphasis to the moment, reinforcing the non-verbal opinion that the YouTuber is presenting.

Comedic Effect

This one is very similar to the above example of emphasis, with the main difference being that the expression the YouTuber is pulling does not have to be intentional. Sometimes the YouTuber will notice they have pulled an amusing face unintentionally and will use a zoom-in to draw attention to it. Usually, in these cases, it will be apparent that the YouTuber did not mean to make the face, and that they themselves are the butt of the joke.

Add Variety

If you’ve ever watched a mainstream news program, you might have noticed that they frequently cut from one angle to another. This is because having one continuous show for long periods quickly becomes monotonous, and the simple act of changing the camera angle breaks things up and makes it visually more interesting.

YouTubers faced the same problems when they started making vlog videos in the early days of the platform, but most people could not afford to purchase a multi-camera set up that would allow them to switch angles while recording. Indeed, many YouTubers can’t even afford a decent camera when they first start out, let alone multiple cameras.

Recording multiple takes of the same video with the camera in different positions is not a feasible alternative, especially since many videos are not scripted, and it would be almost impossible to ensure everything fit together coherently. And that is where zooming comes in.

In precisely the same way that cutting to different angles works, zooming in and out breaks up the content visually, adding a little interest and making things look less monotonous. And, since zooming can be done entirely digitally, it can be done with a single camera and one take, which is ideal for smaller YouTubers who don’t have thousands to spend on their camera setup.

Good Places to Record Videos in Your Home

Should I Use Zooming in my Videos?

The answer to this question is simple enough to say, not so simple to execute. Whether or not you should use zooming in your videos will be entirely determined by whether it adds anything to your content. If it doesn’t noticeably improve your content, there is no reason to add it.

Of course, improvement is a subjective term, and it may be that the “improvement” it makes is just that you prefer the look of the video. That is why we would always recommend getting second opinions whenever you can. Be sure to take those second opinions onboard, and get reasons for why your testers feel the way they do. It may be that, ultimately, you get second opinions on your new format and decide to go against the general consensus, but you should do so fully informed and aware of why the people who looked over your video said what they said.

Zooming Tips

If you are going to employ zooming in your videos, you might like a few tips on making the best use of it, so that’s exactly what we’ve got here.

Camera Quality

Okay, we know we said near the top that one of the reasons zooming became prevalent on YouTube was because YouTubers didn’t have the money for expensive multi-camera setups, so saying “get a good camera” might seem like a bad tip. Remember, these are just ways to improve and get the best video you can; if you can’t use one of these tips, don’t worry. It doesn’t mean you can’t use zooming in your videos.

But yes, camera quality. We’re assuming that you’re not planning to zoom in and out in real-time as you record, which means you’ll be doing it in the edit. If you have ever zoomed in on a picture (and, in these days of powerful handheld phones, who hasn’t?) you might have noticed that the more you zoom in, the worse the quality of the picture gets.

The same thing applies to video, which is essentially just a lot of images shown quickly one after the other. The closer you digitally zoom in to your face, the grainier and more pixellated your video will come. If you are starting off with an already grainy video, it’s going to get very bad.

It’s worth noting that some YouTubers do this intentionally as a stylistic choice. You may want to do this as well, but we can’t really guide you on artistic choices.

Don’t Overdo It

This should be fairly obvious to most of you, but over-using the zoom-in will quickly become tiresome to your viewers. Having a lot of zoom-ins in a short space of time for comedic effect may be fine, but if you bounce in and out continually throughout the whole video, you are going to annoy your viewers.

Don’t Get Too Close (or Not Close Enough)

If you zoom in so far that the viewers are getting nothing but a blurry close-up of your nose-pores, or you barely zoom in at all, and the view doesn’t appear to have perceptibly changed, you risk losing any benefit you might have gotten from the zoom-in, as well as making your video seem awkward and badly put together.

The right amount of zoom will depend on the effect you are going for, but if you are barely zooming in at all, you may want to ask yourself if a zoom-in is right for what you are doing at that point in the video.

Other Editing Tricks To Use

Zooming in is but one trick up the sleeve of your average YouTuber, and making use of a wide variety of techniques can help to give your video that special sauce that separates it from other videos in your niche.

We’ve talked at length about zooming in, but what of the other methods you commonly see on YouTube channels? We’ll save the details for a post on editing, but we thought we’d at least touch on some of the other methods here.


Jump Cut

Another technique that has become synonymous with YouTube is the jump cut. This involves cutting from one part of a video to another.

It is distinctive from a smash cut because it is not cutting to a new scene but rather skipping over something that has happened in this scene.

A common example is a vlogger talking directly to the camera who might cut out a bit they thought felt stilted or unnecessary, or even parts where they sneezed or messed up their lines. Jump cuts tend to add a sense of speed to a video since they cut out long pauses and things that might otherwise have broken up the flow of the content.

Funky Transitions

When you are transition from one scene to another, you might want to make use of interesting transitions, rather than just smash cutting from to the other. If you are using an application like Adobe Premiere, there will be a lot of built-in transitions that you can simply drag and drop into your video. Beware, however, these transitions can often appear tacky and cheap because of how often they have been used.

If you can tie your transitions into things that are happening in the video—a slide swipe timed to follow the swipe of a hand, for example—that can also add a nice touch to your content.

Sound Effects

This is another technique that belongs firmly in the category of “don’t overdo it,” but the occasional sound effect can add a little flavour to your videos. It might be something like adding the sound of a smashing plate when something is knocked off a table. In this case, the more unlikely it is that the knocked off thing would make that much noise, the better.

Using Silence

If you, like many, use background music in your videos, don’t be afraid to make creative use of silence in your videos. If you are talking over the music, and you suddenly mute the music at a certain bit of speech, the abrupt silence draws the attention of the viewer. This can be used for emphasis, but like sound effects, should not be over-used.

Final Thoughts

Zooming in and out, like jump cuts, smash cuts, and a host of other visual tools is just another way to add a little visual interest to your videos.

It just happens to be a method that can be achieved without the need for expensive equipment or professional-grade software, which is a massive part of why it has become so prevalent on YouTube—a platform that has been responsible for countless people who could not afford an expensive camera in the beginning making their fortune.

Like all visual tools, zooming in should not be over-used, as it will quickly become tiresome for your viewers, and maybe the reason they switch off. And, once you have lost a viewer because your video irritated them, they are as good as gone for good on a platform with as many options as YouTube.

Categories
TIPS & TRICKS YOUTUBE YOUTUBE TUTORIALS

Embed a YouTube Video Without Suggested Videos

One of the great things about YouTube is the ability to embed videos on other sites.

Not only does it open up a whole new realm of possibilities for viewer retention if you choose to allow your videos to be embedded, but it will enable you to incorporate useful videos into your blogs and other content.

To do this, all you need to do is add “?rel=0” to the end of the URL in your embed code. As an example, here is the embed code that YouTube outputs for which we have added the argument and highlighted it so you can see where it needs to go;

<iframe width=”560″ height=”315″ src=”https://www.youtube.com/embed/PO9rEOcWo6M?rel=0” frameborder=”0″ allow=”accelerometer; autoplay; encrypted-media; gyroscope; picture-in-picture” allowfullscreen></iframe>

How to Embed a YouTube Video Without Suggested Videos 3

In the past, YouTube has been very relaxed about how their content is shown, making for an excellent resource for those who need video content but can’t host it themselves.

Unfortunately, things are a little less relaxed these days.

One symptom of that is a change in YouTube’s attitude to displaying recommended videos on embedded videos.

Specifically; you used to be able to opt-out of having recommendations show up on embedded content, but that option has gone.

It used to be the case that you could click a checkbox when getting your embed link to let YouTube know you didn’t want recommendations popping up at the end, or, if you were pressed for time and knew your stuff, simply add a “rel=0” argument to the URL.

We’re sorry to say there is not presently a way around this change in YouTube’s thinking. But, as with many YouTube limitations, there are alternative approaches to consider, and information to unpack.

We can’t tell you how to embed a YouTube video without suggested videos popping up at the end, but we can help you understand why this is the case now, and how to make the most of a bad situation.

YouTube Tips for Teachers 4

Why Would You Want to Remove Recommended Videos From Embedded Content?

The primary reason you might want to prevent recommended videos from showing up on embedded videos is if you are making video content specifically as a companion to something external to YouTube.

This could be an accompanying video for a written tutorial, or a short clip from your phone of an event you have written about in your blog.

In cases like these, you might not want things popping up that could lead your viewers away from your site. Suppose you go to the trouble of creating a companion video for your blog post.

In that case, you almost certainly don’t want people clicking on an unrelated recommended video at the end and falling down the YouTube rabbit hole, losing interest in your content.

Retention is one of the most significant factors of success when making online content of any medium. A small number of people who view a lot of your content can be worth considerably more than a large number of people who only look at one thing and never come back.

Turning recommended videos off didn’t guarantee that your blog or site would retain viewers after the video was finished, but it at least removed the possibility of them being lured away by a keyboard playing cat!

Why Did YouTube Make This Change?

Though we’re confident we can accurately guess why YouTube decided to force recommended videos on embedded content, it’s worth mentioning that we are guessing. YouTube has its moments when it comes to transparency, but they don’t explain every action they take.

Ironically, the most likely reason they made the change to force recommended videos into embedded content is the very same reason we mentioned above for why someone might want to remove them; retention.

There are many metrics that YouTube consider important when judging the success of a video or channel, but retention is up there among the big ones. In other words, if a viewer arrives on YouTube, watches the first minute of a video, and leave the site never to return, YouTube probably isn’t going to recommend that video much in future.

YouTube wants people to stay on their platform because the longer people are on YouTube or watching YouTube videos, the more opportunity YouTube has to serve them ads and make money. If they allow you to disable recommended videos on embedded content, whether or not a viewer continues watching YouTube content is entirely out of YouTube’s hands, and they don’t like that. Sure, filling their screen with recommended videos doesn’t guarantee the viewer will stick around, but it does increase the chances. And at least YouTube got to try.

How to Embed a YouTube Video Without Suggested Videos

Not Fair?

The first reaction to learning YouTube has made this change is often that it isn’t fair for them to force you to show recommended content on your site in this way.

It’s worth remembering that YouTube is essentially providing a very expensive service for free. Very few free services come without compromise. For example, to watch a YouTube video, you have to accept that there will be ads. However, if you decide to pay for YouTube Premium, you will no longer receive ads, because YouTube is using your subscription fee instead of the ad revenue you might have generated.

It may not seem fair at first glance, but the unavoidable reality is that YouTube has to pay its bills like every other company, and this is just another way they ensure they can keep doing that without having to charge you to use their service.

It is also worth noting that, if YouTube were a subscription-only service, they would not need to do things like this. Granted they probably wouldn’t allow embedded videos at all, but they wouldn’t need to take steps to keep people on their platform for as long as possible. Consider Netflix, who are entirely subscription-based. They are getting paid whether you are on their service for five minutes of fifty hours. In fact, in that business model, it actually becomes beneficial to have users spend less time on their platform since they get paid the same subscription fee regardless but more watch time means more costs in bandwidth.

Silver Lining?

So, you can’t disable recommended videos in your embedded content, but you might not be forced to accept that YouTube is going to serve up other YouTuber’s content on your website.

We mentioned above that the way you would have removed recommended videos in the past was to either check the option when you get your embed link or add an argument to the URL. Well, that argument still has a purpose. Now, if a video has the “rel=0” argument, the recommendations shown will only be from the same channel as the video that is being embedded. It may not be perfect, but at least your viewers will be getting lured away by more of your content.

To do this, all you need to do is add “?rel=0” to the end of the URL in your embed code. As an example, here is the embed code that YouTube outputs for which we have added the argument and highlighted it so you can see where it needs to go;

<iframe width=”560″ height=”315″ src=”https://www.youtube.com/embed/PO9rEOcWo6M?rel=0” frameborder=”0″ allow=”accelerometer; autoplay; encrypted-media; gyroscope; picture-in-picture” allowfullscreen></iframe>

There is no option for this in the settings you are presented with when you click to embed the video, so you will have to add the code manually. You will also need to be sharing a video from a channel with at least one other video for this to work—YouTube can’t recommend other videos from the same channel if there aren’t any!

It’s also worth noting that the above method only applies to situations where you are inputting the full embed code. If you are using a platform like WordPress, the embed code that is part of the platform may not recognise arguments or may overwrite your arguments with its own.

Auto Draft 41

Are There Alternatives?

Unfortunately, not if you want to use YouTube to embed your videos. You could use other platforms, such as Vimeo, or DailyMotion, but those platforms have their own foibles to deal with, and this is a YouTube blog, so we’ll leave that to someone else. You could always host the videos yourself, but this can be a very costly road to go down, especially if you expect to get a lot of traffic.

Video hosting requires a lot of bandwidth, not to mention storage, hence why YouTube is so keen to squeeze the most revenue from each viewer. If you are dealing with a one or two videos on a low traffic site, you might be able to get away with hosting the videos yourself. If you have plenty of traffic on your site, however, hosting your own videos could very quickly land you with a huge bill from going over the bandwidth allowance that your web host provides.

The best option, in our opinion, is to use the method outlined above to ensure any recommended content is from your channel, and make the most engaging content you can. If everything goes to plan, your viewers won’t disappear off into YouTube Land because your content will have held their attention. And if they do, they’ll be disappearing off to another of your videos.

One final thought on alternatives; consider how important it is that your post exists outside of YouTube. If it is relatively short, consider putting it in the video description rather than an external post. This eliminates the problem of rogue YouTube suggestions at the end of the video, and it could help with the SEO of your video!

When are Embedded YouTube Videos Useful?

If you’re sitting there wondering why anyone might want embedded videos on their site, first off; kudos for reading this far into the post! There are plenty of situations where embedded videos are useful, and we’re going to give you a few examples. Before we do that, we’ll say that the reason for embedded videos is nearly always the same; companion content.

It may be that the page you are embedding the video on is the companion, rather than the video itself (example below), but this is nearly always the fundamental reason you would do this.

Video Alternatives

The first and most obvious situation where an embedded video would be used is when the video and the written content on the page it is being embedded are the same content in different mediums.

The video would usually come with a caption informing the reader that there is a video version of the post if they prefer, with a similar note about the written version in the description of the video on YouTube.

Additional Content

Videos can also be used to provide additional detail or context to an article. For example, if you were writing a post about camping in the woods, you might embed a video on how to build a campfire, rather than write a whole section about it in the post itself.

This is particularly useful for reducing the amount of text your post needs to get your information across while not reducing the amount of information you are conveying.

Video Breakdowns

Though the video is being embedded in your post, there is no rule that states that the video has to be secondary content. The text could be supplementary to the video, such as expanding on things said in the video. It could even be a breakdown of the video, such as a deep dive on a newly released movie trailer.

Demonstrations

Typically more common on business websites than blogs, demonstration videos can help to show a reader what the text on the page is talking about. For example, a business that sells high-tech computer-controlled heavy machinery might embed a video showing that machinery in action.

Final Thoughts

We don’t like not being able to answer the question being posed at the top of the post. Unfortunately, when it comes to how to embed a YouTube video without suggested videos rearing their head at the end, there is no solution to get around it, only alternatives and compromises.

As with all immovable obstacles in life, this should be seen as an opportunity to grow and improve in other areas. Make your content more engaging so that people are less likely to click off to another video at the end. Make more content for your channel so you can at least take advantage of the ability to limit the suggested videos to your own content.

Any excuse to improve your content should be seen as a good thing.

Categories
SOCIAL MEDIA TIPS & TRICKS YOUTUBE YOUTUBE TUTORIALS

How To Bold YouTube Comments (Plus Strikethrough and Italics)

Sometimes plain old boring text just doesn’t cut it when you want to leave a comment on YouTube. Maybe you want to get noticed by your favourite influencer, or perhaps you want a comment to be understood by readers on a deeper level.

Whatever the reason, YouTube permits some text formatting when you leave a comment under a video. There are three effects to choose from to dress up your text; bold, italic and strikethrough.

Unlike word processors and email clients, there are no text formatting icons available with YouTube to change the style; instead, you have to type in other special characters either side of the text you want to style.

So let’s jump in and take a look at how you can format your text in a YouTube comment.

How To Add Bold Text To a YouTube Comment

Bolding words is a centuries-old technique of dressing up the visual appearance of text. Bolding strengthens the emphasis of a particular word or phrase, and you might do this because you want to highlight the importance of a point.

For example, ‘I can’t believe she did that’ sounds different in your head when you read it as ‘I can’t believe she did that’.

In the olden days, scribes used a quill and ink to hand-thicken writing to emphasise a word. Later on, printers used a different font style to emphasise words. Then, in 1845, an enhanced ‘Clarendon’ font typeface was designed, that contained an extra set of type in the same style, but bolder.

To change your text style, so it displays in bold in a YouTube comment, you need to add an asterisk (*) either side of the word or phrase. It’s important to note that you shouldn’t add in and additional spaces.

Meaning each asterisk (or star) should be next to the first and last letter of the text you want to display as bold. If you are struggling to find the asterisk (*) it’s located on most English layout keyboards as the alternative character to the number 8.

Hold down the shift key and press 8 to test it yourself.

Here is an example of bolding text. Copy and paste the following string of text into a YouTube comment yourself and hit the ‘Comment’ button to see how it looks.

Don’t mind me, I’m just figuring out how to make text *bold* !

After you’ve posted your comment, the text with the asterisks on either side is displayed in bold. The asterisks have disappeared from the posted comment, and your’s now stands out from all the drab standard text above and below it!

Note: If you want to add punctuation after a comment you have boldened, you need to add in a space after the closing asterisk. If you don’t put the space in, it will ‘break’ the instruction, and your comment will display the asterisks.

How To Italicise Text in a YouTube Comment.

Italics is a font style where the writing slopes from left to right. They were first designed in the 1500s, and Wikipedia says that using italics is ‘the print equivalent of underlining‘. Some grammatical conventions say that you should use italics when writing spoken words too, like;

Jenny bounded up the stairs and said, here I am!

Other conventions say that you should use italics when you identify something like a book or a film. One example that works for both is Harry Potter and the Philosopher’s Stone.

Whatever you choose to italicise, it’s another form of emphasis you can add to your writing. There are no hard and fast rules, though, so use it however you’d like.

To make the text display in italics, you need to follow the same process as for making text bold, but this time instead of the asterisk you should use the underscore sign (_) directly either side of the text you want to change.

The underscore is a bit of a funny character. It’s found on the same key as the minus sign, or hyphen, and is a character that a lot of people often confuse.

To get the underscore sign press the dash/minus character button while holding down the shift key. The underscore is most often found to the right of the 0 (zero) in the horizontal row of number keys.

Here is an example of italicising the text. Copy and paste the following text string exactly as it is into a YouTube comment section.

Now I’m typing in _italics_ , there really is no stopping me!

Once again, after you have clicked on the comment button, stand back and admire your newfound power. But don’t let it go to your head just yet – there is more to learn.

How To Add a Strikethrough Effect To Your YouTube Comments.

Sometimes instead of deleting something you have written, you might want to strike it out instead, to show the reader that you have changed your mind but let them still read what you previously thought.

Interestingly, the writers of the Domesday Book did strikethrough some entries with red ink. But in this situation, they were doing a medieval version of underlining rather than striking through a written word so they could use another. Conventions change over time.

Today, strikethrough is generally used in two ways. Firstly, in the usual manner, for example, The meeting will be held at Newcastle-Under-Lyme Newcastle-Upon-Tyne. Many people, though, use it for humour. Like, ‘today I have been watching Netflix in my onesie working my butt off on an essay’.

To make text display with the strikethrough effect in a YouTube comment, again you need to place a special character either side of the word you want to format. The character used for strikethrough is the minus or hyphen sign (-).

Here is an example of strikethrough text. Copy and paste the following text string exactly as it is into the YouTube comment section.

Gaze upon my glory as I perform the magic of -strikethrough- !

Click the comment button to update your entry and take a look at that lovely effect.

Advanced Usage

OK, I hope you’re sitting down for this part because it’s likely to blow your mind. You can combine all three effects into the same sentence!

I know this information may be more than some readers can handle. But let’s plough on regardless.

Here’s an example:

First they told me I couldn’t *bold* , then they said _italics_ was beyond my capabilities, and they laughed and pointed saying ‘you’ll never know -strikethrough- ’. Well *whose* _laughing_ -now- !

Use Your Powers Wisely

In all seriousness, don’t overuse text formatting in your YouTube comments. Sometimes when you learn how to do something new, you can go a little overboard and get carried away.

Additionally, formatting the whole of a long comment in bold or italic means that you will stand out, but for all the wrong reasons. Instead of drawing in attention to your comment, people will assume you are a little crazy, and ignore your comment instead.

Bold, italics, and strikethrough are there to emphasise a few words and communicate what you are saying more effectively.

Bonus: How To Add Emojis To a YouTube Comment on the Desktop Version of YouTube.

Of course, it’s easy to add emojis to your YouTube comments when using your smartphone. Smartphone keyboards aren’t physical like desktop keyboards, so it’s easy to add in extra functions and characters.

But if you’ve ever wondered how to add emojis to your youtube comments using a physical keyboard with a laptop or desktop PC? Let me tell you the secret; there are three ways.

On Apple Mac, you can bring up an emoji menu using the keyboard shortcut control+command+spacebar. This gives you access to the same group of emojis you find on your iPhone, and you can click on the popup to add in an emoji wherever the cursor is flashing.

If you use Windows 10, then there is a similar emoji menu pop-up with a keyboard shortcut. Press the Windows key plus the full-stop or semi-colon key to bring up the emoji selector.

If you don’t like either of these options, or you are on an older version of Windows, then you can copy and paste emojis directly into YouTube comments.

Go to a website like Get Emoji. This site has a list of all the standard emojis, which you can copy and paste into YouTube comments and a whole host of other social media applications.

Simply highlight the emoji you want and copy it. Then, navigate back to your YouTube comment to paste the emoji in. Voila!

So there you have it. I hope you liked this little guide to enhancing text comments for YouTube. Head over to my YouTube account now, and leave me a comment using bold, italic, or strikethrough.

Top 5 Tools To Get You Started on YouTube

Very quickly before you go here are 5 amazing tools I have used every day to grow my YouTube channel from 0 to 30K subscribers in the last 12 months that I could not live without.

1. VidIQ helps boost my views and get found in search

I almost exclusively switched to VidIQ from a rival in 2020.

Within 12 months I tripled the size of my channel and very quickly learnt the power of thumbnails, click through rate and proper search optimization. Best of all, they are FREE!

2. Adobe Creative Suite helps me craft amazing looking thumbnails and eye-catching videos

I have been making youtube videos on and off since 2013.

When I first started I threw things together in Window Movie Maker, cringed at how it looked but thought “that’s the best I can do so it’ll have to do”.

Big mistake!

I soon realized the move time you put into your editing and the more engaging your thumbnails are the more views you will get and the more people will trust you enough to subscribe.

That is why I took the plunge and invested in my editing and design process with Adobe Creative Suite. They offer a WIDE range of tools to help make amazing videos, simple to use tools for overlays, graphics, one click tools to fix your audio and the very powerful Photoshop graphics program to make eye-catching thumbnails.

Best of all you can get a free trial for 30 days on their website, a discount if you are a student and if you are a regular human being it starts from as little as £9 per month if you want to commit to a plan.

3. Rev.com helps people read my videos

You can’t always listen to a video.

Maybe you’re on a bus, a train or sat in a living room with a 5 year old singing baby shark on loop… for HOURS. Or, you are trying to make as little noise as possible while your new born is FINALLY sleeping.

This is where Rev can help you or your audience consume your content on the go, in silence or in a language not native to the video.

Rev.com can help you translate your videos, transcribe your videos, add subtitles and even convert those subtitles into other languages – all from just $1.50 per minute.

A GREAT way to find an audience and keep them hooked no matter where they are watching your content.

4. Learn new skills for FREE with Skillshare

I SUCK reading books to learn, but I LOVE online video courses.

Every month I learn something new. Editing, writing, video skills, how to cook, how to run a business – even how to meditate to calm a busy mind.

I find all of these for FREE with Skillshare – Sign up, pick all the courses you want and cancel anytime you need.

5. Shutterstock helps me add amazing video b-roll cutaways

I mainly make tutorials and talking head videos.

And in this modern world this can be a little boring if you don’t see something funky every once in a while.

I try with overlays, jump cuts and being funny but my secret weapon is b-roll overlay content.

I can talk about skydiving, food, money, kids, cats – ANYTHING I WANT – with a quick search on the Shutterstock website I can find a great looking clip to overlay on my videos, keeping them entertained and watching for longer.

They have a wide library of videos, graphics, images and even a video maker tool and it wont break the bank with plans starting from as little as £8.25 ($9) per month.

Categories
SEO SOCIAL MEDIA TIPS & TRICKS YOUTUBE YOUTUBE TUTORIALS

How to Add Captions to YouTube Videos

There are plenty of reasons why you might want to add captions to your YouTube videos beyond mere accessibility. Which is not to say, making your content more accessible to deaf and hard of hearing people is not a good enough reason alone.

We won’t try and tell you that adding captions to a video—especially a long video with a lot of words—is an easy task, but YouTube does make the process as frictionless as possible for you.

In this post we’ll go through the process with you, as well as laying out the reasons why captioning your videos is a good idea, and how you can make your life a little easier in the captioning process.

How to Add Captions to YouTube Videos

How to Add Captions to YouTube Videos

Captions can be added to your YouTube videos from within YouTube Studio.

  • Log in
  • Head over to the left-hand menu and click on “Subtitles”
  • Find the video you want to caption and give it a click.
  • Click “Add Language”
  • Next, click “Add” and begin scrubbing through your video, adding subtitles at the appropriate points.
  • Once you are done, simply click “Publish”

The subtitles editor features several shortcut keys to make your life a little bit easier, and you can find a full list of those on YouTube’s subtitles help page.

There are other options available, such as auto-syncing, which lets you add your transcription without any timecode information.

From there, YouTube uses speech recognition and your transcription to put all of the subtitles in the correct place. This is a very useful and time-saving option, but it does rely on speech recognition technology, which means it is only available for subtitles in the same language as the video.

For the same reason, it is not an ideal option for videos with poor audio quality, or where the words being said are not clear. YouTube also states that it is not recommended for videos that are over an hour long.

Another option available is to upload a closed caption file that already has the timecode information sorted. Of course, you will still have to create that closed caption file before you can upload it, but this option at least means you can use other applications to do that if YouTube’s built-in system is not to your liking. You can find details about what kind of closed caption files YouTube accepts through the subtitles help page linked above.

And, finally, YouTube has the option to caption your videos using speech recognition technology automatically. Automatic captioning has the obvious advantage of it requiring considerably less effort on your part; however, there is a tradeoff.

Speech recognition has made immense leaps and bounds in terms of accuracy over recent years, but it is not perfect, and the chances of it transcribing your video with 100% accuracy are minimal.

And, of course, the accuracy of this process will fall if the video’s audio quality is poor, or the spoken words are not particularly clear.

How to Add Captions to YouTube Videos 1

Bonus Method: Captioning Services

If you have a bit of money to spend on your YouTube channel, or if your channel is already at a stage where it is making money and you want to reinvest some of that in your channel.

You might consider a captioning service like Rev – I use them for all of my YouTube videos and can help boost audience retention and build on international audiences.

For a modest sum—typically around $1-2 per minute of video—you can have your videos captioned for you, getting all of the benefits of automatic captioning, while significantly reducing the inaccuracy rate you would expect from Google’s automatic option.

Captioning OTHER People’s Videos on YouTube

In some cases, you can also caption other people’s videos, which can be a great way to give a little back to a creator you like.

This is also an excellent opportunity to flex your bilingual muscles if you speak (or write) more than one language, or if your native language is different from that of the language used in the video.

The YouTuber in question has to allow subtitle contributions, so this is not an option on every video. For those videos where it is an option, simply head over to that video and click the menu button below the video (the three dots). In there you should see an option to “Add Translations”. Clicking that will take you to the same transcriptions editor we talked about above, with the difference that this will show any previously added or auto-generated transcriptions.

Up top you should see a “Switch Language” link which will allow you to select the language you want to add subtitles for, and, once you are ready, you can click edit and get transcribing!


Making Captioning Easier

Unfortunately, there is no way around the fact that captioning is something of a long and laborious process—especially for longer videos—but you can make your life a little easier with a bit of forward-thinking.

For example, many YouTubers plan their videos out in advance. And, if they don’t write an actual script, they at least tend to sketch out the beats of what they are going to say when the camera starts rolling.

If this is you, consider extending this process to a full script, and stick to that script when you record the video. In doing so, you will already have a transcription for your subtitles ready to go when you have uploaded your video. Remember; YouTube’s speech recognition may not be perfect, but it is incredibly close when given the correct words to use.

Writing a proper script may also help you tighten up your content, making the video more concise and digestible, while also reducing the amount of time you have to spend editing slip-ups and tangents out of your footage.

Of course, scripted videos are not for everyone. Some people are far more comfortable turning the camera on with little more than a vague shape of what needs to be said in their mind and letting the creative juices flow. We would not recommend forcing a script upon yourself if you are this kind of YouTuber.

But if you are already scripting—or partially scripting—your videos, you are most of the way there to captioning your content.

How to Add Captions to YouTube Videos 2

Why Should I Caption My YouTube Videos?

There is an ethical element to consider in the sense that, as a civilised society, it could be argued that we have a responsibility to help those who need a little extra help whenever possible.

Captioning your videos makes it possible for people who are deaf and hard of hearing—two groups of people who fall into that category of occasionally needing a little extra help—to consume your content.

However, if the ethical argument doesn’t do it for you, there are also some numbers to consider. For example, around 466 million people worldwide have disabling hearing problems. While it’s true that not all of those people will be on YouTube, it still represents a sizable portion of a potential audience that you could be reading. And this doesn’t count fringe cases, such as people who just find it easier to watch content with subtitles, or people who do not speak your language but can read it.

Another reason is search engine optimisation (SEO).

There is only so much information you can organically pack into your video descriptions, and formatting it in a way that is useful to your viewers doesn’t always lend itself to SEO.

However, the actual content of your video is as pure as it gets in terms of SEO, and research has shown that Google likely indexes YouTube subtitles, with captioned videos seeing a noticeable increase in views over videos without captions.

The final reason we will give you for captioning your videos is environmental factors. No, not the environment, we’re talking about the environment your potential viewer is in at the time they might want to watch your video.

If you’ve noticed all those videos that pop up on Facebook and Twitter that have captions burned in, you might have reached the natural conclusion that this trend implies. That is trend is more people watching videos in situations where they can’t have sound on. This could be on a busy commute when they have forgotten to bring headphones, or in a situation where they are not, strictly speaking, supposed to be checking their phone.

Viral video makers have cottoned on to this trend, and that is why they burn subtitles into those social media clips.

Putting captions on your videos allows people to consume your content in those situations where they can’t listen to it, which, for the right type of video, may represent a significant amount of views.

Am I Too Old to Start a YouTube Channel? 3

How Much of a Benefit is Video Captioning?

We teased you with talk of increasing your audience through video captioning, so it’s only natural to want to know what kind of increase we’re talking. After all, captioning can be hard work, as we’ve explained, so you may want to do a cost-benefit analysis on whether the additional work is worth your time.

Studies have shown that adequately captioned videos can see as much as a 13% boost in the first two weeks—with a 7% increase over the lifetime of video—over uncaptioned videos.

While we’re not talking about doubling your audience here, a potential increase of around 10% is nothing to be sneezed at. For a video that gets 100k views, that would mean an extra 10k views.

Of course, pure view count would be a limited way to consider the benefits of captioned videos. Those additional views also represent potential subscribers and long term viewers. Especially when you consider that people who need captions in order to enjoy content on YouTube have far fewer options available to them owed to the fact that so many YouTubers don’t caption their videos. In this respect, captioned videos are something of an underserved market.

Not quite a niche, as the interests of people who need closed captioning are just as diverse as those who don’t, but a market that will welcome additional content regardless.

How to Add Captions to YouTube Videos 3

Foreign Languages

Before putting the time and effort into translating—or paying someone else to translate—your content into other languages, take a moment to consider the usefulness of the video to the people who speak those other languages.

Generally speaking, you can assume that someone living in a particular country will at least have a basic grasp of the native language of that country.

Of course, there will always be exceptions, but you usually assume that content that is specific to a certain country doesn’t necessarily need translating to languages other than the primary language of that country.

As an example, a video about how to apply for a building permit in Texas, America, is unlikely to get many views from people in central Europe. That means it would not be the best use of your resources to have your video translated into German, as all of the countries where German is the primary language are located in central Europe.

This is not to say you should actively avoid translating your content, of course. If you have money or time to burn, it certainly won’t hurt your channel to have it translated into as many languages as possible.

But if you are having to weigh up the pros and cons of translating it to other languages, consider where those languages are spoken, and how likely your content is to be viewed in those regions.

That being said, the reverse can also be true.

As a counter-example, a video about how to obtain a building permit in Los Angeles would greatly benefit from being translated into Spanish, due to the large Mexican population there. In this case, the content is specific to a relatively small geographical region, but that region can be considered bilingual.

As with many things on YouTube, it is all a matter of doing your research and knowing your audience. You don’t need to become an expert in foreign languages to determine best when and when not to have your videos translated; a simple Google search should be enough.

Categories
TIPS & TRICKS VIDEO YOUTUBE YOUTUBE TUTORIALS

How To Make A SECOND YouTube Channel with the SAME EMAIL

You have one reliable email address and you want to make two, three, four YouTube channels. I’m here to tell you how you can add a YouTube channel using your same email address.


How To Make A SECOND YouTube Channel with the SAME EMAIL


Hello and welcome back to another video. I’m Alan Spicer your YouTube certified experts. If you want to start your YouTube channel, grow your YouTube channel, or put your brand out there, YouTube is the second largest search engine on the Internet, and you should click Subscribe then start creating.


How To Make A SECOND YouTube Channel with the SAME EMAIL


Now the time may have come for you to either split your channels into niches or to start again, but you want to still use the same email address. That’s not a problem. I can help you start a second, third, fourth channel without you needing to have multiple email addresses, let’s go to the computer.


Okay, so you’re looking to start a second channel using the same email address. What you do when you log into the account of the email address you currently have, I’m going to use this one. For example, you go up to your avatar in the top right-hand corner and click “Settings.”


How To Make A SECOND YouTube Channel with the SAME EMAIL


In here, you’ll see something like this. This is a brand new account, but it works exactly the same. You’ll see here, “Your account” and “View additional features” or “See all my channels or create a new channel.”


How To Make A SECOND YouTube Channel with the SAME EMAIL


I have a few channels that I currently manage, or a few channels that I use for testing.

Now you click “Create a new channel.”


How To Make A SECOND YouTube Channel with the SAME EMAIL


It will then ask you to pick a name and I’ll use “Pink Waffles” as an example.


How To Make A SECOND YouTube Channel with the SAME EMAIL


Click “Create.”


How To Make A SECOND YouTube Channel with the SAME EMAIL


You now have a new channel and you go through to customize the channel. You click that big “Customize Channel” button.


How To Make A SECOND YouTube Channel with the SAME EMAIL


You now have the choice to add a channel description, change the avatar, add some channel art, right?


You do it out like you normally would, and it’s all under the same email address.


So once again, I go up here, and then I can flip through any of the accounts all under the same email address.


How To Make A SECOND YouTube Channel with the SAME EMAIL


You can always see more, but that way you have multiple channels under one email address.


Final Words


Scared To Be On Camera? [WATCH THIS!]


If you need help with more YouTube features that you have overlooked, there is a playlist here, go out there, and start creating.

Categories
TIPS & TRICKS VIDEO YOUTUBE YOUTUBE TUTORIALS

How To Report Videos on YouTube – Flag YouTube Videos

You just come across a video that you think it shouldn’t be on YouTube, I’m going to teach you how to report that video and make the environment safer for everybody else.


How To Report Videos on YouTube – Flag YouTube Videos


Hello and welcome back to another video. I’m Alan Spicer, your YouTube certified expert and if you’re looking to start a YouTube channel, grow a YouTube channel, or push your brand out back into the second-largest search engine on the Internet, you should click Subscribe and start creating now.

Alan Spicer - YouTube certified expert

In an ever-changing world where there’s 400 hours worth of YouTube videos uploaded every minute, or every second, one of those stats is important, there is always going to be abuse when it comes to content.


Now, YouTube is cracking down on content, but they’re having to remove comment sections and they’re having to slap the risks of some completely innocent creators. But the best way for us as a community to police this kind of thing is to report videos that are indeed outside of the community guidelines.


Basically, if you find a video offensive, if it’s gory, if it’s violence, if it shouldn’t be on YouTube, if it’s clearly extremist, or dangerous to somebody’s mental health, physical health or well-being, then you can click the “Report” button and I’ll show you how you can do that.


Let’s go to the computer.


Okay, so you found a video that you want to report, maybe it’s insulting, maybe it’s triggered you, maybe it’s dangerous to people.


How To Report Videos on YouTube - Flag YouTube Videos


You go to the video, you scroll down, you’ll see “More,” and then in that drop down, you click “Report.”


How To Report Videos on YouTube - Flag YouTube Videos


At this point, it will give you the option of why you are reporting it. So, sexual content, violently repulsive, hateful or abusive content, dangerous harmful acts, child abuse, promotes terrorism, spam, infringes my rights or caption issues.


Once you pick on one, you can also have additional drops down. So, under “Infringes my rights” we have infringes my copyrights, invades my privacy, other legal claims.


How To Report Videos on YouTube - Flag YouTube Videos


Or if it’s “Sexual content,” let’s see what we have in the drop down: Graphic sexual activity, nudity, abusive in the description…


How To Report Videos on YouTube - Flag YouTube Videos


In the “Harmful dangerous acts” section, is it drug use? Is it suicide? That kind of thing.


How To Report Videos on YouTube - Flag YouTube Videos


When you’re done and you choose your option, you can highlight exactly the time stamp and type in a more detailed description of why this is a problem.


How To Report Videos on YouTube - Flag YouTube Videos


Then, you click “Submit.”


This then goes to a human being who then paws over this, and then they choose whether or not if it’s an acceptable flag or not.


Final Words

Alan Spicer - YouTube certified expert

For more YouTube tricks and tips that help you improve the community that we live in on YouTube, I’ve done a playlist up here. Remember to hit that Subscribe button, go out there, and start creating.

Categories
DEEP DIVE ARTICLE TIPS & TRICKS YOUTUBE YOUTUBE TUTORIALS

YouTube Cards [What They Are and How To Use Them]

What are YouTube Cards?

YouTube cards – info cards and end screens – are interactive links you can use to promote other videos, playlists, channels, and external sites while your video is playing. It’s a method of keeping a viewer hooked on your content, or if you want, directing them to someone else’s.

It’s like having your own digital traffic cop to direct people where you would like them to go once they have finished watching one of your videos. Because, if you’re holding someone’s attention, isn’t it best to direct them to more of your content when your video ends?

There are four types of cards you can use in your videos.

  • Video
  • Playlist
  • Channel
  • Link

At one time you had the option of running a poll from a card too, but this type of card is no longer available.

The cards don’t automatically show when you add them to a video. The viewer instead has to click a small grey info bar which appears in the top right-hand corner.  You can set when they appear in your YouTube Studio.  Here is how the info-bar looks.

YouTube Cards [What They Are and How To Use Them]

When a viewer clicks on the info-bar, the card displays, the viewer can then click on the card to follow the link.

YouTube Cards [What They Are and How To Use Them] 1

Cards display in both desktop and mobile versions of YouTube and replace the older annotation system, which only displayed on the YouTube desktop site.

The four types of cards all have a similar appearance, so let’s take a look at each type and how you might use them.

The Four Types of Cards and How You Can Use Them.

You can place cards up to five times per video and can add them in at any point you like. Card placement, though, should be done strategically.

Card placement must always be done with a purpose in mind.  Think about how the YouTube algorithm operates. YouTube’s main aim is to keep its users watching content and viewing more advertisements – it’s how they make money.

YouTube attempts to keep viewers tuned-in by suggesting high-quality videos for them to watch next. Have you ever found yourself thinking, ‘I’ll should be doing something else, I just watch one more video’?  That’s YouTube’s ranking algorithm in action.

YouTube has perfected guessing what content will keep its audience engaged, and is an expert at recommending good videos.  Now, YouTube can’t watch all of the videos uploaded on the site to see which are good – there are far too many of them.

YouTube has to work out video quality automatically. One of the main factors YouTube uses to decide video quality is watch time. Watch time is calculated as the average time viewers spend watching a video.

Video Watch time is Important.

YouTube knows that most videos aren’t watched all the way through, but reasons that the longer viewers keep watching, the better the video must be. To succeed on YouTube, you need to keep your audience tuned into your videos for as long as possible.

So, if you were to add cards linking away from your video at the start, then you are potentially harming your video’s chance of getting an excellent watch time average.  As a result, your video may be suggested less frequently by YouTube for others to watch.

Aim to add cards into your video later on, preferably in the second half of your video.

Mention the YouTube Cards in Your Video.

A second factor is that card links are not very noticeable, so for maximum effectiveness you should mention them in your video. This requires planning and scripting in advance, so approach card placement with a well thought out strategy.

Let’s take a look at how you might use each card type in your videos.

YouTube Video Card Example.

This card links to a video and displays a thumbnail. As you can see in the example below, I have added the text ‘Video Card’.  The customisable text helps you to sell the link a bit more, and I’ll cover how to do this later on in this article.

The video card is commonly used to link to other content you have made.  It might be a video which covers a subject in more detail that you are only mentioning briefly, or it could be the next video in a series you are making.

Alternatively, you can also link to another video on YouTube – it doesn’t have to be your content.

YouTube Cards [What They Are and How To Use Them] 2

YouTube Playlist Card Example.

Similar to the video card but this time a collection of videos. Again, it can be any playlist and not necessarily one you have created.

So if you want to link out to your favourite music or draw attention to your own curated collection of content, the playlist card is the one you should choose.

YouTube Cards [What They Are and How To Use Them] 4

YouTube Channel Card Example.

Sometimes it’s useful to direct a viewer to your channel page.  They can access all of your content quickly, or you may be trying to grow your community tab.

An easy way to link to your channel is occasionally useful.

YouTube Cards [What They Are and How To Use Them] 3

YouTube Link Card Example.

While the cards discussed so far are open to anyone with a YouTube account, the link card is only available to those who are part of the YouTube Partner Program. The link card permits users to link away from the YouTube site, which being outside of YouTube’s control, is only offered to established channels.   It helps YouTube to cut down on link-spam.

The link card is ideal for those that have a website as a central part of their business and want to attract traffic using YouTube.  With the link card, it’s easy to raise awareness and pre-sell your service in a video, then direct viewers over to your website to buy.

YouTube Cards [What They Are and How To Use Them] 5

How To Add Cards to YouTube Videos.

You add cards to your video via YouTube Studio.  Go to the main window, and from the menu on the left select ‘Videos’.

YouTube Cards [What They Are and How To Use Them] 7

Then from the list of your videos, select the one you want to add cards to and click the edit icon.

YouTube Cards [What They Are and How To Use Them] 6

In the video details screen towards the bottom of the page on the right, select the cards option.

YouTube Cards [What They Are and How To Use Them] 8

This will open the window with which you assign cards to a video.

YouTube Cards [What They Are and How To Use Them] 9

If I wanted to add a playlist to this video, the first step is to select the playlist option.  In the next window, you can either choose a playlist you have created or search for any other playlist.

YouTube Cards [What They Are and How To Use Them] 10

In this example, I’ll use one of my playlists.  Simply click on the thumbnail, which returns you to the previous window to add further details.

You can set the time for the card to appear using either the timestamp or by moving the blue slider at the foot of the screen.

You can also add a Custom Message and some Teaser Text.  The teaser text is the wording which displays in the info-bar in the corner of your video.

YouTube Cards [What They Are and How To Use Them] 11

The custom message displays in the card that is shown when a viewer clicks the info-bar.  Hit the save button when you are happy with the wording and timing.

YouTube Cards [What They Are and How To Use Them] 12

To add further cards to your video (up to five maximum), open up the card’s window again and select the blue plus symbol to add another.

YouTube Cards [What They Are and How To Use Them] 13

Simply rinse-and-repeat until you have added the cards you want.

Displaying Cards on the End Screen of YouTube Videos.

If you have ever wondered how Youtubers add thumbnails to their other content at the end of a video, this section covers how to do that.  Known as an End Screen, it enables you to show links to other content and also lets you display a clickable subscribe button.

The End Screen differs from the standard cards in that you can only display them during the last 20 seconds of your video. To set your end cards, navigate to your video details page and select the ‘End screen’ menu option on the right-hand side of the screen.

YouTube Cards [What They Are and How To Use Them] 14

The End Screens window gives some measure of customisation, but YouTube has some basic requirements. You must have at least one video or playlist card in your end screen, and the maximum number of elements you can display is four.

You can control the layout in the end screen editor, as long as the cards are arranged within the white shaded box overlaying your video.

YouTube Cards [What They Are and How To Use Them] 15

The end screen also gives you an additional card to choose from – the subscribe card. In the picture below, you can see an end card displaying two video cards plus the subscribe card.

YouTube Cards [What They Are and How To Use Them] 16

The end screen editor also allows you to choose the timings for your end screen elements.

You can display all elements for the full 20 seconds or only the final five seconds if you prefer.  You also don’t have to show all of the cards at the same time.  Once your elements are selected, you can choose appearance times by sliding the element display bar, as shown below.

YouTube Cards [What They Are and How To Use Them] 17

End screens are a powerful tool. They give you a virtual billboard to try and keep viewers watching your content before YouTube suggests to them someone else’s content, giving you the chance to deliver a call to action during a video.

Your best chance of retaining viewer attention will come when you combine a pre-scripted suggestion with an end card.   Tell a viewer which video you think they should watch next then flash up an end card linking directly to the video.

Tips for Placing Cards.

As mentioned earlier, cards should be used with a purpose in mind rather than randomly scattered throughout your content.

Verbal cues are the obvious way to draw attention to your cards, and pre-scripting these should increase in the number of times they are clicked.

Use your Analytics.

Another strategic use of cards involves using the analytics of your existing content.  View the audience retention graph for one of your videos and look for the moment you are losing the most people, as they click away to find another video.

If the average viewer navigates away at this point, flashing a card on the video just before this point can help you direct some of those leaving to alternative content of yours.

YouTube Cards [What They Are and How To Use Them] 18

Choose Custom Text Wisely.

Don’t be boring when you write the teaser text; you need to use words that give viewers an incentive to click the info bar. Use wording that communicates a benefit, something of value.

Look at the two examples below, which one would you click?

YouTube Cards [What They Are and How To Use Them] 19

YouTube Cards [What They Are and How To Use Them] 20

Similarly, use the custom message to reassure the viewer that the content you are promoting is relevant to them too. In the example below, the term ‘related video’ should impress in the viewer’s mind that the video will be beneficial to them.

YouTube Cards [What They Are and How To Use Them] 21

Conclusion

With the number of content creators on YouTube growing every day, you need to use all the tools at your disposal to retain the viewers watching your content. Interactive cards are an excellent way to build traffic funnels and direct viewers where you want them to go.

You are not restricted to promoting only your content either.  You can use cards and end screens to direct viewers to friends channels, or even some of the big Youtubers if you like.  As long as the content is on YouTube, you can steer them there.

Make the best use of end screens too; never let your video end without suggesting more of your content to watch.

Once you are a member of the Partner Program, you also get the ability to link to content outside of YouTube.

This can be powerful for those whose primary business is off YouTube, and you can use YouTube as part of your sales funnel to help grow your business.

Affiliate marketing is a powerful tool that makes me a large income online and it can for you too. Need help understanding affiliate marketing then check out my affiliate marketing for beginners deep dive blog.

Categories
SOCIAL MEDIA TIPS & TRICKS VIDEO YOUTUBE YOUTUBE TUTORIALS

How To Add A Watermark To YouTube Videos

Watermarks, the little thing down here that help grow your YouTube channel. You can now add them in the new YouTube studio. That’s what we talk about today.


How To Add A Watermark To YouTube Videos


Hello and welcome back to another video, I’m Alan Spicer, your YouTube certified expert.


If you’re looking to start a YouTube channel, grow your YouTube channel, or push your brand out there, it’s the second largest search engine on the Internet.

Alan Spicer - YouTube Certified Expert

You should click Subscribe,” and start creating.


Now, my videos, around about the 22nd mark, there’s a little box that pops up here that says you can subscribe. It is a nice additional way on desktop to urge people to subscribe, to place some branding, to push out the chances and make it even easier for people to join your community.


It’s available in the new YouTube studio. So, let’s go to the computer and I’ll show you how you can use it.


But before we deep dive into this, this video is sponsored by TubeBuddy which is an online browser based plugin that can help optimize your titles, your descriptions, your tags, get you more views, get you more subscribers, and generally take away the grind, the day-to-day tasks that you just can’t be bothered with.


How To Add A Watermark To YouTube Videos


It also links up with their mobile phone app in which you can check your stats on the go, communicate with people and just generally level up your YouTube game.

Alan Spicer - YouTube Certified Expert

This is a link here on how to install it for free.


Okay, so when you’re first adding your video watermark, you arrive here in your YouTube studio. You’re used to this place by now, it has your stats, your subscribers, how well your last video is doing, but we’re focusing on the option on the left-hand side that says “Settings.”


How To Add A Watermark To YouTube Videos


You want to click on “Channel,” and then “Branding.”


How To Add A Watermark To YouTube Videos


So, you’ll see here that I’ve already got my watermark set up. It shows up in the bottom right-hand corner, or even being the bottom right-hand corner of this video.


You can see here the display settings, whether you wanted to show it in the last part of the video, a specific time in the video or the entire video.


I start mine at about 20 seconds in, that way, all of the waffling and the branding disappears when it pops up.


To remove it, you click “Remove.”


How To Add A Watermark To YouTube Videos


Then you’ll see here, it says, “Adding a watermark is a great way to improve brand awareness and channel recognition.


How To Add A Watermark To YouTube Videos


It needs to be a PNG or a GIF file format of 150 pixels by 150 pixels, and less than one megabyte in size. Images with one or two colors and a transparent background works best.

So, to choose the image you click “Choose Image,” and then choose your image from your computer, and upload it.


How To Add A Watermark To YouTube Videos


It will see that it’s there, and then when you’re ready, you click “Save” and you are done.


Final Words

Alan Spicer - YouTube Certified Expert

For your hidden tricks, tips and gems, I’ve done a playlist up here.


Hit that Subscribe button for regular YouTube videos from me.


Go out there, start creating.